❏
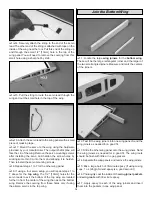
2. Use a rotary tool such as a Dremel with a small round
sanding bit, or a razor saw, to cut away the wood inside the
marks you made flush with the marks on the former.
Fuelproof the area removed with thin CA or epoxy.
❏
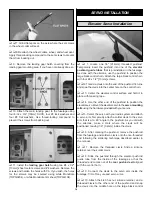
3. Mount the engine to the firewall using four 8-32 x 1-1/4"
[32mm] SHCS, #8 lock washers and #8 flat washers. Do not
permanently mount the engine at this time. By this we mean
do not use thread-locking compound to retain the SHCS. The
engine will be removed later when the cowl is installed.
❏
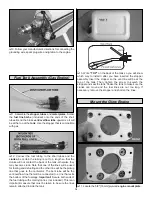
4. Locate two sets of the 5" [127mm] hook and loop
material. Separate the two halves and overlap them 2"
[51mm] as shown.
❏
5. Insert the hook and loop material in the front hatch
area as shown.
❏
6. Wrap the electronic ignition unit from the gas engine in
1/4" [6.4mm] foam and strap it in place using the hook and
loop material. Route the spark plug wire through the slot you
cut in previous steps and the other wires inside the fuselage
and out of the small cutout in the top of the firewall. Wrap your
ignition battery pack in 1/4" [6.4mm] foam and place it next
to the ignition module.
❏
7. Install a kill switch and charge jack for the ignition
system. For our test model, we installed the switch on the
opposite side from the ignition battery pack.
❏
8. Using two #4 x 1/2" [13mm] screws, attach the front
hatch to the bottom of the fuselage. Be sure the spark plug
wire is not being pinched by the hatch.
18


