(or downward) all the way. Manually close the throttle on the
carburetor completely. Tighten the cap screw on the screw-
lock pushrod connector. Check throttle operation with the
radio and make adjustments to the linkages as necessary
for smooth operation. Use the appropriate holes in the servo
and throttle arms to provide the correct amount of throttle
movement and to prevent the servo from binding at its end
points. Once everything is adjusted, install a spare piece of
balsa as a brace near the servo for the outer pushrod
housing.
❏
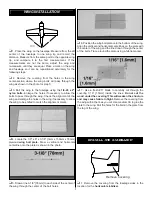
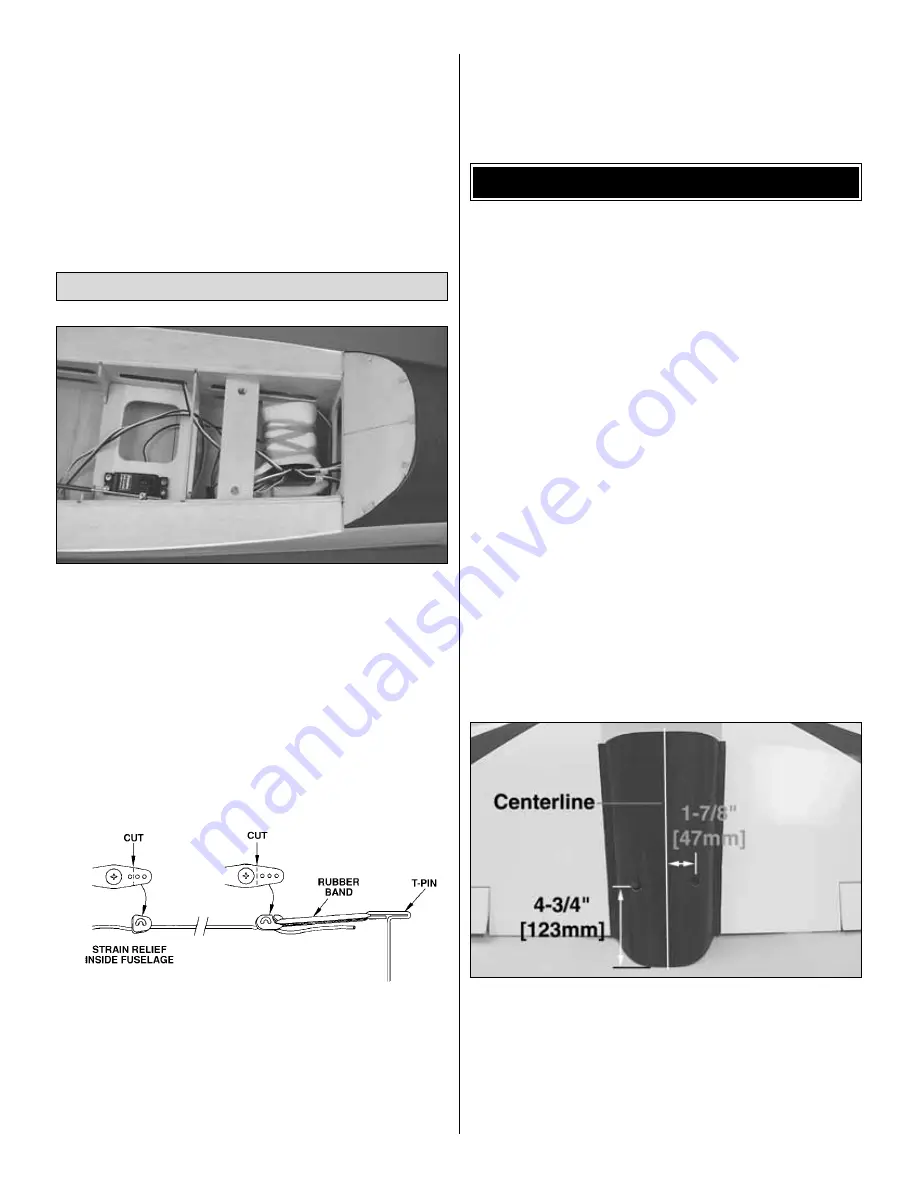
1. Hook up - following the manufacturer’s recommendations
- the receiver, switch and battery as shown in the photo. We
added a Great Planes Switch Mount & Charge Jack
™
(GPMM1000, not included) for convenience and ease of use
at the field, installed on the side of the fuselage. At this time,
it is suggested to allow the receiver and battery the option of
being moved until after the aircraft has been balanced. Once
balanced, the receiver and battery should be secured into
the aircraft to prevent them from moving during flight. Plug
the servo extensions for the elevator and rudder servos, as
well as the extensions for the aileron servos, into the
receiver at this time.
❏
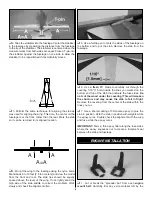
2. Route the antenna to the tail of the model. You may
use your preferred method or the method we use in the
Great Planes model shop. Drill a 15/64" [6mm] hole through
the fuse side in the proximity of the receiver. Cut a 1/2"
[13mm] long piece of fuel tubing and install it in the hole.
Install a strain relief (as shown in the sketch), then route the
antenna through the fuel tubing to the bottom of the fuse at
the tail. Use a rubber band to attach the antenna to a T-pin
at the aft end of the fuselage. Do not cut or shorten the
antenna wire. Leave any excess to hang free.
❏
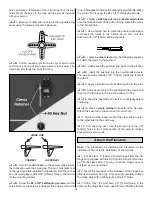
1. Fit approximately 12" to 14" [300mm to 360mm] of fuel
line on the pick-up and vent nipples of your fuel tank. Attach
the fuel lines from the fuel tank to the engine, making sure
the fuel and pressure lines are correctly attached. Be certain
you do not kink the fuel lines.
Note:
If your engine’s carburetor is inaccessible with the
cowl in position, now would be a good time to add a Great
Planes Fuel Filler Valve
™
(not included, GPMQ4160) to the
side of your aircraft. Instructions for installation are included
with the valve.
❏
2. Locate the clear
canopy
and carefully trim along the
cut lines with scissors or Lexan
®
shears. Test fit the canopy
on the fuse as you proceed, making small adjustments as
required for a good fit.
❏
3. Paint the exposed wood behind the canopy with black
paint. Install a pilot if so desired. You can use Top Flite
LustreKote
®
without any special preparations to the paint or
the model. Just make sure to mask off any areas you do not
want painted.
❏
4. Roughen the bottom 1/8" [3mm] of the inside canopy
edge, being careful not to scratch any exposed areas. Glue
the canopy into position with 6-minute epoxy or R/C-56 glue.
❏
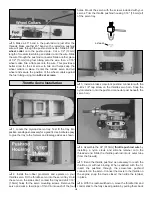
5. Attach the wing to the fuselage using the 1/4-20 x 2"
nylon bolts. Test fit the
belly pan
onto the wing. Trim the
belly pan as necessary to provide a tight fit against the wing.
Trace around the outside of the belly pan using a felt-tip marker.
❏
6. Remove the belly pan and remove a 1/2" [13mm] wide
strip of covering 1/16" [1.5mm] inside the line drawn. Using
30-minute epoxy, glue the belly pan to the wing.
FINAL ASSEMBLY
Receiver & Battery Installation
19


