17
Assemble & Install the Main Gear
❏
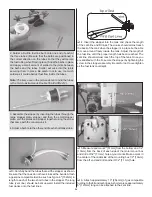
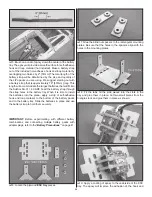
1. Use a rotary tool with a cutoff wheel or a hacksaw to cut
the two 3/16" x 2" [4.8mm x 51mm] bolt-on axles to 1-11/16"
[43mm] long.
❏
2. Attach the axles to the main landing gear legs with two
5/16"-24 locknuts. Slide a 3/16" [4.8mm] wheel collar onto
each axle followed by a 3-1/2" [89mm] wheel and another
3/16" [4.8mm] wheel collar.
❏
3. Temporarily install the wheel pants using four 4-40 x
1/2" [13mm] machine screws (the TE of the landing gear
legs have a slight taper).
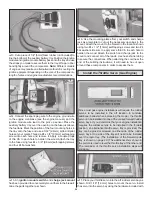
❏
4. Position the wheels in the center of the wheel pants,
slide the wheel collars against the wheel hubs and mark the
location of the screw holes in the wheel collars onto the axles.
Remove the wheel pants from the gear and the wheels and
collars from the axles and grind fl at spots at your marks on
the axles for the wheel collar screws using either a fi le or a
rotary tool. Reinstall the wheels and wheel collars onto the
axles and secure the pants to the gear using four 4-40 x
1/2" [13mm] machine screws, four #4 fl at washers, four #4
lock washers and threadlocking compound. Use four 6-32 x
1/4" [6mm] SHCS and threadlocking compound to secure
the wheel collars to the axles, being sure that you tighten
the screws against the fl at spots on the axles. The wheels
should rotate freely between the wheel collars. Oil the axles
if necessary.
❏
5. Attach the landing gear to the fuse using six 6-32 x 3/4"
[19mm] SHCS, six #6 fl at washers, six #6 lock washers and
threadlocking compound.
❏
6. Install the landing gear cover over the mounting screws
using 8 to 10 dots of silicone sealant or Shoe Goo (other
adhesives could also be used). Wipe away any excess
sealant with a dry paper towel.
Summary of Contents for GPMA1412
Page 52: ......


