❏
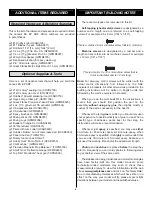
1. Locate the aileron servo bays by holding the wing
panels up to a light source or gently pressing against the
covering looking for the edges of these cutouts. Use a sharp
hobby knife to trim the covering away from the servo bays.
❏
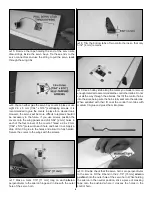
2. Trim the covering away from the slots in the servo
bay covers.
❏
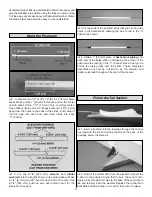
3. Cut off three arms from two four-arm servo horns
leaving one of the long arms intact as shown. Attach the
servo horns at a right angle to the servos using the screws
included with the servos. Enlarge the outer holes of the
servo horns with a 1/16" [1.6 mm] drill bit.
❏
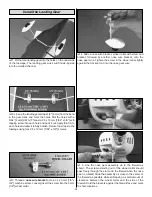
4. We recommend gluing the aileron servos to the servo
bay covers with medium CA glue. Insert the servos through
the underside of the covers and apply epoxy around each
servo mounting tab to secure them. If you do not wish to
glue the servos in place, you can insert the servos through
the top of the covers and screw them in place using the
hardware included with the servos. You will need to glue
mounting blocks made from scrap hardwood to the
underside of the covers for the servo screws.
ASSEMBLE THE WING
Before you begin assembly, take a moment to inspect the
covering on the wing panels and tail section. Use a heat gun
or covering iron to tighten any wrinkled or loose covering. Be
careful when applying heat around the clear hinge tape
holding the ailerons, elevator, and rudder in place. Excess
heat in these areas could cause the tape to lift.
BEFORE YOU BEGIN
7


