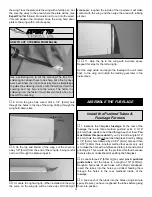
IMPORTANT! Steps 1-11 provide instruction for installing a
stab that is removable. Many of you will find this to be a
helpful feature when packing your plane into your car to
head out to the field. You may not have a need for the
removable stab, in which case you can follow the installation
instructions and never take your stab off. If you choose to,
you can skip steps 2-11 and permanently glue your stab to
the joiners and the fuselage with epoxy. It is suggested you
read through steps 1-11 before making a final decision.
❏ ❏
1. Install the elevators to the stab with three hinges per
elevator, using the same installation method used on the
ailerons on page 7, steps 1-8.
❏ ❏
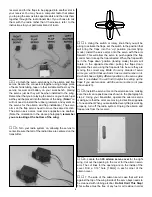
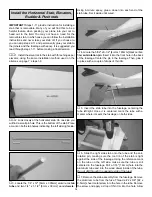
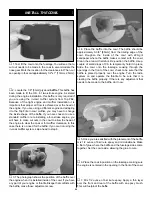
2. Look closely at the horizontal stab. On one side you
will find a small pin hole. This is the bottom of the stab. Place
a mark on both stab halves indicating the left side/right side.
❏
3. Locate the 1/4" x 12" [6mm x 305mm] aluminum stab
tube and two 1/4" x 1-1/2" [6mm x 38mm] wood dowels.
Using 6-minute epoxy, glue a dowel into each end of the
stab tube. Set it aside until cured.
❏
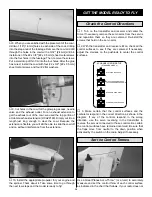
4. Locate the 5/32" x 6-1/2" [4mm x 165mm] black carbon
fiber anti-rotation pin. Insert it into the front hole in the back
of the fuselage. Center the pin in the fuselage. Then, glue it
in place with a couple of drops of thin CA.
❏
5. Insert the stab tube into the fuselage, centering the
tube left/right. Once it is centered, mark the tube with a
marker where it meets the fuselage on both sides.
❏
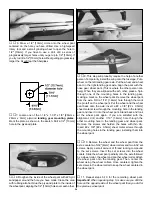
6. Slide the right side stab onto the tube and the anti-
rotation pin, making sure the root rib of the stab is tight
against the side of the fuselage. Using the reference mark
on the tube on the left side, make sure the tube is still
centered in the fuselage. Drill a 1/16" [1.6mm] hole into the
aluminum tube and into the wood dowel inside of the tube.
Do not drill through the opposite side of the tube!
❏
7. Remove the stab assembly from the fuselage. Remove
the aluminum tube from the fuse. Thread a #2 x 3/8" [#2 x
9.5mm] sheet metal screw into the hole in the tube. Remove
the screw and apply a drop of thin CA into the hole. Allow
Install the Horizontal Stab, Elevators,
Rudder & Pushrods
15
Summary of Contents for Lancair ES
Page 40: ......


