If you have never worked with fiberglass there are a few
basic things you should be aware of:
•
When you are cutting into fiberglass, be sure you are
cutting the correct place. Unlike wood, you are not able to
go back and easily fix a mistake.
•
Whenever you are gluing a part to the inside of fiberglass
it is important to roughen the inside surface of the
fiberglass with 220-grit sandpaper and then wipe the area
with alcohol. The molding process leaves a waxy residue
that can prevent a good bond between the glue and the
parts being glued.
•
If you do not have a high-speed rotary tool such as a
Dremel
®
tool you should consider purchasing one or
borrowing one from a fellow modeler. This combined with
a fiberglass cut-off wheel is going to be extremely helpful
in the assembly process.
WARNING: The cowl, wheel pants and fuselage included in
this kit are made of fiberglass, the fibers of which may cause
eye, skin and respiratory tract irritation. Never blow into a
part to remove fiberglass dust, as the dust will blow back
into your eyes. Always wear safety goggles, a particle mask
and rubber gloves when grinding, drilling and sanding
fiberglass parts. Vacuum the parts and the work area
thoroughly after working with fiberglass parts.
❏
1. If you have not done so already, remove the major
parts of the kit from the box and inspect for damage. If any
parts are damaged or missing, contact Product Support at
the address or telephone number listed in the “Kit Contents”
section on page 6.
❏
2. Remove the tape and separate the ailerons and flaps
from the wing and the elevators from the stab. Use a
covering iron with a covering sock on high heat to tighten
the covering if necessary. Apply pressure over sheeted
areas to thoroughly bond the covering to the wood.
Do the right wing first so your work matches the photos
the first time through. You can do one wing at a time, or
work on them together.
❏ ❏
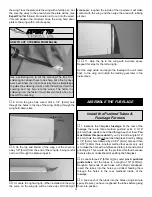
1. Drill a 3/32" [2.4mm] hole, 1/2" [12.7mm] deep in the
center of each hinge slot to allow the CA to “wick” in. Follow-
up with a #11 blade to clean out the slots. Hint: If you have
one, use a high-speed rotary tool to drill the holes.
❏ ❏
2. Use a sharp #11 blade to cut a strip of covering from
the hinge slots in the wing and aileron.
❏ ❏
3. Cut seven 3/4" x 1" [19 x 25mm] hinges from the
CA hinge strip. Snip off the corners so they go in easier.
1" [25mm]
3/4" [19mm]
Trim the Corners
DRILL A 3/32" HOLE
1/2" DEEP, IN CENTER
OF HINGE SLOT
Install the Flaps & Ailerons
BUILD THE WING
PREPARATIONS
IMPORTANT INFORMATION ABOUT
WORKING WITH FIBERGLASS
7
Summary of Contents for Lancair ES
Page 40: ......


