❏
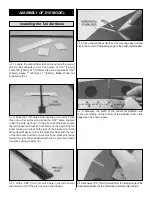
13. Apply CA to the areas where you removed the covering
and into the slot in the stabilizer. Slide the fin/rudder into
position and place a 90° tool onto the top of the stabilizer
holding the fin in place until the glue sets as shown in the
above photograph.
❏
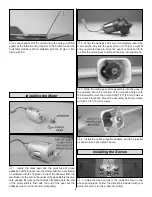
14. Test fit the tail boom into the hole on the wing trailing
edge. Place the assembly onto a flat surface and move the
assembled tail section forward and aft until the
measurement from the hinge line of the elevators to the
hinge line of the ailerons is 11-1/2" [292mm]. Measure the
distance from both sides of the horizontal stabilizer to the table
surface. Adjust the tail boom until these measurements are
equal. Carefully mark the location of the tail boom in the wing.
❏
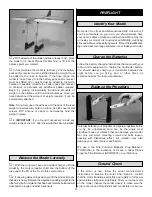
15. When satisfied with the fit and position of the tail
assembly, remove it and apply CA inside the hole. Then
return the tail assembly to the correct position. Make sure
that the position is right before the CA has cured.
❏
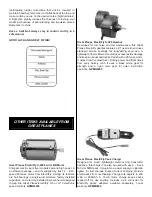
1. As shown in the photograph above, install the two
control horns in the ailerons by cutting a small portion of the
aileron away with a sharp hobby knife. Use sandpaper to
rough up the areas where the control horns will be glued.
Make sure the holes line up with the hinge line. When you
are satisfied with the position, glue it into place with CA.
❏
2. To install the landing gear, first fit the wheels onto the
axle portion of the gear. Slip the wheel collars onto the axle.
Insert the Phillips head screws into the wheel collar and
tighten them securely. Use the photograph above as a guide.
❏
3. Place the airplane on your work surface upside-down.
Using a sharp hobby knife, remove the covering over the
opening in the wood where the gear is placed. As shown in
the photograph above, place the landing gear into the slot in
the bottom of the fuselage.
Assembly of the Fuselage/Wing
8


