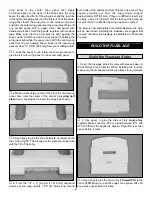
the location, press the button on the handle and the blades
will cut easily into the balsa wood.
❏
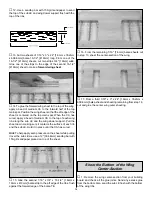
4. Drill a 3/32" [2.4mm] hole, 1/2" [12.7mm] deep in the
center of the hinge slots. The use of a Dremel Rotary Tool
with a 3/32" drill bit or carbide cutter will give you a cleaner
hole than an electric drill. After drilling the holes, use your
hobby knife to clean out the hinge slots.
❏
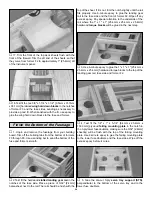
5. Cut the 3/4" x 1" [19mm x 25.4mm] hinges for the
control surfaces from the supplied 2" x 9" [50.8mm x
228.6mm] hinge material. Then, snip off the corners as
shown on the wing plan. Temporarily join the control
surfaces with the hinges, adjusting any hinge slots if
necessary so they all align. Do not glue in the hinges until
you are instructed to do so after the airplane is
covered.
❏
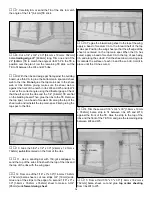
6. Lay the rudder over the fuse plan and mark the
location for the tailgear wire.
❏
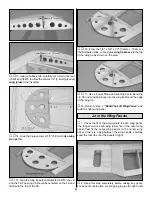
7. Drill a 3/32" [2.4mm] hole 3/4" [19mm] deep, at the
centerline of the rudder LE, at the mark you made for the
tailgear wire. Then, cut a groove for the nylon tailgear
bearing. See the following
Expert Tip. Test fit the tailgear
wire in the rudder.
HOW TO CUT A GROOVE FOR A TAILGEAR WIRE
Use a #11 knife blade to sharpen the inside of a piece of
5/32" [4mm] brass tube. Roll the tube as you sharpen
the end.
IF YOU DO NOT HAVE A SLOT MACHINE
Cut the hinge slot in the rudder, fin, stab and elevator
using a Hobby Knife with a #11 blade. Begin by carefully
cutting a very shallow slit at the hinge location to
accurately establish the hinge slot. Make three or four
more passes, going a little deeper each time. As you cut,
slide the knife from side to side until the slot has reached
the proper depth and width for the hinge.
12
Summary of Contents for Old Timer
Page 6: ...6 DIE PATTERNS...
Page 7: ...7 DIE PATTERNS...
Page 44: ...TWO VIEW DRAWING Use copies of this page to plan your trim scheme...
Page 45: ...B C...
Page 46: ...D A...


