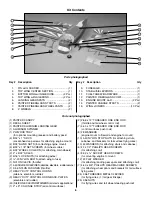
the bottom of the interplane strut. This distance is 3-¼"
(83mm). When satisfied with the position, mark the location
for the two holes in the bottom of the interplane struts.
Remove the interplane struts and drill these two holes with
a 1/8" (3 mm) drill bit. Saturate these two holes with thin CA.
When the CA is set, secure the strut using two 4-40 x 1/2"
(13 mm) socket head cap screws, two 4-40 washers, and
two 4-40 nylon insert stop nuts. Make sure it is tight, but not
overly tight. Repeat this process for the remaining strut.
❏ ❏
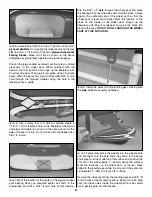
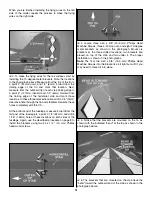
11. The placement of the struts in relation to the top
wing is determined in the following manner. Measure the
distance of the top rear tip of both interplane struts to the
trailing edge of the top wing. If necessary, twist the top wing
in order to make both distances equal. When satisfied with
the alignment, mount the top of the interplane struts to the
brackets installed in the top wing using the same method as
the bottom of the interplane struts.
❏
1. Cut and remove the MonoKote covering from the
opening in the rear of the fuselage for the
horizontal stab
and the
fin
.
❏
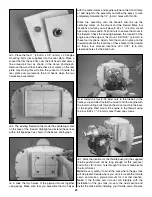
2. Locate the horizontal stab. Find the center by
measuring from tip to tip of the stab. At this point mark a
centerline at a 90-degree angle from the trailing edge of the
stab to the leading edge. Trial fit the stab into the stab
saddle. Check the position of the stab by measuring the
distance from the center of the fuse at the tail post to each
tip of the stab; this distance needs to be the same. Make
adjustments as needed until the distance is equal by
moving the "long" tip in the opposite direction half the
distance it was too long.
❏
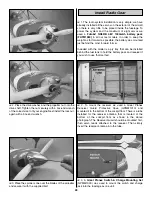
3. With the wings still attached, place the model in a
building stand such as a Robart Super Stand II
(ROBP1402). Place a T-pin on the center line of the fuse at
the forward most former. Measure from the pin to each tip of
the stab. A Hobbico Retractable Fabric Tape Measure
(HCAR0478) works well for this step. The distance from the
pin to the stab tips needs to be equal on both sides.
❏
4. Stand ten to fifteen feet behind the model and view the
stab and wings. If the stab and wings align with each other,
proceed to the next step. If the stab and wing do not align,
remove the stab and carefully sand the "high side" of the slot
in the fuse where the stab fits until the stab aligns with the
wing. If you needed to make any adjustments, reposition the
stab into the fuselage, making sure the alignment is correct.
❏
5. Using a felt-tipped pen, carefully mark the location of
the fuse sides on both the top and bottom of the stab.
Remove the stab from the fuselage and cut 1/8" inside the
line in order to remove the MonoKote covering from the
stab. Use a hot knife or sharp hobby knife with the same
Mount the Stab and Fin
16


