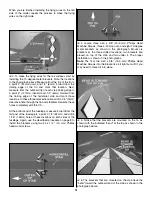
technique that was used while adding the belly pan onto the
bottom wing. Again, be careful not to cut into the wood while
removing the MonoKote.
❏
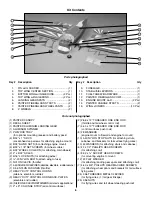
6. Slide the stab back into the fuselage, leaving the
exposed wood outside of the fuselage joining area.
Note
: This will be a little messy but the epoxy will clean up
easily and will allow you to obtain a strong joint of the stab
to the fuselage. Apply 30-minute epoxy to the top and
bottom of the exposed wood on the stab. Slowly work the
stab into the fuselage to a point 1" (25 mm) beyond the first
cut-line to appear on the other side of the fuselage. Since
the fit of the stab into the fuselage is tight, doing this will
push some of the epoxy back. Wipe away this excess epoxy.
Apply more epoxy to the exposed wood on the stab where
you pushed it past the center position and slowly move it
back into place after doing so. Carefully re-position the stab
into proper alignment. Using a paper towel, wipe away the
excess epoxy. Using a generous amount of denatured
alcohol on a paper towel, clean any epoxy residue from the
model, but do not allow an excess amount of alcohol to flow
into your joint. Also check the bottom of the fin slot on top of
the fuselage to make sure you do not have an excess
amount of epoxy in the area on top of the stab. The fin
needs to fit securely and properly into this area. Allow the
epoxy to thoroughly cure before moving the model.
❏
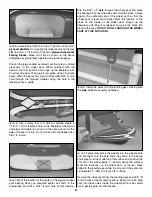
7. Trial fit the fin to the fuse. Use a triangle like the
Hobbico Builders Triangle (HCAR0480) to make sure the fin
is 90 degrees square to the stab. When satisfied that the fit
and alignment are correct, mark the location of the fuse
onto the fin. Carefully remove the MonoKote covering 1/8"
inside these lines using the same method used on the stab.
Apply a generous amount of 30-minute epoxy to the fin slot
sides and the top of the stab at the bottom of the slot. Insert
the fin into the slot and as with the stab remove any excess
epoxy and residue. Using your triangle, re-check for the
correct alignment in relation to the stab. Allow the epoxy to
completely cure before proceeding.
❏
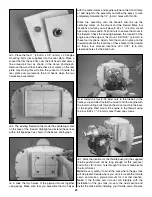
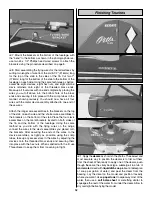
8. To attach the elevators, drill a 3/32" (2.4mm) hole, 1/2"
(13mm) deep in the center of each hinge slot to allow the
CA to “wick” in. Follow up with a #11 blade to clean out the
slots and cut a strip of covering from the hinge slots in the
stab and elevators.
❏
9. Install the hinges into the stab and then test fit both of
the
elevators
. If the hinges don’t remain centered, stick a
pin through the middle of the hinge to hold it in position.
❏
10.
Remove any pins you may have inserted into the
hinges. Adjust the elevator so there is a small gap between the
LE of the elevator and the stab.The gap should be small — just
enough to see light through or to slip a piece of paper through.
❏
11. Apply six drops of thin CA to the top and bottom of
each hinge. Do not use CA accelerator. After the CA has
fully hardened, test the hinges by pulling on the elevators.
❏
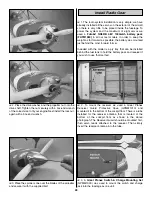
12. To attach the
rudder
drill a 3/32" (2.4mm) hole, 1/2"
(13mm) deep in the center of each hinge slot to allow the
CA to “wick” in. Follow-up with a #11 blade to clean out the
slots and cut a strip of covering from the hinge slots in the
fin and rudder. Trial fit the hinges into the rudder and place
onto the fin. The gap should be small—just enough to see
light through or to slip a piece of paper through.
❏
13. Apply six drops of thin CA to each side of each hinge.
Do not use CA accelerator. After the CA has fully hardened,
test the hinges by pulling on the rudder.
DRILL A 3/32" HOLE
1/2" DEEP, IN CENTER
OF HINGE SLOT
17


