❏
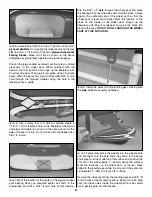
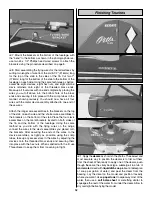
7. Mount the brackets at the bottom of the fuselage, with
the "bend" to the bottom as shown in the photograph above,
use two #4 x 1/2" Phillips head wood screws to attach the
brackets using the procedure described on page 8.
❏
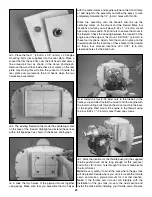
8. Start assembling the flying wires for the tail surfaces by
cutting two lengths of wire from the coil 8-1/2" (216mm) long
for the top of the stab to the sides of the fin. Cut two 7"
(178mm) long for the bottom of the stab to the bottom of the
fuselage on each side. Using the same technique as before,
assemble eight clevises, eight hex nuts, and eight silicone
clevis retainers onto eight of the threaded brass ends.
Make-up all four wires with one end complete by placing the
wires you cut off above into the bottom hole of the brass
ends and securing it into place with the crimp tubes in the
manner shown previously. You should now have all four
wires with the metal clevis assembly attached to one end of
these wires.
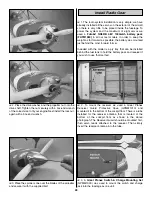
Attach the longer wire assemblies to the brackets on the top
of the stab on each side and the shorter wire assemblies to
the brackets on the bottom of the stab. Place the four clevis
assemblies on the metal brackets located on both sides of
the fin and the bottom of the fuselage. Using the same
method as you did with the flying wires on the wings,
connect the wires to the clevis assemblies you placed onto
the brackets. After securing the ends of the wires to the
clevis assemblies, as tightly as possible, using the crimp
tubes, take up any excess slack in the wires by adjusting the
clevises onto the threaded brass ends and securing them
into place with the hex nuts. When satisfied with the fit use
Threadlocker to keep them from loosening in flight.
❏
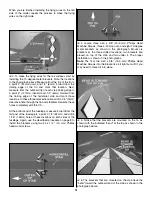
1. Apply the
decals
as shown in the photos. The easiest and
most accurate way to position the decals is to first cut them
from the sheet. When ready to apply one of the decals, even
though these are the sticky back type, submerge it in a tub of
warm water
mixed with
liquid dish soap
(about a tablespoon
of soap per gallon of water) and peel the decal from the
backing. Lay the decal on the model and position it exactly
where you want it. Use a
paper towel
to wipe away most of the
water, then use a
soft balsa sheet
or something similar to
squeegee the rest of the water from under the decal. Allow to
dry overnight before flying the model.
Finishing Touches
32


