20
7) I will not operate models with pyrotechnics (any device
that explodes, burns, or propels a projectile of any kind).
Radio Control
1) I will have completed a successful radio equipment ground
check before the fi rst fl ight of a new or repaired model.
2) I will not fl y my model aircraft in the presence of spectators
until I become a qualifi ed fl ier, unless assisted by an
experienced helper.
3) At all fl ying sites a straight or curved line(s) must be
established in front of which all fl ying takes place with the
other side for spectators. Only personnel involved with fl ying
the aircraft are allowed at or in the front of the fl ight line.
Intentional fl ying behind the fl ight line is prohibited.
4) I will operate my model using only radio control frequencies
currently allowed by the Federal Communications Commission.
5) I will not knowingly operate my model within three
miles of any pre-existing fl ying site except in accordance
with the frequency sharing agreement listed (in the
complete AMA Safety Code).
9) Under no circumstances may a pilot or other person
touch a powered model in fl ight; nor should any part of the
model other than the landing gear, intentionally touch
the ground, except while landing.
CHECK LIST
During the last few moments of preparation your mind may
be elsewhere anticipating the excitement of the fi rst fl ight.
Because of this, you may be more likely to overlook certain
checks and procedures that should be performed before the
model is fl own. To help avoid this, a check list is provided to
make sure these important areas are not overlooked. Many
are covered in the instruction manual, so where appropriate,
refer to the manual for complete instructions. Be sure to
check the items off as they are completed.
❏
1. Check the motor for secure attachment.
❏
2. Balance your propeller (and spare propellers).
❏
3.
Inspect your propeller for proper attachment. Replace
any prop saver that shows evidence of damage or one
that has cracks in it.
❏
4.
Check the wheels for free rotation, the axles and
landing gear for security, and add a drop of light
machine oil to the axles.
❏
5.
Make sure all hinges are securely stuck to the
fl ight controls.
❏
6.
Check the control horns for secure attachment to the
control surfaces.
❏
7.
Pull / push on each of the pushrods and check to see
that the connections do not slip.
❏
8.
Check the servo arms for secure attachment and make
sure that the arm screws are in place and are tight.
❏
9.
Reinforce holes for wood screws with thin CA where
appropriate
❏
10. Check that all servo connectors are fully plugged into
their respective channels on the receiver.
❏
11. Make sure any servo extension cords you may have
used do not interfere with other systems (servo arms,
pushrods, etc.).
❏
12. Check the receiver for secure attachment. This must
not be “stuffed into place.”
❏
13. Extend your receiver antenna.
❏
14. Check the C.G. according to the measurements
provided in the manual.
❏
15. Place your name, address, AMA number and telephone
number on or inside your model.
❏
16. Fully charge your transmitter battery and check the
battery voltage after it is charged.
❏
17. Range-check your radio when you get to the fl ying fi eld.
❏
18. Confi rm that all controls operate in the correct direction
and the throws are set up according to the manual.
❏
19. If you wish to photograph your model, do so before
your fi rst fl ight.
FLYING
The Pluma 3D ARF is an airplane suitable for both indoor
and outdoor fl ying. If you plan on fl ying outdoors, make sure
that you choose days with very light to calm winds (gusting
to less than 5 mph). If this is your fi rst experience with an
indoor-style foamie, seek help from experienced modelers.
Join a local fl ying club or ask your local hobby dealer where
the nearest approved fl ying sites are in your area.
CAUTION (THIS APPLIES TO ALL R/C AIRPLANES): If,
while fl ying, you notice an alarming or unusual sound such
as a low-pitched “buzz,” this may indicate control surface
fl utter. Flutter occurs when a control surface (such as an
aileron or elevator) or a fl ying surface (such as a wing or
stab) rapidly vibrates up and down (thus causing the noise).
In extreme cases, if not detected immediately, fl utter can
actually cause the control surface to detach or the fl ying
surface to fail, thus causing loss of control followed by
an impending crash. The best thing to do when fl utter is
detected is to slow the model immediately by reducing
power, then land as soon as safely possible. Identify which
surface fl uttered (so the problem may be resolved) by
checking all the servo grommets for deterioration or signs of
vibration. Make certain all pushrod linkages are secure and
free of play. If it fl uttered once, under similar circumstances
it will probably fl utter again unless the problem is fi xed.
Some things which can cause fl utter are; Excessive hinge
gap; Not mounting control horns solidly; Poor fi t of clevis
pin in horn; Side-play of wire pushrods caused by large
bends; Excessive free play in servo gears; Insecure servo
mounting; and one of the most prevalent causes of fl utter;
Flying an over-powered model at excessive speeds.
Summary of Contents for Pluma
Page 23: ...23...
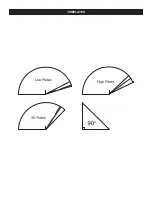
Page 24: ...TEMPLATES TEMPLATES...


