24
❏
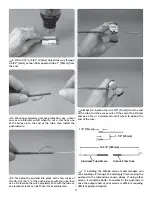
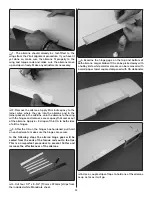
4. The fuel tank must be stabilized so it cannot shift
forward or aft, but because the tank is bubble-less,
completely
isolating the tank in RC foam is not necessary.
But some foam will be helpful for holding the tank into
place and preventing vibration from eventually wearing
the tank. A popular method for keeping the tank from
moving forward is a popsicle stick or similar wood plate
fastened to the tank with Zap Goo and/or tape. Sheets of
1/4" [6.5mm] RC foam were also held to the sides of the
tank with tape.
❏
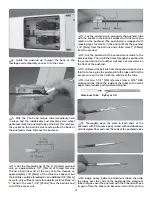
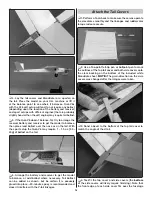
5. Guide the fuel lines through the holes in the side of
the fuselage and connect them to the fuel tank. Install
the tank as you guide the lines through – be certain the
fuel lines are not kinked or pinched inside the fuselage. If
you have any concerns about the fuel lines being kinked
inside the fuselage, you could always pull the engine and
view the lines through the hole in the fi rewall.
❏
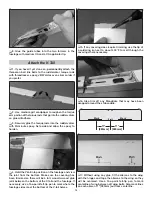
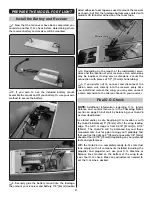
6. Use additional pieces of foam padding on top of
the tank and under the tank as needed. As shown, the
tank was secure and will not shift forward or aft, but if a
little more security is desired a balsa stick could be glued
across the fuselage sides at the back of the tank.
❏
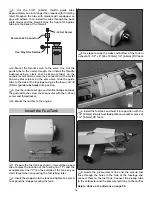
7. Mount the muffl er and connect the fuel lines. Might
as well install the propeller too—be certain to lock the
propeller down so that it will be horizontal when the
piston is at the top of the compression stroke to prevent
damaging the tips when landing.
NOTE:
If you ever replace the wing bolts with different
bolts, be certain they do not contact the top of the
fuel tank.
Hook Up the Ailerons
Note:
The aileron servo is shown with the output shaft
toward the
back
of the wing. This orientation may be
necessary to clear the included fuel tank for the sport
setup, but if using a Tettra fuel tank the servo may be
positioned with the output shaft closer to the
front
of
the wing. In any case, test-fi t the wing with your servo to
make sure it clears your fuel tank before deciding which
way to mount the servo.


