23
❏
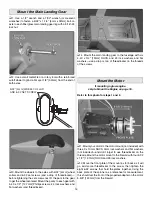
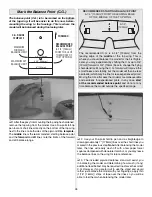
6. If using servo extensions (instead of Y-harnesses),
connect the extensions to the servo wires and secure the
connections with 1-1/2" [38mm] pieces of heat shrink tubing.
Use the string in the
bottom
wing to pull an extension into
each servo opening out through the holes in the top (top
photo). If using Y-harnesses, tape each end of the string to
the edge of the servo hatch (middle photo), then lift the string
up through
one
of the holes in the top of the middle of the
wing. Cut the string in half, tie each end to the ends of the
Y-harness and pull them through (bottom photo).
Hint:
After
tying the knot in the string around the connector, add a drop
of thin CA to the knot so it cannot come untied when you are
pulling the connectors down through the wings.
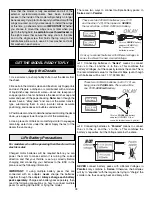
Refer to this photo while hooking up the ailerons.
❏
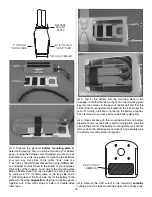
7. Mount the hatches in the wing with #2 x 3/8" [9.5mm]
button-head screws. This will require a .050" ballwrench, as
mentioned in the front of this manual.
❏
8. The same as was done for the elevators and rudder,
make the pushrods and connect the bottom ailerons to the
servos using the hardware shown. Don’t forget to use thin
CA to harden the screw holes for the horn mounting screws
and the hatch screws.
❏
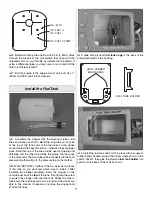
9. Install the servo extension wires, mount the aileron servos
and make the pushrods for the top wing the same way.
Mount the Wings
NOTE:
Before using glue, read the entire wing mounting
procedure so you will have everything ready and understand
how to proceed.
❏
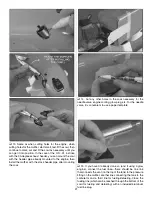
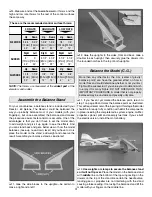
1. Cut the covering from the holes in the eight plywood
wing strut tabs
. Tap a 4-40 blind nut into one side of each
tab. Add a few drops of thin CA around each blind nut and let
it soak in so the blind nuts will not fall out.
❏
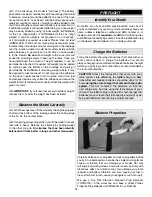
2. With the blind nuts on the tabs toward the
middle
of the
wing, test fi t four tabs into the slots in the
bottom wing
to
make sure they all fi t. Make any adjustments necessary so
they go all the way down.
Summary of Contents for Reactor ARF
Page 36: ......


