❏
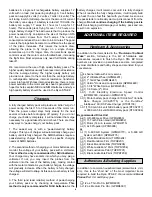
2. Use the same procedure to bevel the leading edge of
the rudder.
❏
3. Attach the elevators to the stab and the rudder to the
fin. Use your bar sander to round the perimeter of the
elevator, stab, rudder and fin (do not round the bottom edge
of the fin where it will be glued to the stab and fuse and the
bottom half of the rudder where the rudder fairing will be
attached later.
Start by building the right wing panel right side up over the
right wing panel plan so your progress matches the photos.
❏ ❏
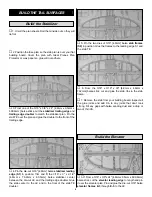
1. Cover the wing panel plan with waxed paper or
Great Planes Plan Protector.
❏ ❏
2. Glue the die-cut 3-ply landing gear doubler (3LG)
to the die-cut 3/32" [2.4mm] balsa wing rib W3. Make sure
to make a left and right rib.
❏ ❏
3. Glue the die-cut 3/32" [2.4mm] balsa rib doublers
3A to a W3 rib and a die-cut 3/32" [2.4mm] balsa wing rib
W4. Note on the wing plan which side of the ribs the rib
doublers are glued to and that the rib doublers are aligned
with the top of the W3 and W4 ribs.
❏ ❏
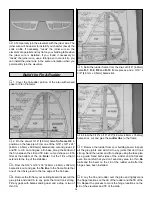
4. Match two of the 1/8" x 1/4" x 30" [3.2mm x 6.4mm
x 762mm] basswood main spars so any warps will counteract
each other.
❏ ❏
5. Position one of the main spars over the plan,
aligning one end of the spar with the outboard edge of the
tip rib W5. Mark the spar at the tip side of rib W4.
Build the Wing Panels
BUILD THE WING
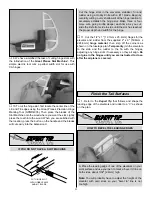
B. Using the “bevel to” lines and the centerline as a guide,
make the “V” on the leading edge of the elevators with a
razor plane or the Great Planes Multi-Sander (GPMR6190)
with 150-grit sandpaper.
12
Summary of Contents for Ryan STA EP
Page 7: ...7 DIE CUT PATTERNS...
Page 48: ...TWO VIEW DRAWING Use copies of this page to plan your trim scheme...
Page 49: ...B C...
Page 50: ...D A...


