❏ ❏
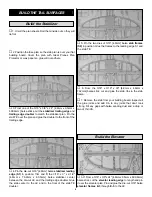
11. Draw a centerline on the LE of the aileron and the
TE of the wing.
❏ ❏
12. Cut the hinge slots in the aileron and the wing. Cut
three 1/2" wide hinges from the supplied hinge strip and trim
the corners. Insert the hinges in the aileron and fit the
aileron to the wing. Do not glue the hinges until instructed to
do so.
❏ ❏
13. Remove the aileron from the wing. Mark the “bevel
to” lines on both sides of the aileron, 3/32" from the LE.
Shape the LE of the aileron to a “V” as shown on the plan.
❏ ❏
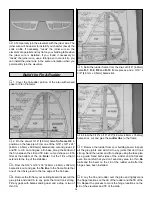
14. Temporarily attach the aileron to the wing. Sand
the tip of the aileron to match the shape of the wing tip.
❏
15. Return to step 1 of
“Assemble the Ailerons” and
build the second aileron.
❏
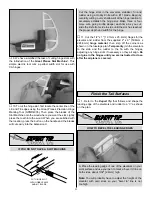
1. Cover the fuselage plan with waxed paper or Great
Planes Plan Protector. When installing the formers, make
sure the enbossed lettering is always facing forward.
❏
2. Glue the two die-cut 3/32" [2.4mm] balsa fuselage
bases together. Pin the base over the fuselage top view.
❏
3. Glue the die-cut 3-ply former F2C to the front of F2A.
Make sure the wing dowel holes are aligned.
❏
4. Glue former F2A perpendicular to the fuselage base
so that F2C is toward the front and F2A is positioned at the
front of the slot.
❏
5. Glue the two die-cut 3/32" [2.4mm] balsa former halves
F6A together.
❏
6. Glue the two die-cut 3/32" [2.4mm] balsa doublers F6D
to the back of former F6A.
Assemble the Fuselage Bottom
BUILD THE FUSELAGE
20
Summary of Contents for Ryan STA EP
Page 7: ...7 DIE CUT PATTERNS...
Page 48: ...TWO VIEW DRAWING Use copies of this page to plan your trim scheme...
Page 49: ...B C...
Page 50: ...D A...


