❏
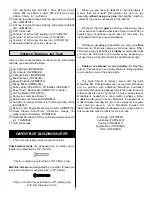
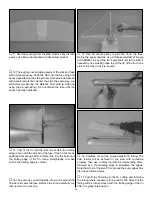
1. Cut the covering from the hole in both sides of the rudder
for the 6-32 x 1-1/2" [38mm] threaded control rod. Temporarily
thread the rod into the rudder until it is centered. (A hemostat
was used to thread the control rod into the rudder.)
❏
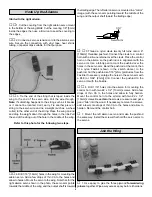
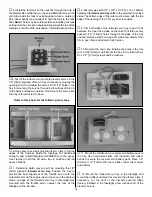
2. Use a #36 (or 7/64" [2.8mm]) drill to enlarge the hole in
both nylon torque rod horns. Use a 6-32 tap to make threads
in the horns. Screw the horns onto the threaded rod on the
rudder until the top of the horns are even with the ends of the
rod. (The horns can be seen in photos on page 18.)
❏
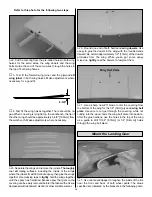
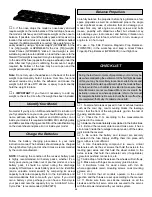
3. Test fit the rudder to the fin with the hinges. If
necessary, enlarge the holes in the back of the fuselage so
the torque rod horns will not contact the edges when the
rudder is moved back and forth.
❏
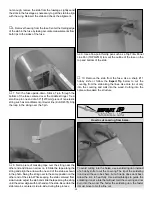
4. Slip a small copper tube (also called a “swage”)and a
threaded brass coupler with a clevis about 6" [150mm] onto
one end of the braided steel rudder pull/pull cable.
❏
5. Insert the end of the cable back down through the
swage, then loop it around and thread it back up through the
swage (as indicated by the dashed line in the photo).
❏
6. Pull the short end of the cable tight through the swage
until the loop “ends” at the swage.
❏
7. Pull the long end of the cable through the swage,
decreasing the loop around the threaded brass coupler until it
is approximately 3/8" [9mm] long. Use pliers to tightly squish
the swage, then cut the excess cable at the end of the swage.
❏
8. Connect another threaded brass coupler to the other
end of the cable the same way, then cut the cable into two
equal lengths.
Hook Up the Rudder
17


