12
❏
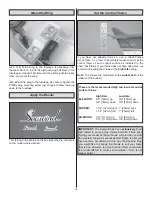
1. With the model ready to fl y and the battery installed, set
the model in the water with the nose pointing into the wind.
❏
2. It will probably fl oat with one tip in the water and one tip up
out of the water. Tilt the wing so the “dry” tip is now in the water
and the “wet” tip is up. Do this several times, tipping the model
from side-to-side.
❏
3. If one tip always comes back down, then the opposite tip
will need some weight. Place incrementally increasing amounts
of weight on the “light” tip until neither tip is “favored” and the
wings can be rocked to either side without one tip always coming
back down.
❏
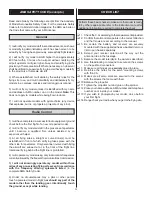
4. Stick the weight to the bottom of the wing next to the “light”
tip. Recheck the balance.
Note: Depending on how the model handles in the water, the
fi nal amount of weight may need to be adjusted.
PREFLIGHT
Identify Your Model
No matter if you fl y at an AMA sanctioned R/C club site or
if you fl y somewhere on your own, you should always have
your name, address, telephone number and AMA number
on or inside your model. It is required at all AMA R/C club
fl ying sites and AMA sanctioned fl ying events. Use a fi ne-
point felt-tip pen to write the information somewhere inside
the airplane such as on the bottom of the cockpit.
Charge the Batteries
Follow the battery charging instructions that came with your radio
control system to charge the transmitter batteries. You should
always charge your transmitter the night before you go fl ying,
and at other times as recommended by the radio manufacturer.
CAUTION: Unless the instructions that came with your
radio system state differently, the initial charge on new
transmitter and receiver batteries should be done for 15
hours using the slow-charger that came with the radio
system. This will “condition” the batteries so that the next
charge may be done using the fast-charger of your choice.
If the initial charge is done with a fast-charger the batteries
may not reach their full capacity and you may be fl ying with
batteries that are only partially charged.
Range Check
When you get to your fl
ying site ground check the
operational range of the radio before the fi rst fl ight of the
day. With the transmitter antenna collapsed and the receiver
and transmitter on, you should be able to walk at least
100 feet away from the model and still have control. Have
an assistant stand by your model and, while you work the
controls, tell you what the control surfaces are doing. Repeat
this test with the motor running (follow the included ESC
directions to “arm” the motor/ESC) at various speeds with
an assistant holding the model, using hand signals to show
you what is happening. If the control surfaces do not respond
correctly, do not fl y! Find and correct the problem fi rst. Look
for loose servo or battery connections, damaged wires or a
damaged receiver crystal from a previous crash in another
model. One other possible source of radio “noise” that could
cause interference is the arrangement and relative location
of the receiver, receiver antenna and motor wires. If possible,
remount the receiver in a different location or reroute some
of the wires. Then try the range check again.
ELECTRIC MOTOR SAFETY PRECAUTIONS
Failure to follow these safety precautions may result
in severe injury to yourself and others.
Use safety glasses when running the motor.
Do not run the motor in an area of loose gravel or sand; the
propeller may throw such material in your face or eyes.
Keep your face and body as well as all spectators away from
the plane of rotation of the propeller as it is turning.
Keep these items away from the prop: loose clothing, shirt
sleeves, ties, scarfs, long hair or loose objects such as
pencils or screwdrivers that may fall out of shirt or jacket
pockets into the prop.
Always remove the LiPo battery from the plane before charging.
Always use a charger designed to charge LiPo batteries for
charging the LiPo fl ight battery.
Never leave the LiPo battery unattended while charging. If
the battery becomes hot, discontinue charging.


