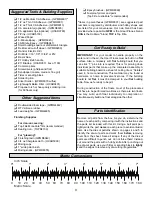
Add the forward bottom sheeting in the same manner as
the aft bottom sheeting:
❏
1. On the 40 and 60 die-cut 1/8" plywood forward
bottom sheets, there is an arrow indicating the inboard
edge of each sheet (although one of the sheets on each
float will have to be flipped over). Trial fit the two sheets and
bevel the inboard edges that contact each other for a good
glue joint.
❏
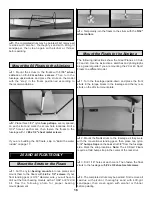
2. Use thick CA to glue one of the sheets to the side
stringer and formers only – do not apply CA to the
forward keel.
❏
3. Apply thick CA to the side stringer, formers and keel
to glue the second sheet in position and both sheets to the
keel and each other simultaneously. Use the embossed
arrows to aid in final alignment.
❏
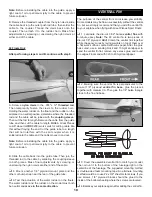
4. Referring to the sketch, “rough sand” the entire float
with a sanding block and 150-grit sandpaper, blending the
sides to the deck and the bottoms to the side. Sand all
sheeting and stringers flush with formers A and H.
❏
1. Glue the balsa nose block to former A with thick CA.
❏
2. Carve the nose block to the approximate shape, then
use a sanding block and 150-grit sandpaper to blend the
block to the sides, deck and bottom.
❏
3. Finish sand the nose block by rounding the front and
slightly rounding the corners.
Nose Block and Finishing
❏
3. Carefully cut the strips along the line. Mark the
inboard edge of each bottom sheet.
❏
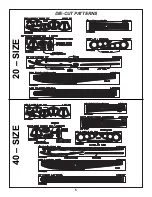
2. Accurately cut out the 20 float forward bottom
sheeting template from the center sheet in the manual,
then trace the outline on each sheet. Hint: Tape the
template to the sheet at the front and the rear.
10
Summary of Contents for Sport Floats
Page 4: ...4 DIE CUT PATTERNS 60 SIZE...
Page 5: ...5 DIE CUT PATTERNS 20 SIZE 40 SIZE...
Page 21: ......


