7
❏
3. Trial fit the 1/8" plywood forward and aft strut mounting
plates, spine and formers C, D, E, and G to the balsa deck.
The formers are positioned in descending order with former A
in the front(see the photo to the right). NOTE: The aft strut
mounting plate for the .40 and .60 Sport Float has the holes
towards the front. The aft strut mount plate for the .20 Sport
Float has a flat edge. Make sure all parts contact the deck, then
use thin CA to glue only the mounting plates to the deck.
❏
4. Remove the formers and spine from the deck. Place a
scrap piece of wood under the deck, then using the holes in the
strut mounting plates as a guide, drill 1/8" holes through the
deck. Run a 4-40 x 1/2" bolt in and out of eight 4-40 blind nuts
to make sure the threads are “cleaned out.” Use a hammer to
lightly tap the 4-40 blind nuts into the plates, then add a few
drops of thin CA to the flange of each blind nut to secure them
in place. Do not get glue in the threads of the blind nuts.
Reinstall the spine and formers. Make sure all parts contact the
deck, then use thin CA to glue the spine to the deck. NOTE: Do
not glue the spine to the deck from former C forward.
❏
5. Lay waxed paper over your flat building board and
position all the formers except A and I on the deck. Make
sure the notches in the formers fit all the way down to the
deck and make adjustments if necessary. Doubler F faces
the rear of the float.
❏
6. Using a carpenter's square or a draftsman's triangle,
make sure each former is perpendicular to the deck and
use medium CA to glue them to the deck and spine.
❏
7. Making sure the formers remain perpendicular to the
deck, trial fit, then use medium CA to glue the forward and
aft keel into the notches in the formers and the spine.
❏
8. Remove the structure from the building board and use
a T-bar or flat sanding block with 150-grit sandpaper to
bevel the edges of the deck sheeting to match the formers.
❏
9. Pin the assembly to your waxed paper-covered flat
building board. Trial fit, then sand a bevel to the top edge of
both die-cut balsa float sides to match the deck. Be sure
to make a
right and a left side.
❏
10. Align the step of one of the float sides with the aft
edge of former E. Use medium CA to glue the side to all
formers and the deck from former B to former H. Do not
glue the side to the deck forward of former B. Glue the
other side in the same manner. NOTE: The float side will
bow inward slightly at for mer G. This slight bow
is intentional.
Summary of Contents for Sport Floats
Page 4: ...4 DIE CUT PATTERNS 60 SIZE...
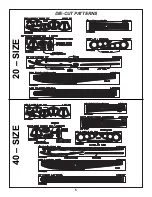
Page 5: ...5 DIE CUT PATTERNS 20 SIZE 40 SIZE...
Page 21: ......


