❏
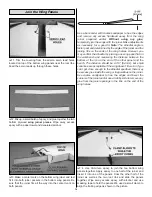
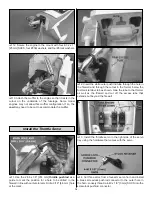
10. Attach a clevis and silicone clevis retainer to two 2-56
x 12" [305 mm] pushrods. Use clamps to hold the ailerons in
the neutral positions. Hook the clevises to the top ailerons
and make a mark where the pushrod crosses the holes in
the bottom aileron control horns.
❏
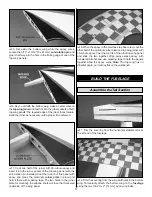
11. Make a 90° bend at the marks and cut the pushrods,
leaving 1/4" [6 mm] beyond the bend. Hook the pushrods to
the bottom aileron control horns and secure them with two
FasLinks. Adjust the clevises as necessary so the top and
bottom ailerons are parallel with each other.
❏
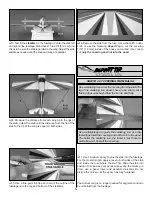
12. Finish up the model by installing a propeller and the
included 2-1/2" [64 mm] aluminum spinner onto the engine.
We used a Top Flite
®
15x6 wood prop (TOPQ5175) to fit onto
our O.S.
®
.91 four-stroke engine. The included 5/16-24
spinner adapter fits into the jam nut for the O.S. four-stroke.
1. Use scissors or a sharp hobby knife to cut the decals from
the sheet.
2. Be certain the model is clean and free from oily
fingerprints and dust. Prepare a dishpan or small bucket with
a mixture of liquid dish soap and warm water–about one
teaspoon of soap per gallon of water. Submerse the decal in
the soap and water and peel off the paper backing. Note:
Apply the Decals
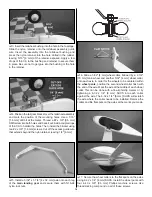
For ease of transport, the Super Skybolt ARF includes a
carrying handle that hooks to the top of the cabane struts.
To assemble the handle, glue the four pieces together as
shown with the square cutouts on the outside of the stack.
The middle pieces with the holes should be oriented so that
the holes are exposed in the square cutouts.
To use the handle, remove the top and bottom wings from
the fuselage. Insert the handle into the cabane struts and
use the 4-40 x 1/2" [13 mm] SHCS and 4-40 lock nuts to
secure it.
Optional: Assemble the Carrying Handle
24

