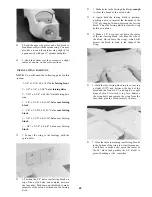
FIBERGLASS THE CENTER SECTION
NOTE: Because of the high stresses in the center
of this wing, fiberglass reinforcement is RE-
QUIRED. Please do not omit this important sec-
tion!
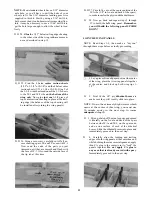
D 1. The fiberglass tape is supplied in two 3"
strips, which are applied in such a way that
they overlap 1-1/2" at the center (see the dia-
gram in the lower left corner of the wing plan).
Begin by marking the wing sheeting 3/4" each
way from the center joint.
D 2. If you have previous experience with apply-
ing fiberglass, feel free to use your favorite
method, providing that it results in a strong
bond between the glass cloth and the wood. If
this is your first time, we offer the following
suggested method, which is the fastest and
easiest we have seen.
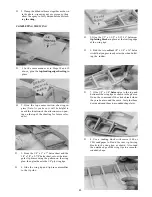
3. Spray a very light mist of 3M "77" Spray
Adhesive on the center section in the area to
be glassed. Hold the spray can at least 12" away
from the surface when doing this to avoid a
heavy buildup. The purpose of this is only to
give the wood a little "tackiness". If you apply
too much spray it could result in a poor glue
bond.
D 4. Beginning at the trailing edge, lay one of
the glass tape strips in place on the wing, over-
lapping the center joint by 3/4". You can use
a scissors to cut a hole in the glass cloth for
the aileron torque rod horn. Gently press the
cloth in place, working out all wrinkles. The
"77" spray adhesive should hold the cloth down
to the surface, but will permit you to lift and
reposition the cloth if you make a mistake.
Keep working forward along the top of the
wing, around the leading edge, and along the
bottom of the wing, ending at the trailing edge.
It is not necessary to wrap the glass cloth
around the trailing edge.
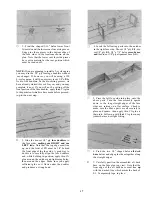
D 5. Working outdoors or in a very well-venti-
lated area, apply thin CA glue to the glass
cloth. Begin by running a bead of glue down
the center of the glass cloth strip, then continue
applying the glue in lines until all the cloth
has been secured. WARNING: This opera-
tion produces a larger than normal quan-
tity of CA fumes, so adequate ventilation
is a must!
D 6. Inspect the surface of the glass cloth. If any
areas are not glued down, apply a couple more
drops of CA glue and press down with a piece
of waxed paper until the glue sets.
D 7. After the glue has set, trim the excess cloth
at the trailing edge with a sharp Xacto knife.
D 8. Carefully sand the edges of the glass cloth
with a sanding block. Also, lightly sand the
surface of the glass cloth to remove any rough
spots.
D 9. Repeat steps 3 through 8 to apply the other
3" strip of fiberglass tape, again overlapping
the center of the wing by 3/4".
INSTALL AILERONS
NOTE: Do not glue the aileron hinges until after
your model has been covered.
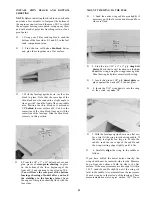
D 1. Note on the wing plan the location of the
small scrap balsa block filler at the wing tip
near the end of the aileron. Glue this filler
block in place at this time, and sand it to blend
with the shape of the aileron.
D 2. Draw an accurate centerline along the lead-
ing edge of the aileron.
D 3. Check the length of your aileron against the
actual aileron opening and trim the aileron as
necessary. You should provide approximately
1/16" gap at each end of the aileron.
D 4. Lay the aileron in place in the opening, with
the torque rod resting on top of the aileron.
Mark the torque rod location on the top of the
aileron.
D 5. Drill a 1/8" or 9/64" hole in the aileron at
the torque rod location, starting at the leading
edge centerline and drilling straight in to the
proper depth.
15

