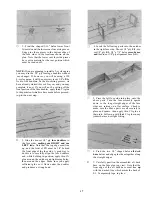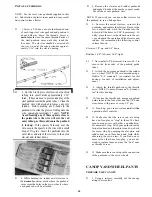
D 2. Sand the nose side pieces and chin block to
blend smoothly with the spinner ring. You may
also have to sand the spinner ring slightly for
a good match with your 3" spinner backplate.
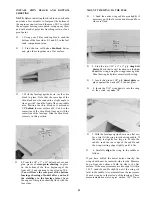
D 3. Sand the bottom rear fuse corners to a slight
radius as shown on the cross-sections.
INSTALL WING FAIRINGS
NOTE: You will need the following parts for this
section:
1 -1/4" x 1-3/16" x 4-11/16" balsa fairing front
2 - 1/4" x 3/4" x 1-5/8" balsa fairing sides
2 - 3/16" x 2-3/4" x 4-11/16" balsa fairing bot-
tom
1 - 1/8" x 2-1/4" x 4-11/16" balsa rear fairing
block
1 - 1/4" x 1-3/8" x 4-11/16" balsa rear fairing
block
1 - 3/8" x 1-3/8" x 4-11/16" balsa rear fairing
block
1 - 5/8" x 2-3/8" x 4-5/8" balsa rear fairing
block
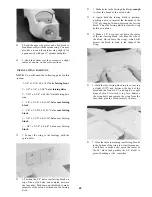
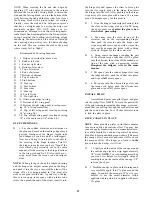
D 1. Mount the wing to the fuselage with the
nylon bolts.
D 3. Make holes in the fairing block large enough
to clear the heads of the nylon bolts.
D 4. Again hold the fairing block in position,
pushing down to imprint the locations of the
1/16" ply wing hold-down plates on the fairing
block. Carve the fairing block to clear the wing
hold-down plates.
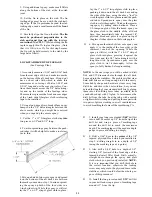
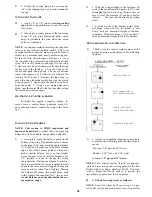
D 5. Make a 1/2" deep saw cut down the center
of the rear fairing block (cut from the side of
the block which faces the wing), which will
permit the block to bend to the shape of the
wing.
D 6. Hold the rear fairing block in place, leaving
a slight (1/32") gap between the back of the
block and the front of F-3, and apply a couple
drops of thin CA to tack it in place. Remove
the wing bolts and remove the wing from the
fuse, then glue the block securely in place.
D 7. Glue the three remaining rear fairing blocks
to the bottom of the wing in a similar manner.
You'll have to make a saw cut in the center of
the 3/8" block (and possibly the 1/4" block) to
permit bending at the centerline.
D 2. Position the 5/8" balsa rear fairing block on
top of the nylon bolts, and centered between
the fuse sides. Push down on this block to make
imprints of the nylon bolt heads in the fairing
block.
29


