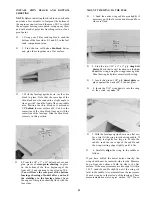
D 11. With the 3/32" drill bit, drill the holes of
steps 8 and 9 of these instructions to a total
depth of 1" (using the masking tape as a depth
gauge).
D 12. Insert the #6 x 1" sheet metal screws into
the holes and screw them down securely.
NOTE: The screws are positioned so they go
into the 1/4" plywood braces in the stabilizer,
providing a strong and positive connection be-
tween the stabilizer and fuselage.
D 13. Now finish sheeting the fuselage bottom
with 1/8" balsa from Former F-6 to the rear of
the fuselage as shown on the plan.
FINISH MOUNTING THE STAB AND FIN
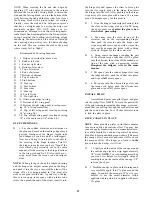
5. From scraps of balsa cut small fillers and
glue them in place at the front of the fin as
shown in the above photo, which will enhance
the appearance and aid in covering. Add light-
weight balsa filler (such as Model Magic Filler)
to any gaps in the tail area, allow to dry, then
sand smooth.
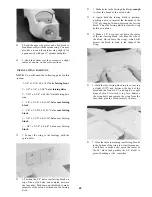
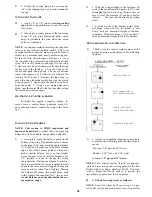
D 1. Assemble the jig for shaping the fin/stab
fairing blocks. This jig consists of three 1/8"
die-cut ply parts, and is glued together as
shown in the photo.
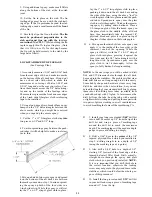
2. Tack glue the 7/8" x l-l/ 4" x 6-5/8" fin/stab
fairing blocks to the jig, using only two small
drops of thick CA glue per block.
D 6. Temporarily attach the elevators and rudder
to check their fit and operation.
IMPORTANT NOTE: When making the tricycle
version, you'll have to install a 4th rudder hinge in
the location where the tailgear bearing would have
been located. Cutting the bottom hinge slot in the
plywood and the fuse tail end joint is best ac-
complished by drilling a line of small holes at the
hinge location with a small (1/16" or smaller) drill
bit in a Dremel Moto Tool. You can then clean out
the slot with a hinge slotting hook.
D 7. If you are building a taildragger, cut the slot
in the fuse tail end for the nylon tailgear bear-
ing at this time. Trial fit the tailgear assembly
into the fuse and rudder to make sure it func-
tions properly.
D 3. Carve and sand the fairing blocks down to
the shape of the jig.
D 4. Break the fairing blocks loose from the jig,
trial fit on the sides of the fin, sanding as neces-
sary for a good fit. Use epoxy to glue these
fairing blocks in place.
SERVOS, HORNS AND
PUSHRODS
MOUNT AILERON SERVO AND PUSHRODS
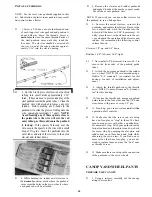
1. Cut the opening in the top of the wing for
the aileron servo If you were following instruc-
tions when you built the wing, you may still
be able to see the marks you made at the front
and rear of the servo opening area. If not, meas-
ure to find the location, based on the plans.
32


