11. D INSTALL RADIO COMPONENTS IN THE FUSE-
LAGE
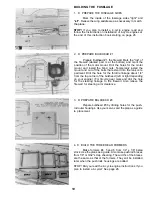
Glue servo rails made from scrap plywood or hardwood into
the radio compartment. Install the rudder, elevator and throttle
servo directly to the hardwood rails or install the servo tray that
comes with your radio. Position the battery and receiver (wrapped
in foam rubber for protection) as shown on the plan. Install the
on/off switch. Install the inner pushrod wires into the outer
pushrod tubes for the rudder and elevator. Also install a cable
type pushrod and its outer tube for throttle linkage. If you have
trike gear, install a pushrod for steerable nose gear. Use a cable
type if you need to bend the pushrod.
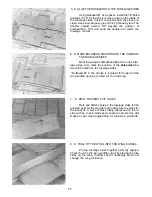
12. D CUT SERVO WELL IN THE TOP OF THE WING
The well is located directly behind the spars. Cut
out enough of the wing sheeting, center rib and root ribs to
allow the placement of the servo as deeply as possible in-
to the wing. Glue hardwood rails (from scrap) as shown in
the photo or use the tray that came with your radio. Drill
small pilot holes in the rails for the servo screws.
NOTE: Do not cut the main spar.
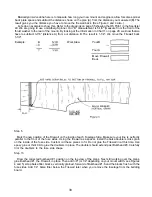
13. D INSTALL AILERON SERVO AND LINKAGE
Mount the servo as deep into the wing as you can to
prevent interference with the other servos Install the
threaded wire pushrods with "Z" bends at the servo. Install
the nylon swivels onto the the aileron pushrods. Install the
nylon swivel clevises onto the rods and attach them to the
swivels. Adjust as needed so that the ailerons are equally
neutral when the servo is centered.
14. D INSTALL MAIN GEAR
Place the wire main gear into the landing
gear blocks in the bottom of the wing. Hold the wire
gear in the blocks with the metal hold down straps
and sheet metal screws. Use two straps on each gear.
Drill 1/16" holes in the blocks first. Then put the
screws in place.
15. D INSTALL THE NOSE GEAR, STEERING ARM
AND WHEEL COLLAR (TRIKE GEAR ONLY)
Shorten the steering arm to the length shown
on bulkhead #1 front view on the plan.
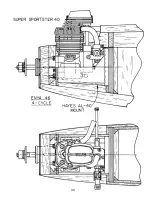
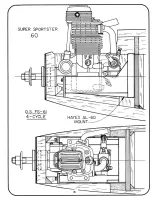
16. D INSTALL THE ENGINE MOUNT AND
ENGINE/MUFFLER
Attach the muffler to the engine. Install the
mount to the fuselage. Attach the engine/muffler to
the mount.
17. D INSTALL THE FUEL TANK
Install the tank now if you haven't done so
already. Assemble the tank per manufacturer's direc-
tions. Feed extra long fuel lines through the front of
former 1A into the tank compartment. Attach the
lines to the tank and pull the tank into position. Cut
the fuel lines to length and attach them to the engine.
24
Summary of Contents for Super Sportster 20
Page 33: ...33...
Page 34: ...34...
Page 35: ...35...
Page 36: ...36...
Page 37: ...37...
Page 41: ...Use trim MonoKote and these letters to create your trim scheme on your Sportster 41...
Page 43: ...PUSHROD LINKAGES 43...

