20
❏
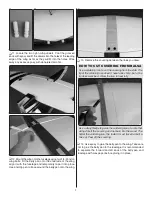
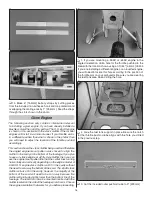
17. Bend the throttle pushrod so that it can reach the
throttle arm on the carburetor without contacting any part of
the engine or mount. Thread a nylon clevis onto the pushrod
and slide a silicone clevis retainer onto the clevis. Insert the
pushrod into the outer pushrod tube and connect the clevis
to the outer hole in the throttle arm.
❏
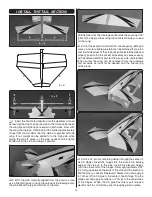
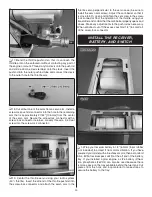
18. Cut all but one of the arms from a servo arm. Install a
screw-lock pushrod connector into the hole in the remaining
arm that is approximately 27/64" [10.5mm] from the center
of the servo arm. Secure the screw-lock connector with a
screw-lock connector retainer. Loosely thread a 4-40 set
screw into the screw-lock connector.
❏
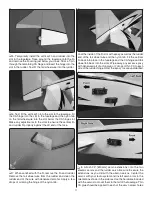
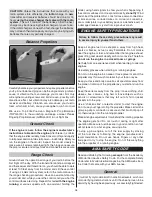
19. Center the throttle servo using your radio system
(50% throttle). Insert the aft end of the throttle pushrod into
the screw-lock connector and attach the servo arm to the
throttle servo perpendicular to the servo case (be sure to
install the servo arm screw). Adjust the carb barrel so that it
is close to 50% open and tighten the set screw in the screw-
lock connector. Test the operation of the throttle using your
transmitter and confi rm that the carb barrel properly opens and
closes. Make any adjustments to the pushrod as necessary.
When satisfi ed, cut off the excess pushrod 1/4" [6.4mm] aft
of the screw-lock connector.
INSTALL THE RECEIVER,
BATTERY, AND SWITCH
❏
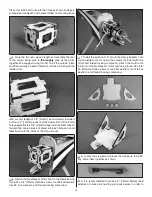
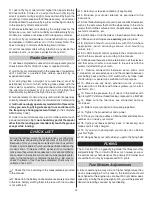
1. Wrap your receiver battery in 1/4" [6.4mm] foam rubber
(not included) to protect it from motor vibration. If you have
powered your model with a brushless motor, then a standard
AA 4.8V fl at receiver pack will fi t at the aft end of the battery
tray. If you installed a glow engine, a LiFe battery (lithium
iron phosphate LiFePO4) can also be used because there
is more space on the tray available behind the fuel tank. Cut
pieces from the hook and loop material to make straps to
secure the battery to the tray.


