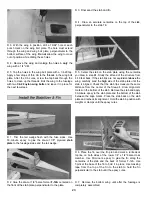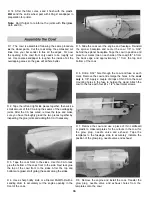
D D 1. Trim one end of the 1-1/4" x 24" balsa aileron to
the same angle as the center TE.
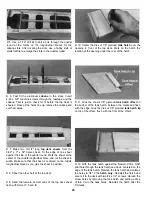
D D 2. With a gap of 1/16" between the aileron and the
center TE, Mark the end of the aileron approximately 1/16"
past the wing tip. This will allow you to sand the aileron
flush with the wing tip later. Cut the aileron at the mark.
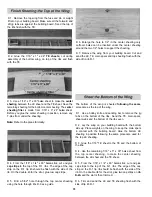
D D 3. Draw a centerline on the LE of the aileron.
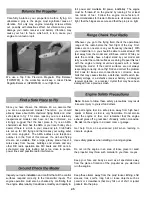
D 1. Cut the "spreader bar" from the supplied Great Planes
engine mount. Use a hobby knife to remove any flashing so
the halves fit together properly.
D 2. Temporarily mount the engine mount to the firewall
with four 6-32 x 1" machine screws and #6 washers. Do not
tighten the screws all the way so you can adjust the mount.
D 3. Place your engine on the mount and slide the halves
in or out so the engine fits. When the engine mount is
adjusted and centered, tighten the mounting screws.
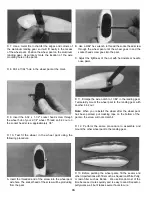
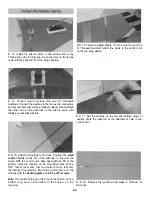
D D 4. Cut out four aileron hinges from the leftover
hinge material.
D D 5. Mark the location for the hinges on the aileron and
wing. Cut the hinge slots and without using glue, test fit the
aileron to the wing.
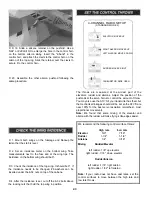
D D 6. Remove the aileron from the wing. Mark the "bevel
to" lines and trim the LE of the aileron to a "V" as shown on
the plan.
D 7. Perform steps 1 through 6 to fit the remaining aileron
onto the wing.
Now that the fuselage and wings are assembled, remove
the cabane from the fuse and rough sand the completed
airplane. Refer to the cross-section drawings often while
sanding. At this point we just want to blend the fuse sides
with the turtledeck and front deck and sand a radius at the
joint between the bottom and sides of the fuse.
D 4. Position the engine on the mount so that the drive
washer (or the backplate of the spinner) is 4-15/16" away
from the firewall. Refer to the Expert Tip that follows, then
mark and drill the engine mounting holes for the #6 x 3/4"
engine mounting screws.
HOW TO ACCURATELY MARK & DRILL THE ENGINE
MOUNTING HOLES ON THE ENGINE MOUNT
A. Use C-clamps to hold the engine in position.
B. Use a torch or a lighter to heat the end of a sharpened
wire rod and mark the center of the engine mounting
holes. It just takes a little pressure of the heated rod to
dimple the plastic.
33


