❏
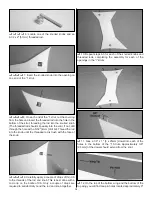
3. Install the battery and receiver onto the tray. Protect
the battery and receiver from vibration by putting 1/4"
[254mm] R/C foam rubber between them. Cut the Velcro
®
to
length and use it to hold the receiver and battery in place.
Push the receiver antenna wire into the antenna tube inside
of the fuselage.
❏
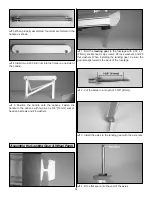
4. Install the radio switch harness and charge jack into
the fuselage. A location for this is provided on both sides of
the fuselage. Always locate this as far from the exhaust flow
as possible.
❏
5. Install a “Y” harness onto the aileron servos for both
the top and bottom wing. Secure the extension to the lead
with tape, a piece of heat-shrink tube or some other method
to keep them from coming unplugged.
❏
6. The bottom wing will simply plug into the receiver when
mounting the bottom wing. A servo extension needs to be
installed in the receiver and routed to the top wing. To
provide a plug into the receiver, we have used a slightly
modified Ernst Charge Receptacle (ERN3124 for Futaba)
and a 12" [305mm] servo extension.
❏
7. Cut the charge receptacle in half just above the
locking fingers.
❏
8. Put a couple of small drops of medium CA on the sides
of the female end of the servo extension. Then, slide the
servo extension into the charge receptacle.
❏
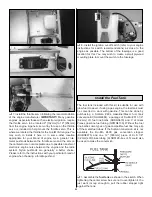
9. Near one of the cabanes, cut a hole in the top of the
fuselage just large enough for the servo extension and the
charge receptacle to fit into. Drill a 1/16" [16mm] hole into
the fuselage through each of the mounting holes in the
charge receptacle. Thread and remove the screws from the
charge receptacle into the holes you drilled. Apply thin CA
into the holes to harden the threads. Glue the charge
receptacle to the fuselage with R/C 56 canopy glue. Install
the mounting screws in the charge receptacle, into the holes
you have drilled.
❏
10. An alternative to the modified charge jack is to simply
run the servo extension along side of the cabane and secure
it to the cabane with heat-shrink, tape, or using epoxy to
glue it to the cabane.
26


