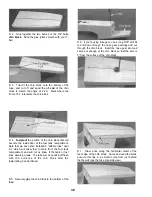
2 Paint your pilot figure, and glue it to the cockpit
floor NOTE: To avoid the possibility of the pilot
coming loose inside the canopy, we recommend that
you drill up through the cockpit floor and pilot base,
and use two #6 or #8 sheet metal screws (not
included) to lock the pilot in place.
GLUE CANOPY IN PLACE
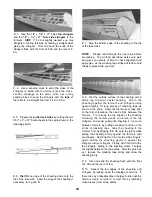
1 Lightly sand the inside of the canopy around the
edge (sand a strip approximately 1/8" wide) NOTE:
To avoid sanding more than you want, it is helpful to
first apply strips of vinyl tape (such as Great Planes
"E-Z Mask") on the inside of the canopy, 1/8" in from
the edges
2 Poke pinholes (1/8" apart) through the covering
material in the area where the canopy will be glued to
the fuselage, then lightly sand the covering material
where the canopy will be glued.
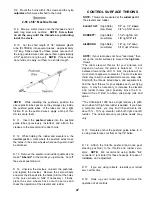
3. Hold the canopy in place on the fuselage and very
carefully apply medium viscosity CA glue (CA+)
around the edges To control the amount of CA, it is
very helpful to use the small diameter teflon applicator
tubing which is supplied with most CA glues, or use a
long pointed applicator tip The medium viscosity
glue will be pulled into the joint NOTE: Do not use
thin CA for this step, as it will fog the plastic.
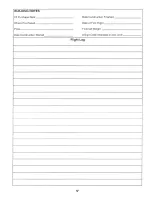
4. To hide the canopy glue joint, you can use 1/4"
wide Great Planes "Kwik Stripe" striping tape as a
border around the canopy
INSTALL LANDING GEAR
1 Re-install the main landing gear struts, securing
them with the nylon landing gear straps and #2 x 3/8"
sheet metal screws.
WING SEATING
1 Apply 1/16" x 1/4" or 3/8" wide foam wing seating
tape to the wing saddle area to seal the wing/fuse
joints.*
2. Also apply a couple pieces of the foam tape to the
1/4" ply wing hold-down plate, which helps to distribute
the load when the nylon bolts are tightened
*NOTE: An alternate method of sealing the wing/fuse
joint is to use "silicone bathtub sealer." This is an
excellent method, used by many experts because it
results in a permanent and nearly perfect wing saddle
joint Briefly the technique is as follows 1 Cover the
top of the wing center section with waxed paper or
plastic kitchen wrap Pull out all wrinkles and tape it to
the wing 2 Squeeze out a bead of silicone sealer
onto the wing saddle area of the fuselage 3 Lay the
wing in the saddle and push down gently The excess
silicone sealer will squeeze out 4 Allow to dry
without disturbing for at least 24 hours 5 Remove
the tape, then remove the wing from the saddle
(leaving the waxed paper or plastic wrap in place) 6
Gently pull the waxed paper or plastic wrap away from
the sealer 7 Using a new single-edge razor blade,
trim the sealer flush with the wing fillets, and along the
inside of the fuselage.
RE-INSTALL ENGINE & RADIO
Re-install the engine, propeller battery,
receiver, servos, control horns, pushrods, main LG,
nose gear and wheels Attach the wing to the
fuselage Secure all steel clevises with the small
retainer clips (METAL014) IMAA regulations also
require that lock nuts be installed at all clevises This
prevents thread wear due to metal-to-metal vibration.
BALANCE YOUR MODEL
NOTE: This section is VERY important and must
not be omitted! A model that is not properly
balanced will be unstable and possibly unflyable.
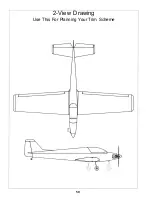
1. Accurately mark the balance point on the bottom of
the wing on both sides of the fairing The balance
point is shown on the plan (CG), and is located
approximately 5-1/4 inches back from the leading
edge This is the balance point at which your model
should balance for your first flights Later, you may
wish to experiment by shifting the balance up to 1/2"
forward or back to change the flying characteristics
Moving the balance f o r w a r d may improve the
smoothness and arrow-like tracking, but it may then
require more speed for takeoff and make it more
difficult to slow down for landing Moving the balance
aft gives the elevator more authority and makes the
model more agile with a lighter and snappier "feel,"
and often improves knife-edge capabilities In any
case, do not balance your model outside the
recommended range.
2. With the wing attached to the fuselage, all parts of
the model installed (ready to fly), and an empty fuel
tank, block up the tail as necessary until the stab is
level (If you have built a tricycle gear, the fuse
should already be sitting level).
3. Lift the model at the CG marks If the tail drops
when you lift, the model is "tail heavy" and you must
add weight to the nose to balance If the nose drops,
it is "nose heavy" and you must add weight to the tail
to balance NOTE: Nose weight may be easily
installed by using a Prather "Spinner Weight"
(available in assorted weights, up to 2 ounces), or by
50

