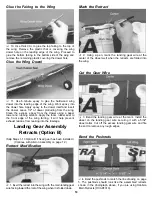
ASSEMBLE, THEN APPLY 6 DROPS
OF THIN CA TO CENTER
OF HINGE, ON BOTH SIDES
3. Drill a 3/32" hole, 1/2" deep, in the center of the hinge
6. After the epoxy cures, apply 6 drops of thin CA to
slot. If you use a Dremel" Moto-Tool for this task, it will
result in a cleaner hole than if you use a slower speed
power or hand drill. Drilling the hole will twist some of the
wood fibers into the slot, making it difficult to insert the
hinge. Insert a standard #11 hobby knife into the slot,
working it back and forth a few times to clean out the slot.
both sides of each hinge, allowing a few seconds between
drops for the CA to wick into the slot. Note: The small
"tunnels" you created by drilling the 3/32" holes allow the
CA to freely travel in to the entire surface of the hinge,
producing an extremely secure bond.
4. Insert the hinges and install the rudder leaving a
1/32" gap between the rudder and fin. It is best to leave a
very slight gap, rather than closing it up tight, to help
prevent the CA from wicking along the hinge line. Make
sure the rudder will deflect to the recommended throws
without binding. Remove the rudder and insert a small pin
through the center of each hinge. This pin will keep the
hinge centered while installing the rudder. Insert the hinges
into the fin.
5. Apply a small amount of 6-minute epoxy in the tail
gear wire slot, in the rudder. Install the rudder on the fin
wiping off any excess epoxy with rubbing alcohol and a
paper towel. Before the epoxy cures, remove the pins in
the CA hinges and adjust the rudder so that their is a 1/32"
gap along the hinge line.
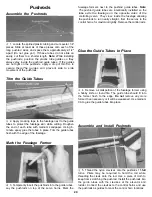
Stabilizer Support Braces
Install Stabilizer Support Braces
brace the horizontal stabilizer. Attach one end of each
brace in the remaining hole in the tail gear bracket using a
#4 x 1/2" sheet metal screw. (Also, see the photo at Step
5, Page 20).
1. Locate the two aluminum tubes that will be used to
18

