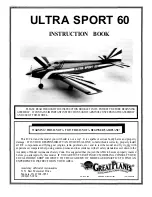
Using the 1/16" ply dihedral brace as a temporary spacer,
glue the 3/32" web to W-l and W-2.
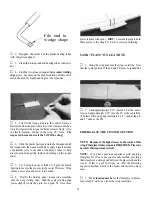
23. Prepare the 3/32" balsa leading edge sheeting by
sanding the front edge to a slight bevel so it will fit snugly
against the back of the leading edge.
3/32" Balsa
L.E. Sheeting
Bevel this
edge
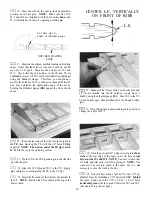
20. Glue the die-cut 1/8" ply front web to the front
21. Lightly sand the lops of the ribs to blend with the
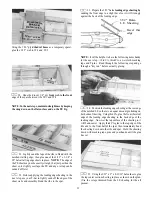
NOTE: In the next steps, maintain straightness by keeping
the wing down on the flat surface and on the TE Jig.
notched trailing edge; then glue one of the 3/32" x 1-3/4" x
30" balsa trailing edge sheets in place. NOTE: The edge of
the TE sheet may not be exactly straight, but just position the
sheet so it slightly overlaps the TE, and any overlap can be
sanded off later.
NOTE: It will be helpful to have the following items handy
for the next step... thin CA, thick CA, a wet cloth, masking
tape and T-pins. Read through the following step and go
through a "dry run" before actually gluing.
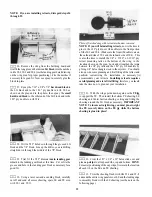
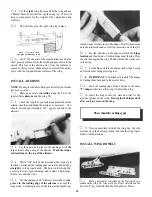
24. Position the leading edge sheeting at the rear edge
of the notched LE so there is an equal amount protruding on
both ends of the wing. Using thin CA, glue the front (beveled)
edge of the leading edge sheeting to the back edge of the
leading edge. Now wet the top surface of the sheeting so it
will bend easier. Apply thick CA glue to the top edge of the
ribs and to the front half of the spar, then immediately bend
the sheeting down onto the ribs and spar. Hold the sheeting
down with masking tape, pins and your hands until the glue
has set.
edge of the spars between ribs W-1 and W-2.
22. Before applying the leading edge sheeting in the
next step, use your T-bar to lightly sand off the edges of the
shear webs and smoothly blend the ribs to the spar.
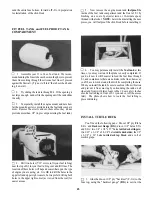
25. Using the 3/32" x 3" x 8-13/16" balsa sheets, glue
the top center section sheeting in place as shown on the plan.
(Use the scraps trimmed from the LE sheeting for the aft
pieces).
11

