❏
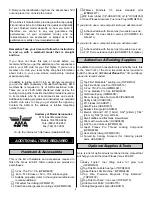
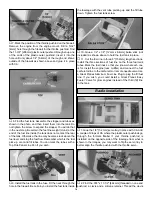
4. Find the two 1-1/4" x 1/4" [30mm x 6.4mm] hardwood
wing dowels and make a mark on the dowels 1/4" [6.4mm]
from the end of each as shown above. Sand the corners of
the ends slightly. Mix a small amount of epoxy and drop it
into the wing’s dowel holes. Also apply some epoxy on the
dowels. Insert the dowels up to the mark you just made, so
that just 1/4" [6.4mm] of each dowel protrudes. Clean up any
excess epoxy.
❏
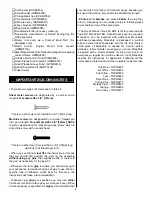
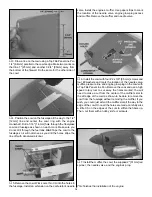
1. Inspect the blind nuts that are pressed into the wing
bolt plate in the fuselage. Apply a little epoxy around them on
the inside of the plate to prevent them from becoming loose.
Do not get epoxy in the blind nuts.
❏
2. Feel through the MonoKote at the trailing edge of the
wing for the pre-drilled wing bolt holes. Cut away the
MonoKote on the top and bottom of the wing and seal with
a sealing iron.
❏
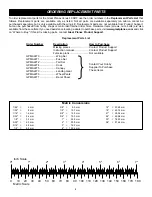
3. Test fit the wing to the fuse and bolt it in position using
two 1/4-20 x 2" [51mm] nylon bolts. If necessary, enlarge or
adjust the wing bolt holes in the wing so the wing bolts will
align with the blind nuts.
❏
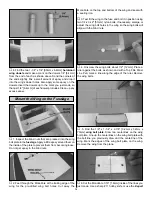
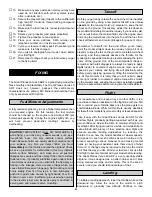
4. Unscrew the wing bolts about 1/2" [12mm]. Place a
ruler against the bolts as shown and with a Top Flite Panel
Line Pen, mark a line along the edge of the ruler. Remove
the wing bolts.
❏
5. Find the 1/8" x 1-1/4" x 2-7/8" [3.2mm x 32mm x
73mm] wing bolt plate. Draw two centerlines on the wing
bolt plate. Line up the centerlines on the wing bolt plate with
the bolt line you previously drew and the centerline of the
wing. Mark the edges of the wing bolt plate on the wing.
Remove the wing from the plane.
❏
6. Cut the MonoKote 1/16" [1.6mm] inside of the lines you
just made. Use a sharp #11 hobby knife or use the
Expert
Mount the Wing on the Fuselage
10


