❏
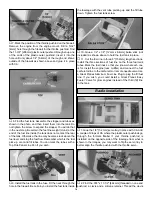
5. Fold a piece of masking tape over the end of the string
and draw an arrow on it. Slide the tape along the string and
align the arrow with one corner of the stab as shown in the
photo. Swing the string over to the same position on the
other corner of the stab. Rotate the stab and slide the tape
along the string until the arrow aligns with both sides. Be
certain the stab remains centered from side-to-side during
this process.
❏
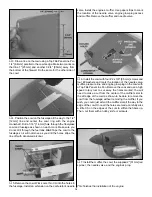
6. Use a Top Flite Panel Line Pen to mark the outline of
the fuse onto the top and bottom of the stab.
❏
7. Remove the stab from the fuse. Use a sharp #11
hobby knife or use the
Expert Tip on page 11 to cut the
covering 1/16" [1.6mm] inside of the lines you marked. Use
care to cut only into the covering and not into the wood.
❏
8. Use 30-minute epoxy to glue the stab into the fuse. For
the most strength, apply epoxy to both sides of the stab and
inside the fuse where the stab fits. Slide the stab into
position. Wipe away residual epoxy with a paper towel and
alcohol. Use the pin and string method to confirm the stab
is aligned. Stand behind the model to check the stab’s
alignment with the wing. If you cut the covering as
suggested over the slots in the fuse for the stab, carefully
use a trim iron to iron the covering to the stab before the
epoxy hardens. Do not disturb the model until the epoxy has
fully hardened.
❏
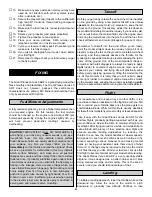
9. Fit the fin into the fuse. Mark the outline of the fuse
onto the fin with a Top Flite Panel Line Pen. Just as you did
with the stab, remove the covering 1/16" [1.6mm] away from
the line. Glue the fin into position with 30-minute epoxy
using a builder’s square to make certain the fin is vertical. If
necessary, pull the fin to one side or the other with masking
tape until the fin is perpendicular to the stab.
❏
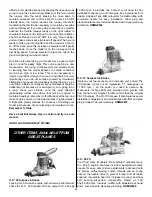
10. Insert the tail wheel wire in the tail wheel support.
Mark the tail wheel wire 1-1/4" [32mm] from the end. Bend
the wire 90 degrees as shown above. Note: Make sure the
bent wire is in line with the tail wheel.
13


