❏
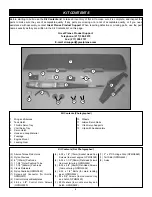
1. If you have not yet done so already, remove the parts
of the kit from the box and inspect them for damage. If any
parts are damaged or missing, contact product support at
the address or telephone number on page 6. Note: With
minor disassembly, the plane will fit back into the box. This
makes a great way to transport your plane to races.
❏
2. Remove the masking tape and separate the ailerons
from the wing and the ruddervators from the V-tail. Where
necessary, use a covering iron with a covering sock to
tighten the covering that may have loosened during storage
or from removing the masking tape. Apply pressure over
sheeted areas and the servo openings to thoroughly bond
the covering to the wood.
❏
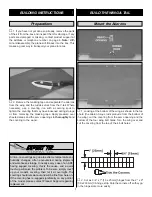
1. Looking at the bottom of the wing as shown in the top
photo (the aileron torque rods protrude from the bottom of
the wing), cut the covering from the servo opening and the
bottom of the four wing bolt holes. Turn the wing over and
cut the covering from the top of the 4 bolt holes.
❏
2. Cut six 3/4" x 1" [19 x 25mm] hinges from the 2" x 9"
[50 x 230mm] CA hinge strip. Snip the corners off so they go
in the hinge slots more easily.
Mount the Ailerons
BUILD THE WING & TAIL
All iron-on coverings sag due to extreme temperature and
humidity changes, often encountered during shipment
and warehouse storage. In nearly every case of an ARF
having sagged covering, this is the cause, and a quick
touch-up will solve the problem. To be sure, simply touch
up your model’s covering, then let it sit overnight. The
covering should remain taut and will be fine from here on.
If the covering has re-sagged significantly on any portion
of the model, please contact Product Support regarding
replacement.
Preparations
BUILDING INSTRUCTIONS
7

