13
❏
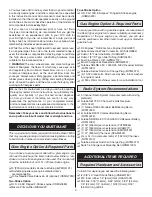
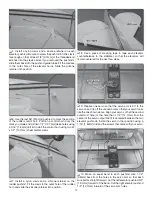
7. File a 1/4" [6.4mm] wide flat spot at a distance 3/16"
[4.8mm] from the base of the axle. File another one that is
1-9/16" [40mm] from the base of the axle.
❏
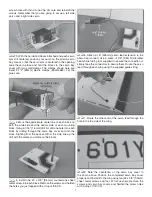
8. Install a 3-1/2" [89mm] wheel onto each axle using two
3/16" [4.8mm] wheel collars with two 6-32 x 1/4" [6.4mm]
SHCS. Apply a drop of blue thread locking compound to the
locking screw threads to prevent the screws from backing out.
❏
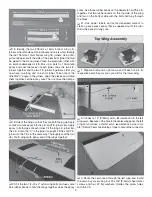
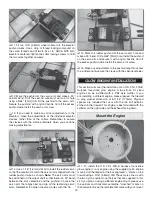
9. Using a 5/16-24 lock nut, install each axle assembly
onto the main landing gear. Make sure that the heads of the
set screws face directly down with respect to the model.
Cabane Strut Installation
❏
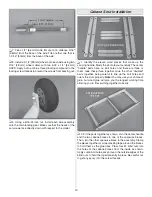
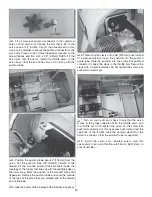
1. Identify the eleven wood pieces that make up the
carrying handle. Study the photo layout carefully. The center
“handle” parts have no bolt holes and there are three of
them. Glue these three together. Glue the other “doubled”
parts together, being careful to line up the bolt holes and
orient the slots properly.
Note:
You may use your choice of
glue, but wood glue will give you the longest working time
allowing you to fit everything together correctly.
❏
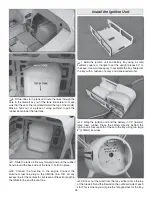
2. Fit the parts together as shown. Join the center handle
and the two cabane braces to one of the spanwise braces.
Then, join the other spanwise brace to the assembly. Clamp
the pieces together or wrap masking tape around the braces
to hold them as the glue dries. Press four #4 blind nuts into
the holes of the cabane braces from the inside as shown.
Apply some 5-minute epoxy around the outside edges of the
blind nuts to hold them permanently in place. Be careful not
to get any epoxy into the screw threads.
Summary of Contents for Waco YMF-5
Page 40: ......


