9
❏
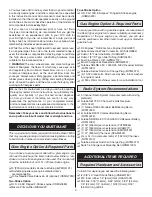
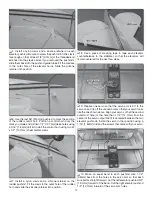
18. Identify the two 208mm x 15mm bottom wing L.E.
joiners. One is made out of aluminum and one is wood. Identify
the two 105mm x 12mm bottom wing T.E. joiners. Using 180-
grit sandpaper, scuff the side of the aluminum joiner that will
be glued to the wood joiner. Clean the aluminum joiner with
an alcohol-dampened cloth. Mix up a batch of 30-minute
epoxy and coat the faces of each joiner. Glue the two L.E.
joiners together and the two T.E. joiners together so that you
now have one long and one short joiner. Take note of the
dihedral “V” angle in the joiners. Align the pieces and clamp
them together. Let the epoxy cure. Then, remove the clamps.
❏
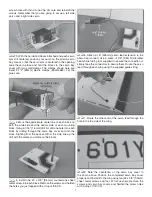
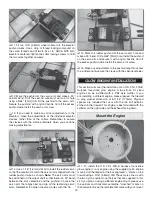
18. Orient the wings so that they are both facing up. Apply
some 30-minute epoxy into the L.E. and T.E. joiner slots. Apply
epoxy to both sides of each joiner. Fit the long L.E. joiner into
the L.E. slot so the “V” in the joiner is upright. Fit the short T.E.
joiner into the T.E. slot the same way. Thoroughly coat the root
rib of both wings with epoxy and fit the wings together.
❏
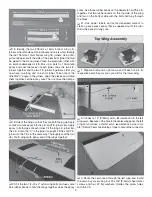
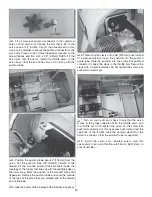
20. Fit the two 1/4-20 x 2" nylon wing bolts and use some
#64 rubber bands to hold the wings together while the epoxy
cures. Use three rubber bands on the dowels to hold the L.E.
together. Put two rubber bands on the top side of the wing
and two on the bottom side with the bolts half way through
the holes.
❏
21. Use paper towels and some denatured alcohol to
clean up any excess epoxy that is squeezed out of the joint.
Allow the epoxy to fully cure.
Top Wing Assembly
❏
1. Prepare a left and a right servo and fit each one to its
respective servo bay cover as you did for the lower wing.
❏
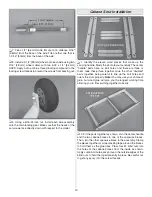
2. Connect a 12" [300mm] servo lead extension to the left
wing servo. Because of the hole in the center wing panel, the left
wing servo will use a shorter servo lead extension. Use some
3/8" [9.5mm] heat shrink tubing or tape to secure the connector.
❏
3. Route the servo lead through the left wing and install
the servo bay cover using four #2 x 3/8" [9.5mm] sheet metal
screws and four #2 flat washers. Harden the screw holes
with thin CA.
Summary of Contents for Waco YMF-5
Page 40: ......


