INTRODUCTION ..........................................................................2
SAFETY PRECAUTIONS.............................................................2
ADDITIONAL ITEMS REQUIRED................................................3
Flight Equipment....................................................................3
Building Supplies ...................................................................3
IMPORTANT BUILDING NOTES .................................................3
KIT CONTENTS ...........................................................................4
ORDERING REPLACEMENT PARTS .........................................5
BUILDING INSTRUCTIONS.........................................................6
Install the Bottom Wing..........................................................6
Install the Top Wing ...............................................................7
Install the Servos ...................................................................8
Install the Canards ..............................................................10
Install the Rudders ..............................................................11
Final Assembly ....................................................................11
GET THE MODEL READY TO FLY ............................................11
Check the Control Directions...............................................11
Set the Control Throws........................................................12
Balance the Model (C.G.) ....................................................12
PREFLIGHT ...............................................................................13
Identify Your Model ..............................................................13
Charge the Transmitter Batteries.........................................13
Ground Inspection ...............................................................13
Range Check .......................................................................13
Performance Tips.................................................................13
Motor Safety Precautions ....................................................14
AMA SAFETY CODE (excerpt).................................................14
FIND A SAFE PLACE TO FLY ...................................................14
FLYING .......................................................................................15
Takeoff .................................................................................15
Flight ....................................................................................15
Landing ................................................................................15
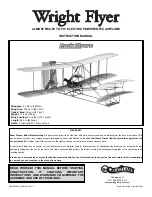
Thank you for purchasing the Great Planes Wright Flyer
ARF. The Wright Flyer ARF is a lightweight, fun scale model
of the historic Wright Flyer, the first successful powered
aircraft.
While the original Wright Flyer first flew in 1903, it was not
until 1905 that the Wright brothers developed an improved
version of the aircraft. This improved aircraft solved many of
the problems found on the 1903 Flyer. This model is based
on the 1905 Wright Flyer.
The Wright Flyer ARF is a slow flying model that is ideal for
park flying. It is stable and easily maneuvered. The original
Wright Flyer was not aerobatic and this model isn’t either.
For the latest technical updates or manual corrections to the
Wright Flyer visit the Great Planes web site at
www.greatplanes.com. Open the “Airplanes” link, then
select the Wright Flyer ARF. If there is new technical
information or changes to this model a “tech notice” box will
appear in the upper left corner of the page.
Attention: The product you have purchased is powered by
a rechargeable battery. At the end of its useful life, under
various state and local laws, it may be illegal to dispose of
this battery into the municipal waste system. Check with
your local waste officials for details in your area for recycling
options or proper disposal.
This product contains a chemical known to the State of
California to cause cancer and birth defects or other
reproductive harm.
1. Although the Great Planes Wright Flyer is a light weight
electric powered model, just the same as any R/C plane, it
should still be flown with care. The Wright Flyer should not
be considered a toy, but rather a sophisticated, working
model that functions very much like a full-size airplane. If
not assembled and operated correctly, the Wright Flyer
could possibly cause injury to yourself or spectators and
damage property.
2. You must assemble the Wright Flyer according to the
instructions. Do not alter or modify the model, as doing so
may result in an unsafe or unflyable model. In a few cases
the instructions may differ slightly from the photos. In those
instances the written instructions should be considered as
correct.
3. You must take the time to build straight, true and strong.
4. You must use an R/C radio system that is in first-class
condition.
5. You must correctly install all R/C and other components
so that the model operates correctly on the ground and in
the air.
6. You must check the operation of the model before every
flight to insure that all equipment is operating and that the
model has remained structurally sound. Be sure to check
clevises or other connectors often and replace them if they
show any signs of wear or fatigue.
7. If you are not already an experienced R/C pilot, you
should fly the model only with the help of a competent,
experienced R/C pilot.
PROTECT YOUR MODEL, YOURSELF
& OTHERS...FOLLOW THESE
IMPORTANT SAFETY PRECAUTIONS
INTRODUCTION
TABLE OF CONTENTS
2


