


11
ABOUT MAINTENANCE AND CARE
Hazardous suction. Stop pump before
attempting to clean pool cleaner.
• Keep skimmer basket and pump strainer basket clean
and free of debris.
• If cleaner jams with large debris (leaves, sticks, etc.),
try cleaning debris first from bottom of unit. If this
doesn’t clear unit, remove top swivel assembly (turn
1/4 turn) and clear the debris from the top.
• Remove the pool cleaner from the pool before super
chlorinating (shocking) or chemical balancing. Wait at
least four hours after the chemical procedure before
reinstalling the cleaner.
• Make sure that the cleaner’s brush bristles don’t
become deformed during storage. Store the unit so
that it doesn’t sit on the bristles and so that nothing
compresses them.
• If possible, do not coil the hose. Remove the hose from
the cleaner when removing the cleaner from the pool.
Store the hose flat and straight.
• Periodically examine bristles and vacuum skirt for
wear or distortion. Replace if necessary. See
"Assembly", Page 9.
• If necessary to remove oscillator, see "Disassembly",
Page 8.
• Don’t store the cleaner with the hose connected to the
cleaner body or with the hose coiled. To do so will
cause the hose to take a set or kink over a period of
time. When reinstalled in the pool, the hose will tend
to stay coiled and will cause the cleaner to malfunc-
tion.
• If the hose has taken a set, uncoil it as far as possible
without damaging it and lay it out in the sun for sev-
eral hours to straighten itself. Once it has relaxed and
straightened out, store it laid out flat and straight (no
coiling) if possible. If no storage area is available that
will allow this, coil the hose as loosely as possible and
expect to have to let it straighten for a while before
using the cleaner again.
• Make sure the lift brush is retracted during storage or
else that the cleaner is supported such that the lift
brush is not taking any of the cleaner’s weight. If the
lift brush is down during storage and the cleaner rests
on it, the brush bristles will collapse over time and the
cleaner will no longer turn during operation as it was
designed to do.
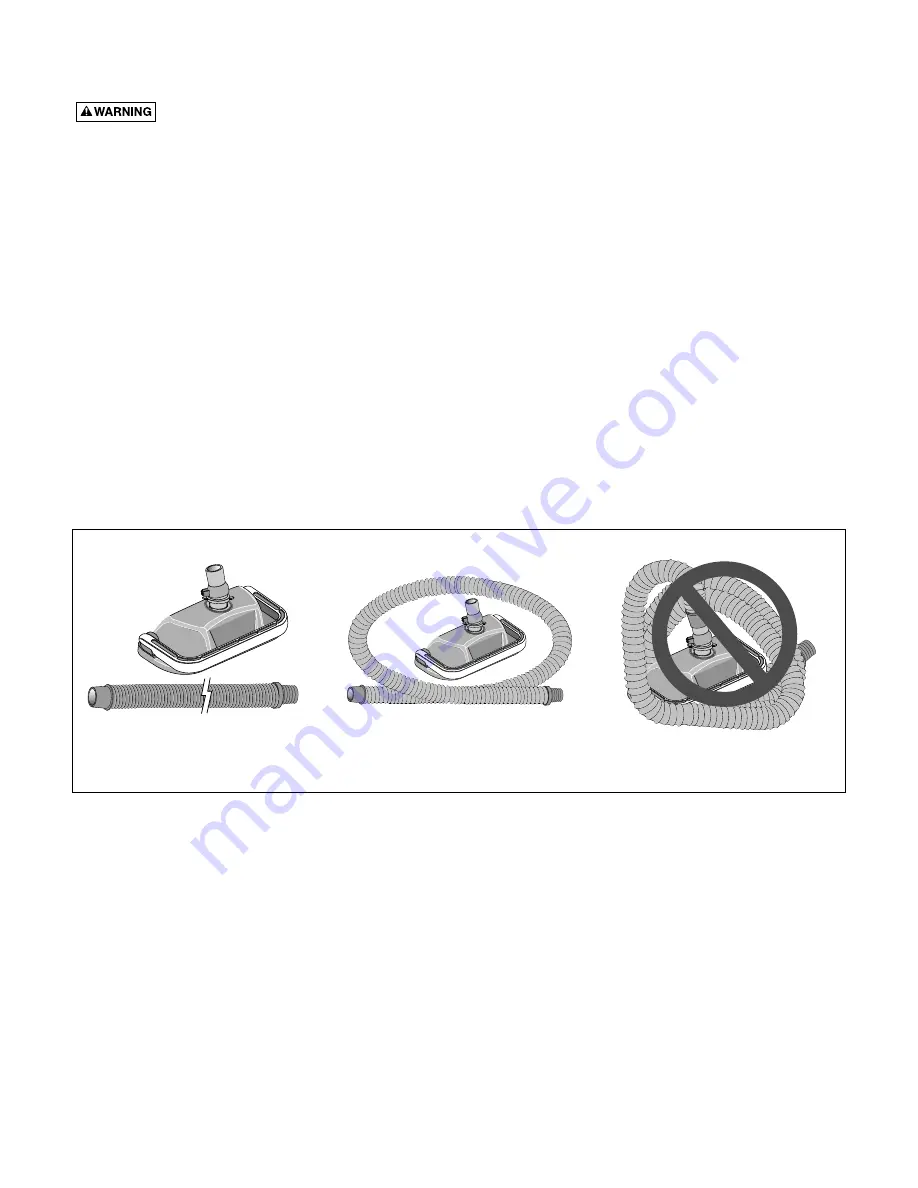
HOSE STORAGE
OK, Not Recommended:
Hose is
disconnected from cleaner and
loosely coiled (no sharp bends).
Wrong:
Storing cleaner with hose
connected will damage hose and
void the hose warranty.
Best:
Hose stored correctly – laid
out straight, not connected to
cleaner.


