background image


www.GreenSeriesFitness.com


©April 2017 


Call Toll free at (800) 269-7130


CIR-RB7000-G1      Revision 1.2 

40 


PREVENTATIVE MAINTENANCE 


HOW TO CARE FOR 

YOUR RECUMBENT BIKE 


The Safety of the equipment can be maintained only if the equipment is examined regularly for damage 
or wear.    If maintenance is required, keep the equipment out of use until defective parts are repaired 
or replaced. 
Pay special attention to parts that are subject to wear as outlined in the 

Preventative Maintenance 

Schedule. 


The following preventive maintenance will keep the recumbent bike operating at peak performance


Locate the exercise elliptical in a cool, dry place. 


Clean the top surface of the pedals regularly. 


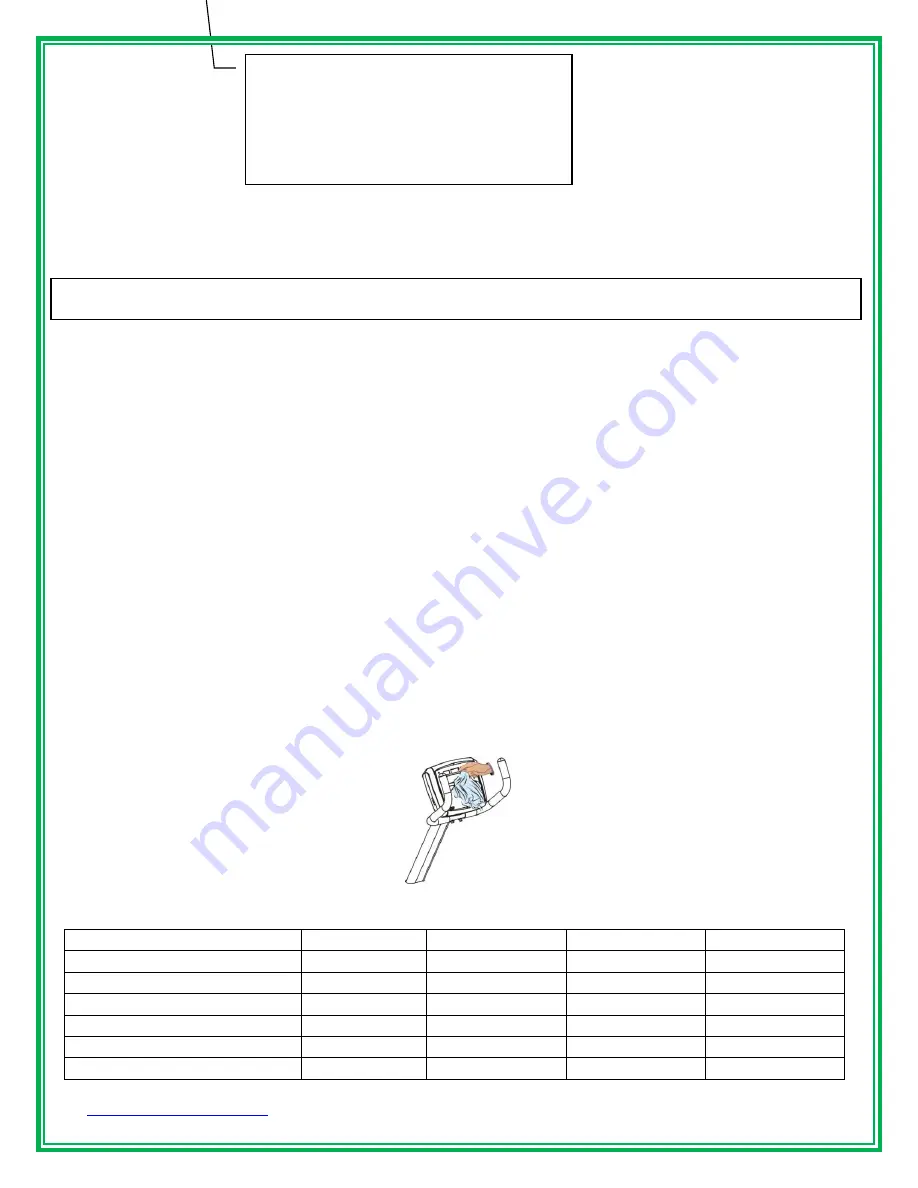
Keep the display console free of fingerprints and salt build-up caused by sweat. 


Use a 100% cotton cloth, lightly moistened with water and mild liquid cleaning product, to 
clean the exercise elliptical other fabrics, including paper towels, may scratch the surface.   
Do not finger to press the selection buttons on the console. 


Clean the housing thoroughly on a regular basis. 

 
The recumbent bike can be wiped clean with a soft cloth and mild detergent.   

Do not use abrasives 

or solvents

.    To prevent damage to the console, keep liquids away from the console and keep the 

console out of direct sunlight. 


Preventative Maintenance Schedule 

Follow the schedule below to ensure proper operation of the product. 

ITEM 

WEEKLY 

MONTHLY 

BI-ANNUALLY 

ANNUALLY 

Display Console 


Console Mounting Bolts 


Accessory Tray 


Frame 


Plastic Covers 


Pedals and Straps 


USB port on the console mainly acts 
as a smartphone charger, and it will 
not upload any file/data from your 
smartphone to the treadmill console. 
Charging spec : 5V/0.5A 

Summary of Contents for CIR-RB7000-G1

Page 1: ...2017 Call Toll free at 800 269 7130 CIR RB7000 G1 Revision 1 2 Owner s Manual CIR RB7000 G1 Full Commercial Recumbent Bike Install Date _________________________ Serial Number ________________________...

Page 2: ...on grounding instructions how often you exercise how hard you exercise how long you exercise beginner treadmill program target heart rate zone TECHNICAL SPECIFICATIONS 4 UNPACKING ASSEMBLY 5 22 Parts...

Page 3: ...programs to advise you of a workout routine you should adopt Always use this upright bike on a clear and level surface Do not use outdoors or near water Don t insert any object into any openings Befor...

Page 4: ...exercise You should exercise three to four times a week to improve your cardiovascular and muscle fitness UHow hard you exercise Intensity of exercise is reflected in your heart rate Exercise must be...

Page 5: ...he serial number contains of ten values The location of the serial number shows as the figure SPECIFICATIONS Length 62 157 cm Width 24 61cm Height 52 132 cm Weight of product 185lbs 84kgs Program 9 pr...

Page 6: ...00 269 7130 CIR RB7000 G1 Revision 1 2 5 UNPACKING ASSEMBLY Parts Main frame Main frame X 1pc Rear stabilizer X 1pc Front stabilizer X 1pc Upper handlebar X 1pc Console set X 1pc Handle bar post X 1pc...

Page 7: ...Revision 1 2 6 UNPACKING ASSEMBLY Parts seat set Adjustment seat back X 1pc Seat back cushion X 1pc Seat X 1pc Seat frame cover X 1pc Backrest rear cover X 1pc Left Right track cover X 1pc Lower handl...

Page 8: ...1 2 7 UNPACKING ASSEMBLY Hardware kit X 4 M6 45mm M6 S washer M8 65mm X 3 M8 S washer X 2 M8 curve X1 M8 15mm X 2 X 2 M4 12mm X 4 X 2 4 35 4 18 4 17 4 22 4 13 4 14 4 15 4 44 Step15 Step14 Step13 Step...

Page 9: ...B7000 G1 Revision 1 2 8 UNPACKING ASSEMBLY Hardware kit X 1 Adjust Lever 1 10 X1 Non slip sticker 1 34 X 1 Recline Lever 4 28 M15 M15 Allen wrench 8mm Allen wrench 6mm Allen wrench 5mm Allen wrench 4m...

Page 10: ...face It is recommended that you place a protective covering on your floor Notice Because of heavy weight please assemble this recumbent bike more than two people 1 Step1 Assemble Front Rear Stabilizer...

Page 11: ...800 269 7130 CIR RB7000 G1 Revision 1 2 10 UNPACKING ASSEMBLY Step2 Assembly pedal set on crank 1 Use wrench 15mm to clockwise fix right pedal set to crank set 2 Use wrench 15mm to counterclockwise fi...

Page 12: ...at 800 269 7130 CIR RB7000 G1 Revision 1 2 11 UNPACKING ASSEMBLY Step3 Assemble main frame and handle bar post 1 Please take off pre lock screws on the mast cover 2 Please take off pre lock screws on...

Page 13: ...800 269 7130 CIR RB7000 G1 Revision 1 2 12 UNPACKING ASSEMBLY Step4 Assemble main frame and handle bar post 1 Take front cover joint into handle bar post 2 Take the console wire heart rate wire AIR wi...

Page 14: ...e mast into main frame and use Allen wrench 6mm to lock on 1pcs M8 70mm screw 1pcs M8 20mm screw and 2pcs M8 washer 2pcs M8 flat washer 2 Use Allen wrench 5mm to lock 4pcs M8 20mm screw and 4pcs M8 fl...

Page 15: ...017 Call Toll free at 800 269 7130 CIR RB7000 G1 Revision 1 2 14 UNPACKING ASSEMBLY Step6 Assemble main frame and handle bar post 1 Use Allen wrench 5mm to lock 2pcs M4 15mm screw on the cover of mast...

Page 16: ...st 1 Please take off pre lock console screws on the mast 2 Put the console into the mast and connect upper and lower wires such as console wires hand pulse wires 3 Use Allen wrench 6mm to lock 4pcs M5...

Page 17: ...sembly Upper handlebar with console mast 1 Put the handlebar to the mast use Allen wrench 5mm to lock on 2pcs M8 65mm screw 2pcs M8 S washer 2pcs M8 Arc washer 1pcs M8 15mm screw 1pcs M8 S washer for...

Page 18: ...9 Assemble backrest frame and main frame 1 Please take off pre lock screws of the backrest on the main frame 2 Put the backrest to the main frame use Allen wrench 8mm to lock on 6pcs M10x25mm screw 6p...

Page 19: ...ff pre lock screws of the lower handlebar on the backrest 2 Put the lower handlebar to the backrest use Allen wrench 6mm to lock on 4pcs M8x15mm screw 4pcs M8 S washer for fixing the lower handlebar t...

Page 20: ...vision 1 2 19 UNPACKING ASSEMBLY Step11 Assemble seat bottom and backrest 1 Put the seat bottom to the backrest use Allen wrench 6mm to lock on 4pcs M6x45mm screw 4pcs M6 S washer for fixing the seat...

Page 21: ...on 1 2 20 UNPACKING ASSEMBLY Step12 Recline Adjustable Lever and Seatback assembly 1 Use Allen wrench 4mm and wrench 10mm to lock on 2pcs M6 nut 2pcs M6 S washer for fixing the Adjustable Lever to the...

Page 22: ...Revision 1 2 21 UNPACKING ASSEMBLY Step13 Seat frame cover and lower handlebar assembly 1 Assemble the seat frame cover to the lower handlebar use Allen wrench 5mm to lock on 2pcs M4x12mm screw first...

Page 23: ...KING ASSEMBLY Step14 Assemble seatback cushion and backrest frame 1 Put the seatback cushion to the backrest frame use Allen wrench 4mm to lock on 4pcs M6x45mm screw and 4pcs M6 S washer for fixing th...

Page 24: ...1 Put the left bottle holder into the lower handlebar use Allen wrench 5mm to lock on 2pcs M4x12mm screw for fixing the left bottle holder to the lower handlebar 2 Put the right bottle holder into th...

Page 25: ...00 269 7130 CIR RB7000 G1 Revision 1 2 24 UNPACKING ASSEMBLY Step16 Assemble backrest rear cover with seat set 1 Use Allen wrench 5mm to lock on 2pcs M4x10mm screw for fixing the backrest rear cover t...

Page 26: ...BLY Step17 Assemble left right track cover on the seat set 1 Use Allen wrench 5mm to lock on 2pcs M4x10mm screw for fixing the left track cover to the seat set 2 Use Allen wrench 5mm to lock on 2pcs M...

Page 27: ...00 269 7130 CIR RB7000 G1 Revision 1 2 26 UNPACKING ASSEMBLY Step18 Assemble seat adjust lever and seat set 1 Use Allen wrench 3mm to lock on 2pcs M4x18mm screw for fixing the adjust lever to the seat...

Page 28: ...pril 2017 Call Toll free at 800 269 7130 CIR RB7000 G1 Revision 1 2 27 UNPACKING ASSEMBLY Step19 Assemble adjust pad and main frame 1 Left up the main frame 2 Fasten the adjust pad under the main fram...

Page 29: ...GreenSeriesFitness com April 2017 Call Toll free at 800 269 7130 CIR RB7000 G1 Revision 1 2 28 UNPACKING ASSEMBLY Step20 Paste the non slip sticker to the appropriate position non slip sticker 1 34 X...

Page 30: ...il they are over your head Reach your right arm as far upward toward the ceiling as you can for one count Feel the stretch up your right side Repeat this action with your left arm INNER THIGH STRETCH...

Page 31: ...www GreenSeriesFitness com April 2017 Call Toll free at 800 269 7130 CIR RB7000 G1 Revision 1 2 30 PANEL CONTROL Display Keys Message window display program profiles message...

Page 32: ...ies burned Mets Displays the multiple of rest Key function Key Function Adjusts the resistance level while in use Adjusts program types and program values Watts RPM Switch display Watts RPM Calories M...

Page 33: ...ped 2 Preset Programs 2 1 Press program key to select a preset program there are 7 preset program keys ROLLING VALLEY FAT BURN RAMP STRENGTH INTERVAL RANDOM 2 1 1 Message window show SET BODYWEIGHT TH...

Page 34: ...3 5 5 5 6 7 7 8 8 9 9 10 LEVEL 2 1 1 5 5 5 7 7 7 8 9 9 10 10 11 11 12 LEVEL 3 1 2 5 6 6 7 8 8 9 10 10 11 12 12 13 13 LEVEL 4 2 3 6 6 7 8 9 9 10 10 10 11 12 12 13 14 LEVEL 5 3 4 7 7 8 8 9 9 10 10 11 12...

Page 35: ...9 9 8 7 7 7 5 5 5 1 1 LEVEL 3 13 12 12 11 10 10 9 8 8 7 6 6 5 5 3 1 LEVEL 4 13 12 13 11 10 10 10 9 9 8 7 6 6 5 4 2 LEVEL 5 15 14 13 12 12 11 10 10 9 9 8 8 7 7 4 3 P4 LEVEL 1 6 7 7 7 8 8 8 8 6 5 4 4 3...

Page 36: ...HEN PRESS ENTER set age then press ENTER to next setting 3 2 2 2 Message window show SET BODYWEIGHT THEN PRESS ENTER set body weight then press ENTER to next setting 3 2 2 3 Set time Message window sh...

Page 37: ...st stage 0 3 minute the WATT preset value is 50W second begin watt depends on average heart rate of 2 3 minute of first stage show as below 4 4 2 The program will end when heart rate reaches MHR 85 10...

Page 38: ...tments An optimal seating position is crucial for comfortable cycling Height of seat As a general rule you should be able to reach the pedal with your heel when straightening your leg and aligning it...

Page 39: ...the adjustment knobs on the ends of the rear foot caps to level the rear stabilizer to the floor B Adjust seat set Pull up the adjust lever to slide forward or backward and adjust seat position accord...

Page 40: ...www GreenSeriesFitness com April 2017 Call Toll free at 800 269 7130 CIR RB7000 G1 Revision 1 2 39 OPERATION E Headphone jack and USB Port...

Page 41: ...sed by sweat Use a 100 cotton cloth lightly moistened with water and mild liquid cleaning product to clean the exercise elliptical other fabrics including paper towels may scratch the surface Do not f...

Page 42: ...17 H020802 008 Bolt M5 10mm 3 1 19 F300472 100 Seat post protecting cover K90 2 2 18 H021608 000 Washer M10 4 1 20 F270220 000 Housing cover fixer 4 2 19 H022303 003 Nylon nut M10 8 1 21 F300469 100 L...

Page 43: ...20207 002 Bolt M4 15mm 2 4 12 F500446 001 Upper handlebar 1 4 13 H020602 017 Bolt M8 65mm 2 4 14 H020603 000 Bolt M8 15mm 5 4 15 H021603 002 Curve washer M8 2 4 16 F340028 000 Seat 1 4 17 H020689 001...

Page 44: ...0968 000 Recline Adjustment 1 4 33 7 H020610 004 Bolt M6 8mm 2 4 33 8 H021209 000 S washer M8 4 4 33 9 H020603 004 Bolt M8 15mm 4 4 33 10 F300479 000 Stud 2 4 34 F290119 000 Recline Lever 1 4 35 H0221...

Page 45: ...www GreenSeriesFitness com April 2017 Call Toll free at 800 269 7130 CIR RB7000 G1 Revision 1 2 44 EXPLODED DRAWING CONSOLE SET...

Page 46: ...www GreenSeriesFitness com April 2017 Call Toll free at 800 269 7130 CIR RB7000 G1 Revision 1 2 45 EXPLODED DRAWING CONSOLE MAST SET...

Page 47: ...www GreenSeriesFitness com April 2017 Call Toll free at 800 269 7130 CIR RB7000 G1 Revision 1 2 46...

Page 48: ...d warranty extends only to the original purchaser and is non transferable Shipping fees incurred from returns for under warranty service in the warranty time line will be paid by GREEN SERIES All ship...

Page 49: ...int scratches and labels 7 Travel costs associated with service more than 100 miles or two hours outside the service area of GREEN SERIES service technicians shall be the responsibility of the custome...

Page 50: ...EEN SERIES will pay for shipping to and from the customer only within the time allocated under the warranty time line following the original product installation date Following this period all shippin...

Reviews: