D .
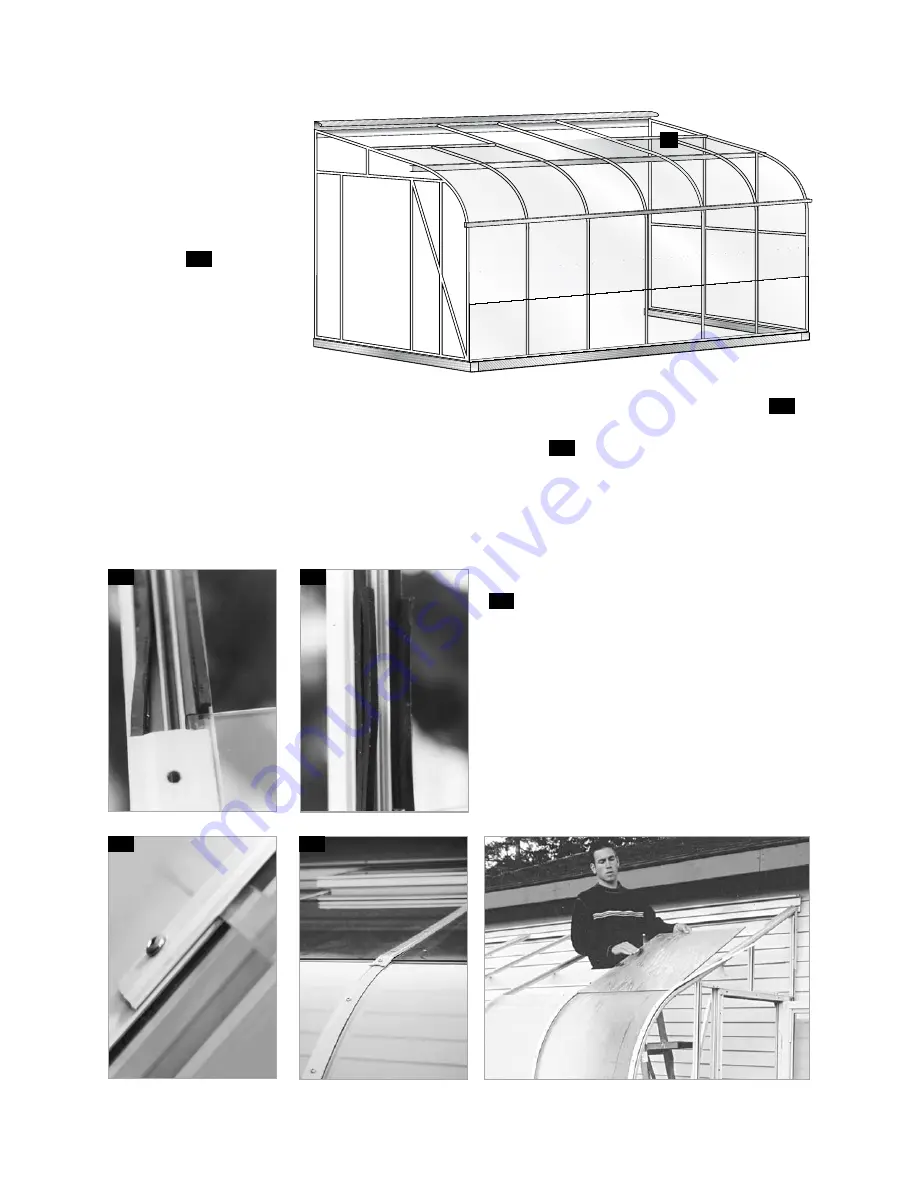
The next row of
glass
(see the sketch
for size)
overlaps
the curved glass by
1/2” . Therefore, the
curved cap is 1/2”
shorter than the
glass
7
.
Cut a 6” piece of
foam strip and
lay it on top of
the existing foam,
starting with one
end against the
edge of the curved glass . This will eliminate any air drafts due to the overlap of the glass
8
.
Lay the next glass against the curved aluminum cap (giving you a 1/2” overlap) . The
aluminum cap for this row has a slight bend in one end
10
. This bend makes it easier to
fasten it to the curved shape of the previous cap . Again, the bottom hole of the aluminum
cap should line up with the top hole of the curved cap . The size of the glass is on your glazing
sketch . When you do this row of glass, the glass below the vents may be a different size .
NOTE:
every row of glass in the roof is done the same way . The glass always butts against the
aluminum cap and the aluminum cap top
hole lines up with the next cap’s bottom hole
9
.
p r i d e o f t h e p a c i f i c S e r i e S c U r V e d G L a S S L e a N t o M o d e L • G r e e N h o U S e i N S t r U c t i o N S
D
10
9
8
7
– 25 –


