High Capacity Ratchet Knockout Drivers
Greenlee Textron / Subsidiary of Textron Inc.
6
4455 Boeing Dr. • Rockford, IL 61109-2988 USA • 815/397-7070
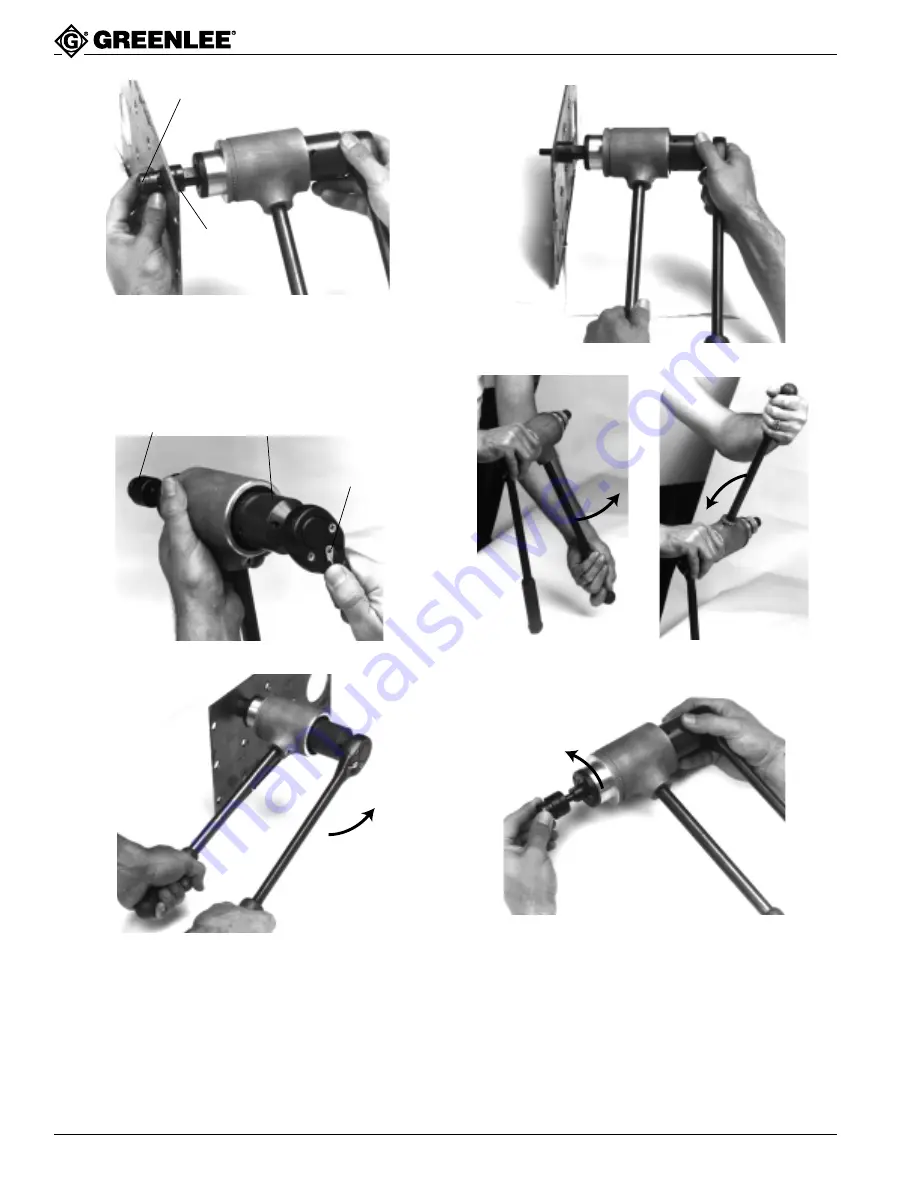
Draw Stud Threads
Punch
7.
Thread the punch onto the stud so that the cutting
surfaces of the punch are toward the material.
Note: This end of the stud and the punch have right-
hand threads.
Note: Do not unthread the stud.
Input Hub
Ratchet Lever
8.
Push the ratchet direction lever to the left.
10. Remove the driver assembly from the punched hole.
Line up using
crosshairs on die
Punch
Direction
9.
Turn the ratcheting handle counterclockwise.
Continue to ratchet until the punch is completely
through the material.
Do not drive the ratchet after spindle motion stops.
Driving the ratchet after the spindle motion stops can
damage the punch driver. If the spindle is at the end
of its stroke and the punch is not completely through,
unthread the punch and check the setup. The
spindle must be in the starting position and the stud
must be threaded completely into the spindle.
11. For rapid return, hold the assembly as shown.
Rotate the handle as shown until the spindle is fully
extended.
12. Remove the punch, die, and draw stud.


