58
Connected Lighting
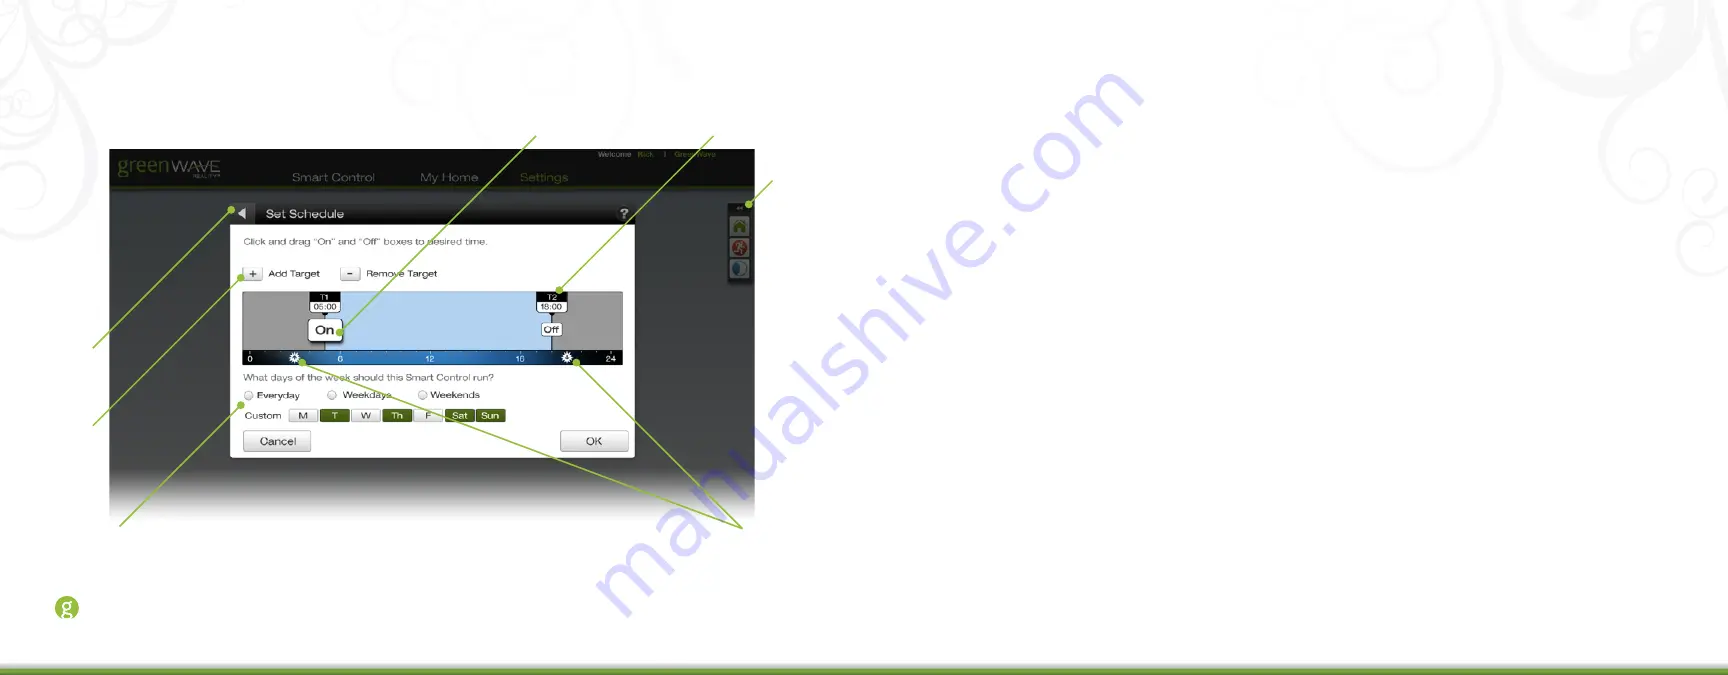
Schedule Setting in Smart Controls
When creating or editing a schedule or lighting scene Smart Control, the schedule page allows you to specify
the days and times to activate and deactivate the Smart Control:
1. Back:
Click to return to the previous page.
2. Target options:
Click the + button to add a
new target (a time at which lights are turned on
or off) to the schedule. You can have multiple
targets. Click the - button to remove a selected
target from the schedule.
3. Day selection:
Select the days of the week
you want the Smart Control to run. You can
select every day of the week, only weekdays,
or only weekends. Or you can create a custom
schedule by selecting specific days of the
week.
4. Smart Control toolbar:
Click an icon to quickly
activate that Smart Control.
5. Target schedule slider:
Drag the target slider
to the time you want the Smart Control to
activate or deactivate.
6. Activation:
Click the box to specify whether
you want the Smart Control to activate (On) or
deactivate (Off) at the scheduled time.
7. Sunrise and sunset:
Use these icons to set the
scheduled time to sunrise or sunset. The time
adjusts automatically throughout the year as
sunrise and sunset changes. Drag the target
schedule slider close to the icon, and then click
the icon to snap the slider into place.
1
2
3
4
5
6
7
Summary of Contents for GL30000
Page 1: ...Connected Lighting...


