background image

15

OPERATION


W A R N I N G

W A R N I N G

W A R N I N G

Do not allow familiarity with this product to make you careless. Remember that a careless

fraction of a second is sufficient to inflict serious injury.

Always wear eye protection with side shields marked to comply with ANSI Z87.1, along with 

hearing protection. Failure to do so could result in objects being thrown into your eyes and other 

possible serious injuries.

Do not use any attachments or accessories not recommended by the manufacturer of this

product. The use of attachments or accessories not recommended can result in serious

personal injury. Before each use, inspect the entire product for damaged, missing, or loose parts,

such as screws, nuts, bolts, caps,etc. Tighten securely all fasteners and caps and do not operate 

this product until all missing or damaged parts are replaced.

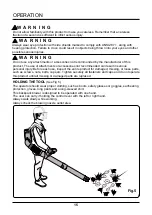
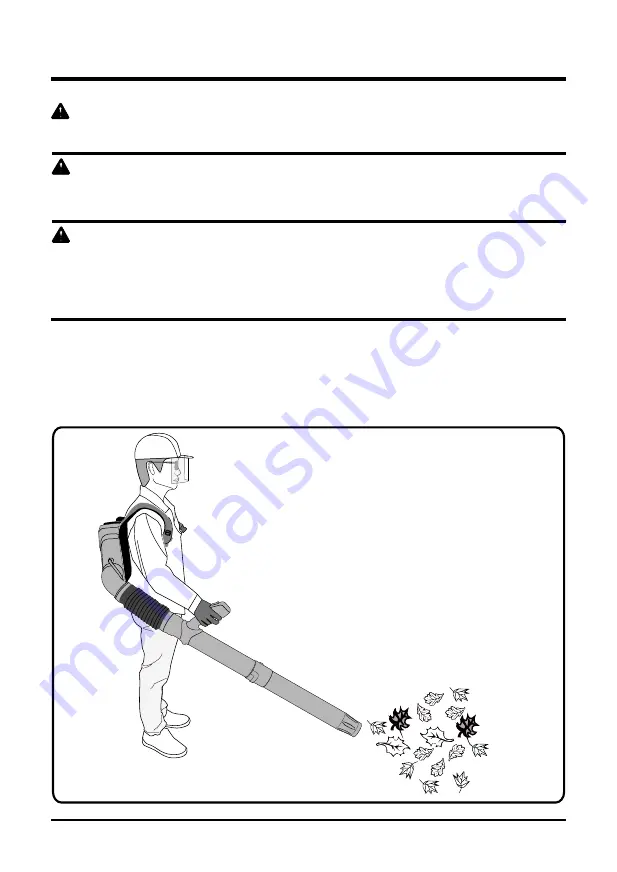
HOLDING THE TOOL 

(See Fig 5.)

The operator should wear proper clothing, such as boots, safety glasses or goggles, ear/hearing

protection, gloves, long pants and a long-sleeved shirt.

This backpack blower is designed to be operated with one hand. 

The user can carry it holding the control lever with the left or right hand.

Always walk slowly while working.

Always check the blowing nozzle outlet area.

Fig.5

Summary of Contents for BPB60L00

Page 1: ...60V BACKPACK BLOWER BPB60L00 Read all safety rules and instructions carefully before operating this tool Owner s Manual TOLL FREE HELPLINE 1 855 345 3934 www GreenWorksTools com ...

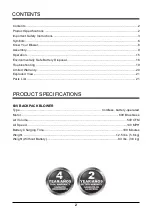
Page 2: ...nvironmentally Safe Battery Disposal 18 Troubleshooting 19 Limited Warranty 20 Exploded View 21 Parts List 21 PRODUCT SPECIFICATIONS 60V BACKPACK BLOWER Type Cordless battery operated Motor 60V Brushless Air Volume 540 CFM Air Speed 140 MPH Battery Charging Time 180 Minutes Weight 12 5 lbs 5 6 kg Weight Without Battery 8 3 lbs 3 8 kg ...

Page 3: ...ipment Never allow adults to operate the equipment without proper instruction Always wear safety glasses with side shields that comply with ANSI Z87 1 Everyday glasses only have impact resistant lenses They are NOT safety glasses Following this rule will reduce the risk of eye injury If working in a dusty area use a dusk mask Wear heavy long pants boots and gloves Avoid loose garments or jewellery...

Page 4: ...ergizing power tool that have the switch on invites accidents Disconnect the battery pack from the power tool before making any adjustments changing accessories or storing the power tool Such preventive safety measures reduce the risk of starting the power tool accidentally Battery tools do not have to be plugged into an electrical outlet therefore they are always in operating condition Be aware o...

Page 5: ...es in contact with your skin wash immediately with soap and water then neutralize with lemon juice or vinegar If liquid gets into your eyes flush them with clean water for at least 10 minutes then seek immediate medical attention Following this rule will reduce the risk of serious personal injury Do not use a battery pack or appliance that is damaged or modified Damaged or modified batteries may e...

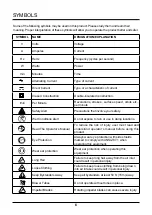
Page 6: ...using this product Eye Protection Always wear eye protection with side shields marked to comply with ANSI Z87 1 when operating this equipment Wear ear protection Wear ear protection when operating this equipment Long Hair Failure to keep long hair away from the air inlet could result in personal injury Loose Clothing Failure to keep loose clothing from being drawn into air intake could result in p...

Page 7: ...our eyes which can result in severe eye damage Before beginning power tool operation always wear safety goggles or safety glasses with side shields and when needed a full face shield We recommend Wide Vision Safety Mask for use over eyeglasses or standard safety glasses with side shields Always use eye protection which is marked to comply with ANSI Z87 1 The following signal words and meanings are...

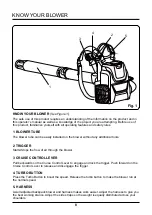
Page 8: ...additional tools 2 TRIGGER Starts Stops the flow of air through the blower 3 CRUISE CONTROL LEVER Pull backwards on the Cruise Control Lever to engage and lock the trigger Push forward on the Cruise Control Lever to release and disengage the trigger 4 TURBO BUTTON Press the Turbo Button to boost the speed Release the turbo button to make the blower run at the normal speed 5 HARNESS A well adjusted...

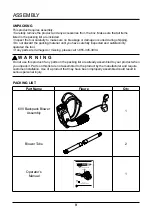
Page 9: ... 1 855 345 3934 W A R N I N G Do not use this product if any parts on the packing list are already assembled to your product when you unpack it Parts on this list are not assembled to the product by the manufacturer and require customer installation Use of a product that may have been improperly assembled could result in serious personal injury PACKING LIST Part Name Figure Qty 60V Backpack Blower...

Page 10: ...ersonal injury W A R N I N G Do not attempt to modify this product or create accessories not recommended for use with this product Any such alteration or modification is misuse and could result in a hazardous condition leading to possible serious personal injury W A R N I N G Do not connect to power supply until assembly is complete Failure to comply could result in accidental starting and possibl...

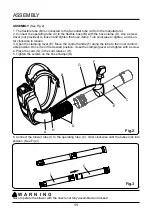
Page 11: ... loosen and tighten the hose clamp Turn clockwise to tighten and coun ter clockwise to loosen 3 Open the clamping lever E Move the control handle F along the tube to the most comfort able position Once it is in the desired position close the clamping lever and tighten with a screw 4 Place the cord G in the cord retainer H 5 Tighten the screws on the hose clamps D 6 Connect the blower tube I to the...

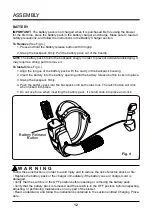
Page 12: ...til the battery release button locks into place 3 Grasp the backpack firmly 4 Push the battery pack into the backpack until both sides lock The latch button will click when locked into place 5 Do not use force when inserting the battery pack It should slide into place and click To Install See Fig 4 W A R N I N G Follow these instructions in order to avoid injury and to reduce the risk of electric ...

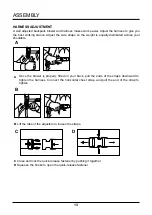
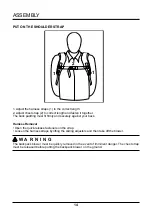
Page 13: ... release fastener A well adjusted backpack blower and harness makes work easier Adjust the harness to give you the best working stance Adjust the side straps so the weight is equally distributed across your shoulders Once the blower is properly fitted on your back pull the ends of the straps downward to tighten the harness Connect the horizontal chest strap and pull the end of the strap to tighten...

Page 14: ...ust fit firmly and securely against your back Harness Removal Open the quick release fasteners on the strap Loosen the harness straps by lifting the sliding adjusters and then take off the blower W A R N I N G The backpack blower must be quickly removed in the event of imminent danger The chest strap must be released before putting the backpack blower on the ground 2 1 1 ...

Page 15: ... use of attachments or accessories not recommended can result in serious personal injury Before each use inspect the entire product for damaged missing or loose parts such as screws nuts bolts caps etc Tighten securely all fasteners and caps and do not operate this product until all missing or damaged parts are replaced HOLDING THE TOOL See Fig 5 The operator should wear proper clothing such as bo...

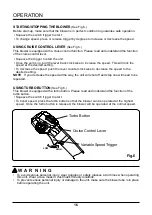
Page 16: ...ecrease the speed to the desired setting NOTE If you decrease the speed all the way the unit will shut off and step one will need to be repeated USING TURBO BUTTON See Fig 6 This blower is equipped with a turbo button Please read and understand the function of the turbo button Squeeze the switch trigger to start To boost speed press the turbo button so that the blower can be operated at the highes...

Page 17: ...ear gloves to protect yourself from the impeller blades or other sharp objects OPERATING TIPS Ensure that the unit is not directed at anybody or any loose debris before starting the unit Verify that the unit is in good working condition Make sure the tubes and guards are in place and secure To reduce the risk of hearing loss associated with sound level s hearing protection is required Operate powe...

Page 18: ...attery pack cracks or breaks with or without leaks do not recharge it and do not use Dispose of it and replace with a new battery pack DO NOT ATTEMPT TO REPAIR IT To avoid injury and risk of fire explosion or electric shock and to avoid damage to the environment Cover the battery s terminals with heavy duty adhesive tape DO NOT attempt to remove or destroy any of the battery pack components DO NOT...

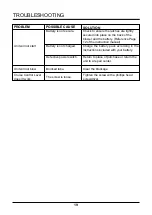
Page 19: ...t secure Battery is not charged Check to ensure the latches are tightly secured into place on the back of the blower and the battery Reference Page 12 of the instruction manual Charge the battery pack according to the instructions included with your battery Cruise Control Lever doesn t work The screw is loose Tighten the screw with a phillips head screwdriver PROBLEM POSSIBLE CAUSE SOLUTION ...

Page 20: ...D BY WARRANTY 1 Any part that has become inoperative due to misuse abuse neglect accident improper maintenance or alteration or 2 The unit if it has not been operated and or maintained in accordance with the owner s manual or 3 Normal wear except as noted below 4 Routine maintenance items such as lubricants blade sharpening 5 Normal deterioration of the exterior finish due to use or exposure GREEN...

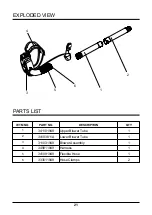
Page 21: ... PARTS LIST 4 5 6 IETM NO PART NO DESCRIPTION QTY 1 341101949 Upper Blower Tube 1 2 34103811A Lower Blower Tube 1 3 311031949 Blower Assembly 1 4 349011949 Harness 1 5 341091949 Flexible Hose 1 6 333011949 Hose Clamps 2 2 ...

Page 22: ...Rev 00 09 20 16 Printed in China on 100 Recycled Paper TOLL FREE HELPLINE 1 855 345 3934 Greenworks Tools PO Box 1238 Mooresville NC 28115 ...

Reviews: