ASSEMBLY
11
W A R N I N G
Never operate the blower with the nozzle not fully assembled and locked.
ASSEMBLY
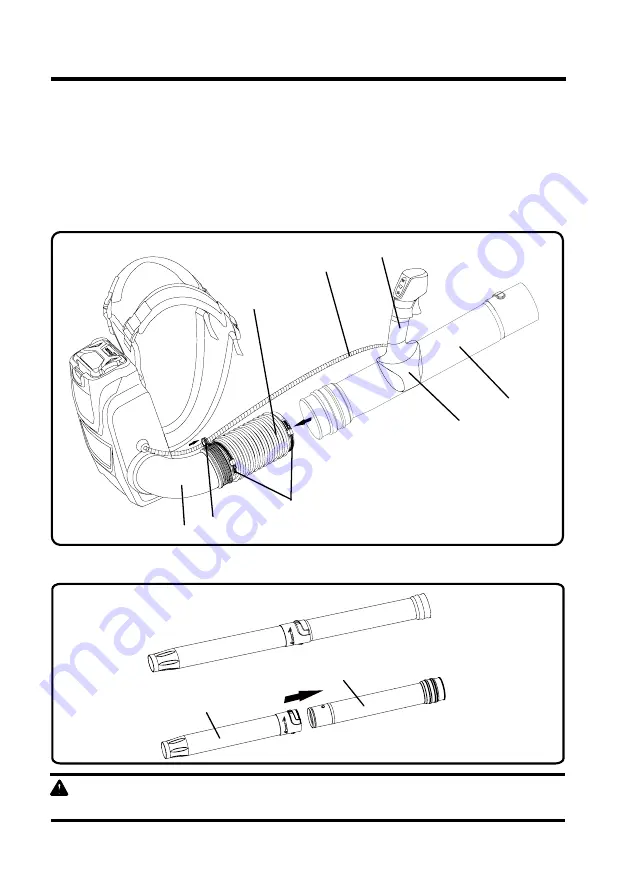
(See Fig.2)
1. The flexible tube (B) is connected to the fan outlet tube (A) from the manufacturer.
2. Connect the operating tube (C) to the flexible hose (B) with the hose clamp (D). Use a screw
driver (not provided) to loosen and tighten the hose clamp. Turn clockwise to tighten, and coun-
ter clockwise to loosen.
3. Open the clamping lever (E). Move the control handle (F) along the tube to the most comfort-
able position. Once it is in the desired position, close the clamping lever and tighten with a screw
4. Place the cord (G) in the cord retainer (H).
5. Tighten the screws on the hose clamps (D)
.
6. Connect the blower tube (I) to the operating tube (C). Twist clockwise until the tubes lock into
position. (See Fig.3)
Fig.3
Fig.2
A
H
D
E
C
F
G
B
I
C


