14
15
BATTERY CHARGER
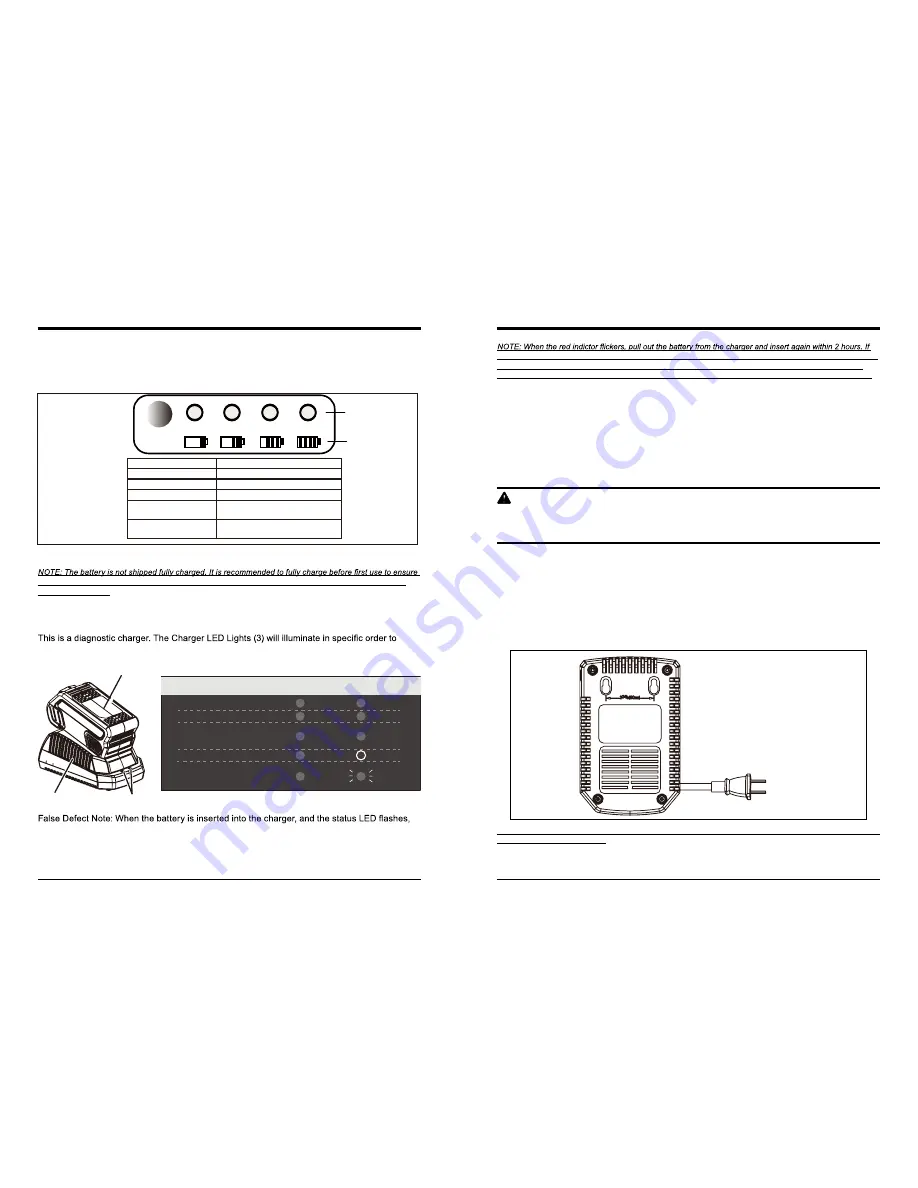
CHECKING BATTERY CAPACITY
Press the battery capacity indicator (BCI) button. The lights will illuminate according to the
batteries capacity level. See chart below:
CHARGING PROCEDURE
that maximum run time can be achieved. This lithium-ion battery will not develop a memory and may be
charged at any time.
1. Plug the charger into an AC power outlet.
2. Insert the battery pack (1) into the charger (2).
communicate the current battery status. They are as follows:
3
1
2
remove the battery from the charger for 1 minute, then reinsert. If the status LED indicates
normal than the battery pack is good. If the status LED is still blinking, remove the battery pack
and unplug the charger. Wait 1 minute and plug the charger back in and reinsert the battery
pack. If the status LED indicates normal than the battery pack is good. If the status LED is still
blinking then the battery pack is defective and needs to be replaced.
CHARGING PROCEDURE (LED INDICATOR)
BATTERY IS CHARGING:
FULLY CHARGED:
BATTERY IS TOO WARM:
(REMOVE FOR APPROX. 30
MINUTES TO ALLOW TO COOL)
DEFECTIVE BATTERY:
(REMOVE AND REPLACE WITH
NEW BATTERY IF THIS OCCURS)
NO BATTERY PRESENT
REDR
ED
GREEN
ORANGE
OFF
RED
RED
RED
RED
RED
BLINKING
BATTERY CHARGER
the indictor shows charging, that means the battery is good. After 2 hours, please pull out the battery and also
pull out the AC power plug of the charger for 1 miniute, and then insert the AC power plug and the battery
again. If the indictor shows charging, that means the battery is good. If not, the battery needs to be changed.
CHECKING THE CHARGE
If the battery pack does not charge properly:
•
Check the current at the power outlet with another tool. Make sure that the outlet is not turned
off.
•
Check that the charger contacts have not been shorted by debris or foreign material.
•
If the surrounding air temperature is not normal room temperature, move the charger and
battery pack to a location where the temperature is between 45
˚
F and 104
˚
F .
W A R N I N G
If the battery is inserted into the charger when warm or hot, the CHARGING LED indicator light on
the charger may switch on and illuminate ORANGE. If this occurs allow the battery to cool outside
of the charger from approximately 30 minutes.
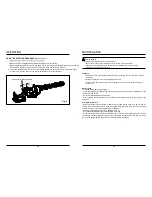
CHARGER MOUNTING
1. This charger can be installed hanging on a wall using two screws (not supplied)
2. Locate the placement for the charger to be wall mounted.
3. If fastening to wood studs use 2 wood screws.
4. Drill two holes 2 3/8” (6 cm) on center ensuring they are level.
5. If fastening to drywall use wall anchors and screws to secure the charger to the wall.
NOTE: If the battery and the charger won’t be used for a long time, please remove the battery from the charger
and pull out the AC power plug.
BATTERY CAPACITY
INDICATOR (BCI) BUTTON
LIGHT METRE
BATTERY METRE
Lights Capacity
4 Green Lights The battery is at full capacity
3 Green Lights The battery is at 75% capacity
2 Green Lights The battery is at 50% capacity
1 Green Light
Lights go out
The battery is at 25% capacity and re-
quires charging soon
The battery is less than 10% capacity
and requires charging immediately


