background image


Read all safety rules and instructions carefully before operating this tool.

Owner’s Manual

TOLL-FREE HELPLINE: 1-888-909-6757

www.GreenWorksTools.com

40V Cordless Snow Shovel

2601402

Summary of Contents for 2601402

Page 1: ...Read all safety rules and instructions carefully before operating this tool Owner s Manual TOLL FREE HELPLINE 1 888 909 6757 www GreenWorksTools com 40V Cordless Snow Shovel 2601402...

Page 2: ...cm Impeller Size 11 in 27 8 cm Discharge Distance 20 ft 6 m Weight with battery 18 3 lbs 8 3 kg CONTENTS Cold Weather Operation Lithium Ion batteries can be safely used from temperatures ranging from...

Page 3: ...ng the power tool on The operator and the power tool must be in a stable position during start up See the section titled Starting Stopping Instructions Use this power tool only for the purposes it was...

Page 4: ...tore Idle Power Tool Indoors When not in use power tools should be stored indoors in a dry locked up place out of reach of children Maintain Power Tools With Care Follow instructions for lubricating a...

Page 5: ...S OTHER BATTERIES MAY CAUSE INJURY OR DAMAGE TO THE SNOW SHOVEL USE ONLY WITH GREENWORKS 40V BATTERY Model 29472 and GREENWORKS 40V CHARGER Model 29482 W A R N I N G P R O P O S I T I O N 6 5 This pro...

Page 6: ...stand operator s manual before using this product Wear ear protection at all times while operating the machine Always wear eye protection with side shields marked to comply with ANSI Z87 1 when operat...

Page 7: ...operation of any power tool can result in foreign objects being thrown into your eyes which can result in severe eye damage Before beginning power tool operation always wear safety goggles or safety...

Page 8: ...shovel Compare the illustration in Figure 1 to your snow shovel in order to familiarize yourself with the location of various controls and adjustments Save this manual for future reference Auxiliary...

Page 9: ...y parts are damaged or missing please call 1 888 909 6757 for assistance W A R N I N G If any parts are damaged or missing do not operate this product until the parts are replaced Failure to heed this...

Page 10: ...FTS See Figures 2 3 Align the pin on the handle shaft and the hole on the lower shaft Fig 2 Once the two shafts are secured turn the lock knob clockwise until it is fully tightened Fig 3 Fig 3 Fig 2 L...

Page 11: ...s fully inserted into the snow shovel when you hear an audible click TO REMOVE BATTERY PACK See Figure 5 Release the trigger switch The lock out button will pop out and the snow shovel will stop Press...

Page 12: ...le is angled toward the rear handle that allows for comfortable operation Slide the auxiliary handle over the metal ring 2 and ensure the metal ring fits between the slot on the auxiliary handle Align...

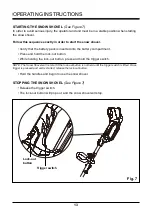
Page 13: ...old the lock out button While holding the lock out button press and hold the trigger switch NOTE The Snow Shovel will not start if the lock out button is not held until the trigger switch is lifted On...

Page 14: ...e 8 Start the snow shovel by following the Starting Instructions The depth and weight of the snow will determine the forward speed Push the snow shovel forward so that it rides on the scraper OPERATIN...

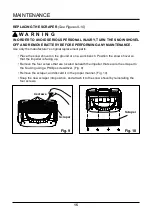
Page 15: ...l replacement parts Place the snow shovel on the ground or on a work bench Position the snow shovel so that the impeller is facing up Remove the four screws that are located beneath the impeller that...

Page 16: ...shovel off and remove battery before cleaning or servicing Use a small brush to clean the outside of the snow shovel Do not use strong detergents Household cleaners that contain aromatic oils such as...

Page 17: ...removing 6 screws Insert the impellor shaft with pulley assembly attached in the new impellor Be sure to replace the retained shaft sleeve that secures left side of the shaft Remove the belt Remove th...

Page 18: ...cover Place the belt tensioner idler arm back into its place 13 14 15 Replace and tighten the remaining nut to secure the left side plate assembly Replace and tighten the remaining screws to secure th...

Page 19: ...nd do not use it Dispose of it and replace it with a new battery pack DO NOT ATTEMPT TO REPAIR IT Follow these instructions in order to avoid injury and the risk of fire explosion or electric shock an...

Page 20: ...ry is too cold Remove battery from snow shovel Bring battery and charger into warm area for 15 minutes on charge After 15 mins remove from charger and install in snow shovel for use The battery is not...

Page 21: ...Any part that has become inoperative due to misuse commercial use abuse neglect accident improper maintenance or alteration or 2 The unit if it has not been operated and or maintained in accordance w...

Page 22: ...Motor Assembly 1 3 311121468 Belt tensioner 1 4 329011468 Belt 1 5 311131468 Impeller shaft assembly 1 6 3220401 Screw 4 7 3390198 Tensioner spring 1 8 32205877 Screw 4 9 341041468 Scraper 1 10 341031...

Page 23: ...TOLL FREE HELPLINE 1 888 909 6757 Greenworks Tools PO Box 1238 Mooresville NC 28115 Rev 02 07 24 17 Printed in China on 100 recycle material...

Page 24: ...as de seguridad y las instrucciones cuidadosamente antes de utilizar esta herramienta Manual Del Propietario L NEA GRATUITA L NEA DE AYUDA 1 888 909 6757 www GreenWorksTools com Pala de nieve Inal mbr...

Page 25: ...cm 4 pulgadas Tama o del impulsor 27 8 cm 11 pulgadas Distancia de descarga 6 m 20 pies Peso con la bater a 8 3 kg 18 3 lbs CONTENIDOS Operaci n en Clima Fr o Bater as de ion de litio pueden ser utili...

Page 26: ...antenga a los ni os y mascotas lejos del rea de trabajo No utilice la herramienta el ctrica a altas velocidades en superficies resbaladizas Mire hacia atr s y tenga cuidado cuando retroceda Al usar la...

Page 27: ...la herramienta el ctrica ii Inspeccione si hay da os iii Repare cualquier da o antes de volver a arrancar y usar la herramienta Guarde la herramienta en un lugar interior cuando no se utilicen las her...

Page 28: ...reducir su exposici n a estas sustancias qu micas trabaje en un rea bien ventilada y con equipos de seguridad aprobados como mascarillas contra el polvo especialmente dise adas para filtrar part cula...

Page 29: ...el operador antes de usar este producto Use protectores auditivos en todo momento durante el funcionamiento de la m quina Siempre p ngase protecci n ocular con la marca de cumplimiento de la norma ANS...

Page 30: ...os Antes de iniciar la operaci n de herramientas de corriente siempre utilice gafas de seguridad gafas de seguridad con protecci n lateral y en la medida en que sea necesario un protector para toda la...

Page 31: ...ilustraci n en Fig 1 con la podadora para familiarizarse con la ubicaci n de los diferentes controles y ajustes Guarde este manual para referencia futura Manija auxiliar Interruptor de gatillo Bot n p...

Page 32: ...iamente Si hay piezas da adas o faltantes le suplicamos llamar al 1 888 909 6757 donde le brindaremos asistencia A D V E R T E N C I A Si hay piezas da adas o faltantes no utilice este producto sin ha...

Page 33: ...Consulte la figuras 2 3 Alinee el perno del tubo de la empu adura y el agujero del tubo inferior Fig 2 Gire la palanca de bloqueo hacia la derecha hasta que quede completamente apretada Fig 3 Asta m...

Page 34: ...l quitanieve cuando se escucha un clic EXTRAER LA BATER A Consulte la figura 5 Suelte el interruptor de gatillo El bot n para bloqueo por desconexi n salta y la pala de nieve se detiene Presione y man...

Page 35: ...e manera que el mango est inclinado hacia el mango trasero Deslice el mango auxiliar en la anilla met lica 2 y aseg rese de que la anilla encaja entre la ranura del mango auxiliar Alinee los orificios...

Page 36: ...el bot n para bloqueo por desconexi n presione y sostenga el interruptor de gatillo NOTA La pala de nieve no arranca si el bot n para bloqueo por desconexi n no se sostiene hasta presionar el interrup...

Page 37: ...ue la pala de nieve siguiendo las instrucciones de arranque La velocidad hacia adelante se determina por la profundidad y peso de la nieve Empuje la pala de nieve hacia delante de manera que se apoye...

Page 38: ...ante Coloque la pala de nieve en el suelo o en un banco de trabajo Coloque la pala de nieve de manera que el impulsor se encuentre hacia arriba Con un desatornillador en cruz quite los cuatro tornillo...

Page 39: ...piarla o hacer tareas de mantenimiento Use una brocha peque a para limpiar el exterior de la pala de nieve No use detergentes fuertes Los limpiadores caseros que contienen aceites arom ticos tales com...

Page 40: ...los 6 tornillos Inserte el eje propulsor con todo el rodillo incluido en el nuevo eje propulsor Aseg rese de volver a colocar el manguito de sujeci n que cierra el lado izquierdo del eje Retire la cor...

Page 41: ...a ensamblar la cubierta derecha Coloque el tensor de la correa brazo tensor de nuevo en su lugar 13 14 15 Coloque y apriete la tuerca restante para ensamblar la placa izquierda Coloque y apriete los t...

Page 42: ...er as nuevo NO INTENTE REPARARLA Obedezca las siguientes instrucciones para evitar lesiones y riesgos de incendio explosi n o choques el ctricos y para evitar da os al medio ambiente Para evitar lesio...

Page 43: ...etire la bater a Coloque la bater a en el cargador y deje cargar por 10 minutos para permitir que la bater a se entibie Luego retire de el cargador para usar con la quitanieve La bater a no est bien c...

Page 44: ...haya vuelto inoperante debido a mal uso uso comercial abuso descuido accidente mantenimiento inapropiado o alteraci n o 2 La unidad si no ha sido operada o si no se le ha dado mantenimiento de acuerdo...

Page 45: ...or de la correa 1 4 329011468 Correa 1 5 311131468 Eje propulsor 1 6 3220401 Tornillo 4 7 3390198 Resorte del tensor 1 8 32205877 Tornillo 4 9 341041468 Raspador 1 10 341031468 Impulsor 1 11 362011469...

Page 46: ...L NEA DE AYUDA GRATUITA 1 888 909 6757 Greenworks Tools PO Box 1238 Mooresville NC 28115 Rev 02 07 24 17 Impreso en China en papel reciclado de 100...

Page 47: ......

Page 48: ......

Reviews: