


•
Dusts from materials such as leadcontaining coatings,
some wood types, minerals and metal can be harmful to
one’s health and cause allergic reactions, lead to
respiratory infections and/or cancer. Materials containing
asbestos may only be worked by specialists.
1. As far as possible, use a dust extraction system
suitable for the material.
2. Provide for good ventilation of the working place.
3. It is recommended to wear a P2 filterclass respirator.
•
Prevent dust accumulation at the workplace. Dusts can
easily ignite.
•
To save energy, only switch the power tool on when you
use it.
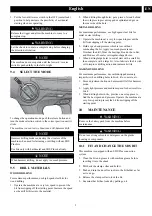
•
Apply the power tool to the screw/nut only when it is
switched off. Rotating tool inserts can slip off.
•
If the apply tool become blocked, turn the machine off.
Loosen the apply tool.
•
When switching on with a blocked drilling tool, high
torque reaction can occur.
•
Always wait until the machine has come to a complete
stop before placing it down. The tool insert can jam and
lead to loss of control over the power tool.
•
Prevent accidental switch. Make sure that On/Off switch
is in the off position to insert the battery pack.
•
Do not open the battery. Risk of short-circuiting.
•
In case of damage and improper use of the battery,
vapours may be emitted. Ventilate the area and seek
medical help in case of complaints. The vapours can
irritate the respiratory system.
•
Use the battery only in access with your power tool. This
measure prevents the battery against dangerous overload.
•
Charge the battery pack only with the recommended
charger.
•
The batttery has some power. Fully charge the battery
when you use it for the first time.
•
Read the operator instructions of the battery charger.
•
Check the tight position of the battery. Two lock levels
are possible.
5
PROPOSITION 65
WARNING
This product contains a chemical known to the state of
California to cause cancer, birth defects or other
reproductive harm. Some dust created by power sanding,
sawing, grinding, drilling, and other construction activities
contains chemicals known to cause cancer, birth defects or
other reproductive harm. Some examples of these chemicals
are:
•
Lead from lead-based paints;
•
Crystalline silica from bricks and cement and other
masonry products;
•
Arsenic and chromium from chemically treated lumber.
Your risk of exposure to these chemicals varies depending
on how often you do this type of work. To reduce your
exposure to these chemicals, work in a well-ventilated area,
and work with approved safety equipment, such as dust
masks that are specially designed to filter out microscopic
particles.
Save these instructions.
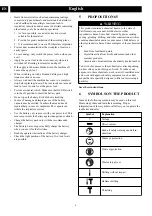
6
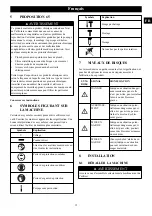
SYMBOLS ON THE PRODUCT
Some of the following symbols may be used on this tool.
Please study them and learn their meaning. Proper
interpretation of these symbols will allow you to operate the
tool better and safer.
Symbol
Explanation
V
Voltage
Direct current
Read all safety warnings and all in-
structions.
Wear eye protection
Wear ear protection
Wear safety gloves
Drilling without impact
Hammer drilling
Chiselling
6
English
EN
Summary of Contents for HMG405
Page 2: ......


