background image


WARNING

If the battery pack or charger is damaged, replace the
battery pack or the charger.

Stop the machine and wait until the motor stops before
you install or remove the battery pack.

Read and understand the instructions in the battery and
charger manual.

1. Align the lift ribs on the battery pack with the grooves in

the battery compartment.

2. Push the battery pack into the battery compartment until

the battery pack locks into place.

3. When you hear a click, the battery pack is installed.

8.5

REMOVE THE BATTERY PACK

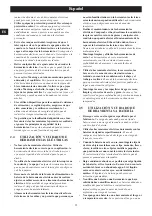
1. Push and hold the battery release button.
2. Remove the battery pack from the machine.

9

OPERATION


IMPORTANT

Before you operate the machine, read and understand the
safety regulations and the operation instructions.


WARNING

Be careful when you operate the machine.

10

OPERATION


WARNING

Do not use any attachments or accessories not
recommended by the manufacturer of this product.

10.1 ADJUST THE STAPLE DEPTH

The depth adjustment knob increases or decreases the force
with which a staple is driven into the workpiece. The drive
force indicator, located on top of the tool, will show the force
at which the staple will enter the workpiece. Harder materials
will require greater drive force.
1. Remove the battery pack.
2. Rotate the depth adjustment knob clockwise to increase

the drive force.

3. To test for desired depth, use a scrap piece of the same

material you will be using for your project.


NOTE

Always keep your fingers away from the discharge area of
the tool when driving a staple and when using the accessory
to install screen or wire. Failure to keep fingers out of the
way can result in serious personal injury.

10.2 DRIVING A STAPLE

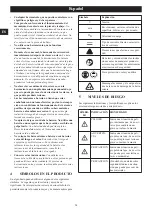
2

90

1. Hold the handle firmly with the nose of the tool flat

against the workpiece at a 90° angle.

2. Press the activation foot of the stapler down against the

workpiece. The activation foot must be depressed before
pulling the switch trigger.

3. The tool will drive another staple each time the trigger is

depressed as long as the activation foot is depressed.

10.3 WIRE AND SCREEN ACCESSORY

The wire and screen accessory included with the stapler is
useful for attaching screen or wire to a wood frame or
workpiece. One accessory edge is used for fencing wire,
while the other edge is for attaching screen.

Drive a test staple in a scrap piece of the same material you
will be using for your project to test for desired drive force.

To install the accessory: Remove the battery pack and select
the desired application; Turn the selected edge toward the
nose of the tool; Slide the accessory over the nose of the tool
until it fits into place over the tab on each side of the tool.

11

MAINTENANCE


CAUTION

Do not let brake fluids, gasoline, petroleum-based materials
touch the plastic parts. Chemicals can cause damage to the
plastic, and make the plastic unserviceable.


CAUTION

Do not use strong solvents or detergents on the plastic
housing or components.

9

English

EN

Summary of Contents for STG309

Page 1: ...GW 24V 3401802 21 11 29 B 5 HSF GLB CGR 146 B STG309 EN OPERATOR MANUAL FR MANUEL DE L UTILISATEUR 3 8 CROWN STAPLER ES MANUAL DEL OPERADOR www greenworkstools com 3 8 GRAPADORA DE CORONA 3 8 AGRAFEUS...

Page 2: ...STG309 EN OPERATOR MANUAL FR MANUEL DE L UTILISATEUR 3 8 CROWN STAPLER ES MANUAL DEL OPERADOR www greenworkstools com 3 8 GRAPADORA DE CORONA 3 8 AGRAFEUSE COURONNE Rev B G24CS10 PA421K...

Page 3: ......
Page 4: ...5 4 Symbols on the product 6 5 Risk levels 7 6 Environmentally safe battery disposal 7 7 Proposition 65 7 8 Installation 7 8 1 Unpack the machine 7 8 2 Install belt clip 8 8 3 Load staples 8 8 4 Insta...

Page 5: ...y is earthed or grounded Do not expose power tools to rain or wet conditions Water entering a power tool will increase the risk of electric shock Do not abuse the cord Never use the cord for carrying...

Page 6: ...k Use power tools only with specifically designated battery packs Use of any other battery packs may create a risk of injury and fire When battery pack is not in use keep it away from other metal obje...

Page 7: ...d must be repaired Check operation of the workpiece contact mechanism frequently Do not use the tool if the workpiece contact mechanism is not working correctly as accidental driving of a nail may res...

Page 8: ...nt injury and risk of fire explosion or electric shock and to avoid damage to the environment Cover the terminals of the battery with heavy duty adhesive tape DO NOT try to remove or destroy any of th...

Page 9: ...e the tool is assembled completely 8 2 INSTALL BELT CLIP NOTE The belt clip may be installed on either side of the housing 1 Remove the battery pack from the machine 2 Align the belt clip with the hol...

Page 10: ...e same material you will be using for your project NOTE Always keep your fingers away from the discharge area of the tool when driving a staple and when using the accessory to install screen or wire F...

Page 11: ...nd to be defective through normal use free of charge to the customer This warranty is valid only for units which have been used for personal use that have not been purchased or rented for industrial c...

Page 12: ...ur l agrafeuse 14 4 Symboles figurant sur la machine 15 5 Niveaux de risques 15 6 limination des batteries sans danger pour l environnement 15 7 Proposition 65 16 8 Installation 16 8 1 D baller la mac...

Page 13: ...de l outil lectrique doivent tre compatibles avec la prise de courant Ne modifiez jamais la prise d aucune fa on N utilisez pas d adaptateur de prise avec des outils prise de terre Des prises non mod...

Page 14: ...ons l utiliser Les outils lectriques sont dangereux entre les mains des utilisateurs non form s Entretenir les outils lectriques V rifiez le d salignement des pi ces mobiles ou la fixation des pi ces...

Page 15: ...ue facial ou un masque anti poussi re si l op ration est poussi reuse Le respect de cette r gle r duira le risque de vous blesser gravement Retirez toujours la batterie avant de charger les clous de p...

Page 16: ...tilisez les pour former d autres utilisateurs qui pourraient utiliser cet outil Si vous pr tez cet outil quelqu un pr tez lui aussi ces instructions 4 SYMBOLES FIGURANT SUR LA MACHINE Certains des sym...

Page 17: ...oduit chimique connu dans l tat de Californie comme tant une cause de cancer de malformations cong nitales ou d autres probl mes de reproduction Certaines poussi res produites par le pon age m canique...

Page 18: ...d agrafes 8 4 INSTALLER LE BLOC BATTERIE AVERTISSEMENT Si le bloc batterie ou le chargeur est endommag remplacez le au besoin Arr tez la machine et attendez que le moteur s arr te avant d installer o...

Page 19: ...e le pied d activation est enfonc 10 3 ACCESSOIRE FIL ET CRAN L accessoire pour fil et cran inclus avec l agrafeuse est utile pour fixer un cran ou un fil un cadre en bois ou une pi ce de travail Un b...

Page 20: ...du manuel du propri taire fourni avec le produit neuf ARTICLES NON COUVERTS PAR LA GARANTIE 1 Toute pi ce qui est devenue inop rante en raison d une mauvaise utilisation d une utilisation commerciale...

Page 21: ...ad para grapadoras 23 4 S mbolos en el producto 24 5 Niveles de riesgo 24 6 Eliminaci n de bater a segura para el medio ambiente 25 7 Propuesta 65 25 8 Instalaci n 25 8 1 Desembalaje de la m quina 25...

Page 22: ...pueden hacer que pierda el control 2 2 SEGURIDAD EL CTRICA Los enchufes de las herramientas el ctricas deben corresponder con la toma de corriente Nunca modifique el enchufe en modo alguno No utilice...

Page 23: ...marcha accidentalmente Almacene las herramientas el ctricas inactivas fuera del alcance de los ni os y no permita que personas que no est n familiarizadas con la herramienta el ctrica o estas instruc...

Page 24: ...rriente y podr an producir una descarga el ctrica al operario Proteja sus o dos Lleve protecci n auditiva durante periodos prolongados de funcionamiento Si sigue esta regla reducir el riesgo de lesion...

Page 25: ...inmediatamente y de forma adecuada una bater a ca da o da ada No coloque las herramientas a bater a o sus bater as cerca del fuego o el calor Esto reducir el riesgo de explosi n y posibles lesiones Pa...

Page 26: ...ertificado 7 PROPUESTA 65 AVISO Este producto contiene una sustancia qu mica conocida en el estado de California como causante de c ncer defectos de nacimiento u otros da os reproductivos El polvo gen...

Page 27: ...ire la bater a 1 Mantenga la herramienta al rev s Apriete el pestillo del almac n y deslice el almac n para abrirlo 2 Introduzca las grapas en el canal con la parte de la corona hacia abajo y las pata...

Page 28: ...en sentido horario para aumentar la fuerza de clavado 3 Para probar la profundidad deseada utilice un trozo del mismo material que utilizar para su proyecto NOTA Mantenga siempre los dedos alejados d...

Page 29: ...a defectos en materiales piezas o mano de obra A su entera discreci n Greenworks reparar o sustituir cualquiera y todas las piezas que resulten ser defectuosas con un uso normal sin coste alguno para...

Reviews: