background image

69

05.2012

1

2

3

a

1

2

3

4

V

V

V

V

Tetra

Subject to technical modifications

15.4  Replacing shares or tines

 WARNING 


Risk of injury during repair work.

•  Wait until the implement has come to a complete standstill. 
•  With the machine coupled: - Turn off the tractor engine - take the key out of the ignition.
•  Only perform work when the implement is in a safe condition and has been secured to 

prevent it from dropping and rolling away.  

•  Wear protective gloves and safety footwear.
•  Only use suitable tools.

Replace worn shares in good time.

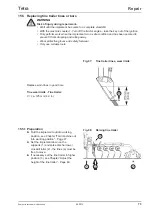
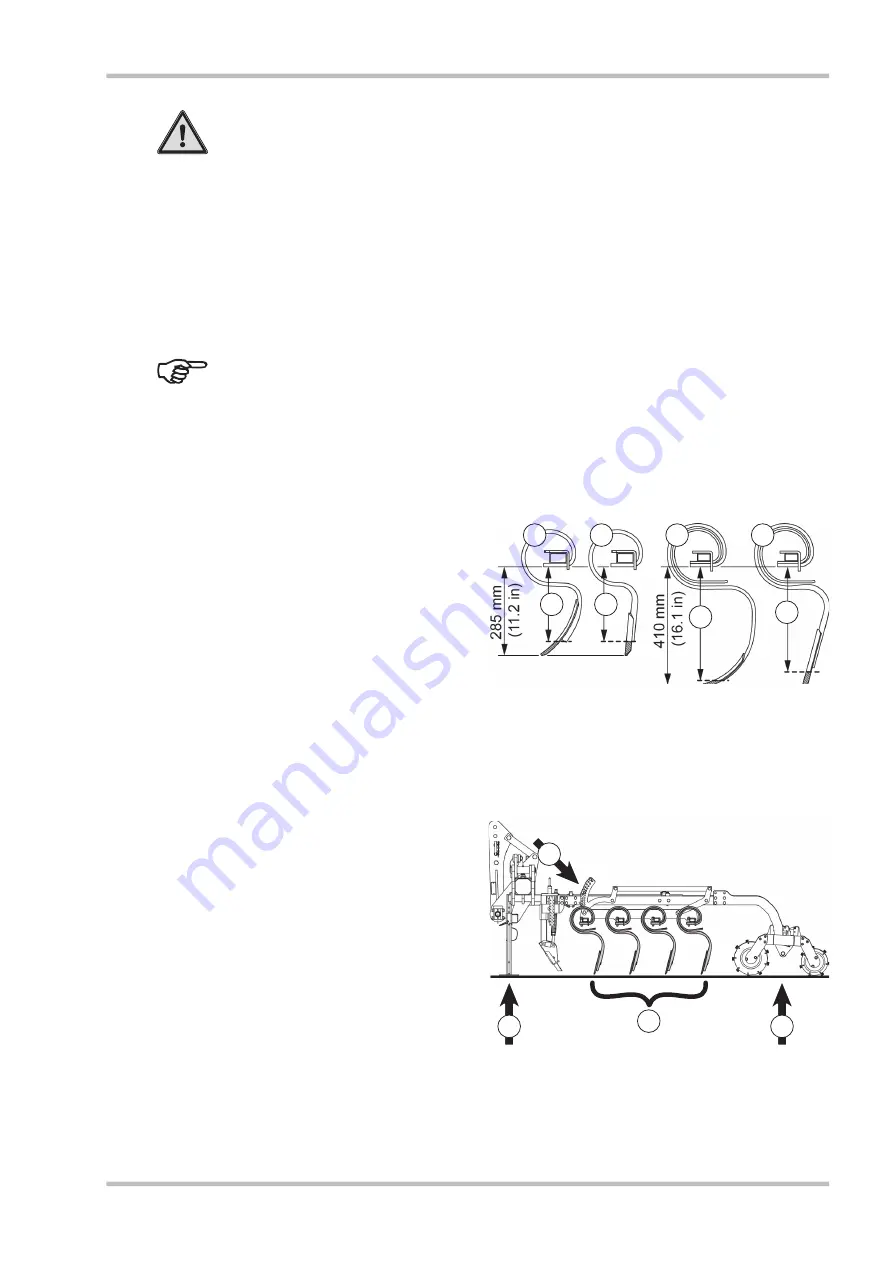
Share wear limits  - Tines (V):

1)  Mild harrow tines 

= ca. 240 mm (9.5 in)

2)  Upright, mild harrow tines 

V =

 ca. 240 mm (9.5 in)

3)  Dual spring reinforced tines   

V = 

ca. 380 mm (15 in)

4)  Upright, vibra tines 

V =

 ca. 360 mm (14.2 in)

 NOTE


Worn out shares can be turned around once.

Fig. 91;  Share - wear limits

15.4.1 Preparation


Fold the implement out into working 

position, see Chapter “Fold machine out 

into working position“ - Page 47.


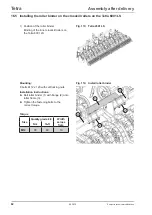
► Pin the tine fields in the top position (1) 

Chapter “Adjust the working depth of 

the tine fields“ - Page 48. 


Set the implement down on the 

supports (2) and spike disc harrow or 

crosskill roller (3) - the tines (a) must be 

free to move. 

Fig. 92;  Raise tines

Repair

Summary of Contents for Tetra 3001 L

Page 1: ...EN Operating Instructions Implement serial no Mounted Seed bed harrow Tetra 3001 L 4501 L 6001 L 7500 L 9000 L Tetra 4501 LS 6001 LS Series 0 ...

Page 2: ...is publication in other media translations or use of extracts or parts are not permitted without the express permission of Grégoire Besson GmbH All rights reserved The contents of these operating instructions may change without notice Subject to technical modifications ...

Page 3: ...t All instructions pertaining to direction should be taken to mean in the direction of travel This document was produced using the information with respect to equipment and operation which was known at the time of printing Changes due to technical improvements are reserved In order to confirm that the initial commissioning and orientation on the implement with respect to Completeness of the scope ...

Page 4: ...05 2012 4 Tetra Subject to technical modifications ...

Page 5: ...riants 19 3 0 Scope of delivery 20 3 1 Basic equipment 20 3 2 Additional equipment 22 4 0 Description of the implement 23 4 1 Functional description 23 4 2 Description of the components 24 4 3 Description of the components 24 4 3 1 Tower 24 4 3 2 Tine field 25 4 3 3 Tines 26 4 3 4 Spike disc harrow or crosskill roller 26 4 3 5 Tine trailer 27 4 3 6 Wheel mark eradicator additional equipment 28 4 3...

Page 6: ...rking speed 46 9 3 Preparations in the field 46 9 4 Fold machine out into working position 47 9 5 Adjust the working depth of the tine fields 48 9 6 Adjust the height of the tine trailer 49 9 6 1 Tine trailer 49 9 6 2 Hydraulic tine trailer additional equipment 50 9 7 Adjusting the working depth of the wheel mark eradicator additional equipment 51 9 8 Adjust the height of the support wheels Tetra ...

Page 7: ...iler bars 74 15 6 Replacing wheel mark eradicator shares 75 15 6 1 Preparation 75 15 7 Replacing bulbs in the lighting system 76 16 0 Assembly after delivery 77 16 1 Safety instructions Assembly 77 16 2 Parts delivered separately 77 16 3 Installing spike disc harrow crosskill roller 78 16 3 1 Preparation with Tetra 6001 78 16 3 2 Installing spike disc harrow on Tetra 79 16 3 3 Installing crosskill...

Page 8: ...6 Lay lighting cable 93 17 6 1 Installing lighting cable on Tetra 3001 L 6001 L 6001 LS 93 17 6 2 Installing lighting cable on Tetra 4501 L 4501 LS 94 18 0 Disposal of the implement 95 19 0 Appendix 96 19 1 Ballast calculation combination of the tractor and implement 96 19 2 Position of the safety symbols 98 19 2 1 Safety symbols Tetra 3001 L 98 19 2 2 Safety symbols Tetra 4501 L 4501 LS 6001 L 60...

Page 9: ...this docu ment Meaning Hazard warning Hazard warnings allude to risks which occur when using the implement The hazard warnings are arranged into different levels and are described with the signal words Danger Warning Caution The signal words specify the severity of the impending hazard Danger Identifies hazards with a high degree of risk Failure to observe these hazards can result in the most seri...

Page 10: ...e observed at all times 1 6 Who may operate the implement Qualified persons only The implement may only be operated maintained or repaired by persons whose qualifications authorise them to do so and who are sufficiently informed with regard to the dangers involved with operating the equipment In general these persons have received agricultural education or are comparably trained 1 4 General safety...

Page 11: ... every start up Before first use re tighten all bolts to the stipulated tightening torque All safety devices must be fully installed and secured Prescribed setting maintenance and inspection work must be carried out within the required timeframe DANGER Risk of accident due to riding on the implement during operations and transport Riding on the implement and standing within areas of danger is proh...

Page 12: ...ting implements make sure that no persons are standing in the danger area When lifting implements make sure that there is adequate clearance around the implement WARNING Risk of accident from the folding and unfolding of implement parts When folding and unfolding implement parts make sure that no persons are standing in the danger area When folding and unfolding implement parts make sure that ther...

Page 13: ...e parts Use suitable tools when looking for leakages Set down implement depressurise the system switch off the engine and remove the ignition key before commencing work on the hydraulic system Consult a doctor immediately in case of injury 1 10 Safety instructions Coupling and uncoupling WARNING Risk of accident while coupling the implement to and uncoupling it from the tractor During coupling and...

Page 14: ...e in the immediate vicinity The operator must not leave the operator s platform while the vehicle is in motion Risk of accident due to unsecured attachment components Secure all components of the attachment to prevent uncontrolled movements using the retaining system provided transport lock or other suitable measures Always use the supplied covers e g tine protection equipment Risk of accident due...

Page 15: ... Only perform work when the implement is in a safe condition and has been secured to prevent it from dropping and rolling away Use all provided supports During all work wear work gloves the prescribed working clothing and protective equipment If the implement is folded use additional means to secure it against unfolding unintentionally Close the provided shut off valves engage mechanical locks Ris...

Page 16: ...ent Improper repairs to the brake systems cause the brakes to fail and result in serious accidents Adjustment and repair work on brake systems may only be performed by individuals with the proper technical training or by service centres Risk of accident due to improperly carried out work on tyres and wheels The removal and installation of wheels requires thorough expertise and approved mounting to...

Page 17: ...old out side parts Maintain sufficient distance from high voltage lines 9998 02 81 9998 02 81 Crushing hazard when staying between tractor and the implement When coupling the implement combination to the tractor ensure that no one is standing between the tractor and the implement Do not step between the tractor and the implement when activating the external control for the three point linkage 9998...

Page 18: ...nd infection due to hydraulic fluid penetrating under the skin Observe information in the operating instructions 9998 06 17 9998 06 17 Read the operating instructions prior to set up maintenance and repair Observe the safety instructions Observe the set up and assembly instructions 9998 02 63 9998 02 63 Do not remain in the vicinity of the implement when lifted up Attaching lifting accessories her...

Page 19: ...19 05 2012 Tetra Subject to technical modifications 2 0 Variants Variants Fig 1 Tetra variants ...

Page 20: ...More information on this can be found in Chapter Assembly after delivery Page 77 Scope of delivery 3 1 Basic equipment Included in the delivery 1 Implement with either a Mild harrow tines or b Upright mild harrow tines or c Dual spring reinforced tines or d Upright vibra tines Fig 2 Scope of delivery Fig 3 Scope of delivery tines Fig 4 Scope of delivery Dual spike disc harrow Fig 5 Scope of delive...

Page 21: ...6 Scope of delivery Crosskill roller Fig 7 Scope of delivery Transport lock Fig 8 Scope of delivery Crosskill roller roller binder 4 LS variant with crosskill roller 5 Roller binder for crosskill roller 6 Transport lock for Tetra 4501 L and 6001 L 7 Operating instructions not shown ...

Page 22: ... tines trail 2 Hydraulic tines trail Scope of delivery Fig 9 Scope of delivery tine trail mechanical hydraulic Fig 10 Scope of delivery Wheel mark eradicator Support wheel Fig 11 Scope of delivery Lighting 3 Wheel mark eradicator sprung version 4 Support wheels for Tetra 7500 L and 9000 L 5 Lighting ...

Page 23: ...able design The tine modules are individually swing suspended Depending on the tine design they are equipped with 4 rows or 5 rows of tines The rows of tines are each equipped with either 4 or 5 tines The tines are distributed across the harrow field such that there is a tine spacing line spacing of 94 mm 4 rows 4 tines or 60 mm 5 rows 5 tines depending on the version The tine rows are installed o...

Page 24: ...nes a 5 Roller Either a spike disc harrow or crosskill roller design depending on the version 6 Tine trailer 7 Set down support 8 Wheel mark eradicator 4 3 1 Tower The tower consists of 1 The top coupling point for coupling the top link 2 The three point axis for coupling the tractor s bottom links Designed for category 3 and 3 short three point linkage depending on version Tetra 3001 and Tetra 45...

Page 25: ... 5 tines Z This gives a tine fitment of 16 or 25 tines A 4 row tine field with 16 tines has a line spacing S of 94 mm A 5 row tine field with 25 tines has a line spacing S of 60 mm Fig 14 Tine field 4 rows 16 tines Fig 15 Tine field 5 rows 25 tines The height of the tine fields can be adjusted via a perforated bar 1 With the height adjustment the lower spring pin a serves to adjust the working dep...

Page 26: ...o support the seed bed combination harrow Design for Tetra Dual spike disc harrow The dual spike disc harrow is designed for light soil It is equipped with two rollers Roller diameter front 330 mm rear 270 mm The dual spike disc harrow provides better crumbling without reconsolidating the soil Implement description Fig 18 Dual spike disc harrow Fig 19 Crosskill roller 1 1 1 1 Design for Tetra LS C...

Page 27: ...tack a for the levelling bar 5 can be adjusted by the hydraulic cylinder 7 and levelling bar blockages can be rectified by hydraulic driven movement of the levelling bar The height adjustment is implemented via rotating spindles 2 A height scale 3 simplifies equal adjustment The tine trailer s spring mounted 4 levelling bar 5 can side step stones stone protection The tines 6 screw on make the brea...

Page 28: ...an be turned around when worn Fig 23 Wheel mark eradicator Implement description Fig 24 Lighting 4 3 7 Lighting additional equipment The lighting comprises 1 Warning panel 2 Side spotlight 3 Rear spotlight 4 Rear light 5 Location for number plate 6 Sidelight NOTE The design of the lighting deliv ered may differ from one country to another 4 3 8 Support wheel additional equipment Tetra 7500 L 9000 ...

Page 29: ...mensions ca A Transport width 3000 mm B Working width 3000 mm 4500 mm 6000 mm 7500 mm 9000 mm C 3035 mm 2680 mm 3037 mm 2680 mm 3205 mm D 2965 mm 2610 mm 2965 mm 2610 mm 3135 mm E 510 mm F 1290 mm H 1350 mm 1750 mm 2360 mm 3400 mm 4100 mm Transport height over 4 m transport on public roads forbidden Technical data 4 4 1 Dimensions in basic configuration ...

Page 30: ...dth 3 0 m Working width 3 0 m 4 5 m 4 5 m 6 0 m 6 0 m 7 5 m 9 0 m Tractor power up to 80 kW 112 HP 100 kW 135 HP 100 kW 135 HP 133 kW 180 HP 133 kW 180 HP 147 kW 200 HP 178 kW 240 HP Three point linkage Cat 3 3 short Cat 2 can also be selected Cat 3 3 short Max hydraulic pressure 200 bar Working speed max 15 km h Transport speed Tractor speed Sound pressure level 70 dB A Tyres for support wheels 1...

Page 31: ...provisions of the Machinery Directive and other relevant EU Directives The EU Declaration of Conformity extract in the Appendix attests to the fact that implement being placed on the market is manufactured in accordance with the relevant standards 4 6 Safety components 4 6 1 Transport lock Only for folding variants with spike disc harrow The transport lock 1 is attached to the outer tine fields an...

Page 32: ...r Safety components 4 6 3 Roller binder The roller binder 3 ties the inner fields of the Spike disc harrow on the Tetra 3001 L 6001 L 9000 L or The crosskill roller on the Tetra 6001 LS This prevents the fields swinging around during transportation 4 6 2 Side arm locking Tetra 7500 L 9000 L The locking latch 2 locks the side arms of the raised tine fields during transportation a Pawl for locking l...

Page 33: ...On the tine field Crane points The crane points for attaching hoisting accessories are identified with the following stickers 9998 02 63 1 Crane point on the tower For fastening hoisting accessories to the tower insert and secure the top link stock a 2 Crane points on the load bearing axles of the tine fields Prior to loading Implement can be lifted in folded in or folded out condition With cranes...

Page 34: ...05 2012 34 X X X X X X X X X X X X X X Tetra Subject to technical modifications Fig 34 Crane points on the implement Loading X Crane point positions ...

Page 35: ...the tractor and implement is the same Tractor See tractor operating instructions Implement CAT 2 selectable for Tetra 3001 4001 or CAT 3 3 short depending on order Attach ballast weight See tractor operating instructions Check tractor tyres for correct and even air pressure See tractor operating instructions Follow the coupling instructions in the tractor operating instructions 6 2 Ballast weight ...

Page 36: ...tand between the tractor and the implement Non compliance may result in serious or fatal injuries WARNING Risk of accident due to crushing during set up and adjustment With all work care must be taken to ensure that the implement is in a safe position and has been secured against rolling away Fig 36 Adjusting the track gauge of the wheel mark eradicator 6 3 Adjusting the track width of the wheel m...

Page 37: ...tor and the implement while operating the external hydraulics control Take note of all crushing and shearing points on all moving parts of the implement Before coupling and uncoupling the hydraulic plug couplings depressurise the hydraulic system Follow the operating instructions and safety instructions Prior to uncoupling wait until the implement has come to a complete standstill lower the implem...

Page 38: ...ent 7 2 Coupling the top link NOTE Attach the upper link 3 such that it rises slightly relative to the implement or is parallel to the lower links 1 when in working position This assures an almost parallel implement behaviour The incline can be changed by inserting the top link stock in position A to D Fig 39 Top link position Fig 40 Insert top link stock Insert the top link stock 4 in the selecte...

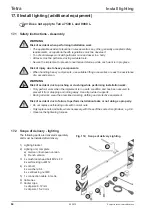
Page 39: ...ly w by ad justing the length of the top link 3 Coupling the implement 7 3 Install the cable for releasing the side arm locking on Tetra 7500 L 9000 L Install the release cable 1 from the locking latch 2 of the folding lock into the tractor cab Fig 43 Install the cable for the side arm locking Fig 44 Connecting the lighting 7 4 Connecting lighting additional equipment Connect the connection cable ...

Page 40: ...under high pressure may penetrate the skin and cause se vere injury Set down implements depressurise the system switch off the engine and remove the ignition key before commencing work on the hydraulic system Use suitable tools when looking for leakages Consult a doctor immediately in case of injury NOTE Maximum operating pressure 200 bar The operating pressure of the hydraulic system must not exc...

Page 41: ...hydraulic system or switch to floating position depressurise Connect the hydraulic hoses for the folding cylinder and hydraulic tine trailer additional equipment in accordance with the table chapter 7 5 1 During connection make sure that the lock on the hydraulic connection audibly engages Open the hydraulic system on the tractor Fig 45 Connect hydraulic couplings example photo Coupling the implem...

Page 42: ...00 L and 9000 L are also equipped with set down supports III iV at the rear These must also be retracted as described above before driving on the roads or working in the fields Fig 47 Slide in the support Fig 48 Rear support Tetra 7500 L and 9000 L Lift the implement with the three point power lift until the supports I II are free of the ground 1 Pull out spring cotter 2 Pull out pins 3 Slide in t...

Page 43: ... use the supplied covers e g tine protection equipment Risk of tipping due to the large centrifugal mass of the implement When cornering the large centrifugal mass can cause the implement to tip over Drive slowing when cornering and in turns DANGER Risk of accident due to riding on the implement during operations and transport Riding on the implement and standing within areas of danger is prohibit...

Page 44: ...lowing conditions for marking the extremities of the implement Marking to the rear If there is more than 1 m distance from the tractor s tail lights to the end of the machine If attachments cover the tractor s tail lights Marking to the front and rear If the machine protrudes at the side more than 40 cm over the sidelights or tail lights of the tractor The lighting must comprise of white lights to...

Page 45: ...ing by road NOTE Before use check the pressure in the tractor tyres tractor operating instructions For driving on roads implements that are 4 5 m or more in width must be folded from working position to transport position see Chapter Fold in the implement Page 54 Preparations for road travel Lift the implement with the three point power lift until it is sufficiently free of the ground Take transpo...

Page 46: ...rson may be in the immediate vicinity Risk of tipping due to the large centrifugal mass of the implement When working on a slope the large centrifugal mass can cause the implement to tip over Pay attention to the position of the centre of gravity during lifting and turning Risk of accident due to crushing during set up and adjustment With all work care must be taken to ensure that the implement is...

Page 47: ...nd folding unfolding implement parts ensure that sufficient clearance is left for power lines Working in the field 9 4 Fold machine out into working position Fig 57 Lift the implement Lift up the implement with the three point power lift Only with Tetra 7500 L and 9000 L Actuate the Fold in command on the control unit briefly until the locking latch loosens Unlatch the side arm locking by pulling ...

Page 48: ...6 to the appropriate hole Large working depth Small working depth Secure the spring pin by inserting the spring cotter Preparations Fold the implement out into working position lift the implement with the three point power lift until both spring pins fig 65 4 6 can move freely Switch off the tractor and secure it from rolling away Pull spring cotter 3 and remove upper pin 4 Fig 61 Adjust working d...

Page 49: ...wered Fold the implement out into working position see Chapter Fold machine out into working position Page 47 Switch off the tractor and secure it from rolling away Adjustment Set the desired tine trailer ground clearance 1 by turning the spindles 2 Set all tine trailer holders to the same height by means of the adjustment scale a Setup instructions Adjust all tine trailer holders to the same heig...

Page 50: ...stricted by moving the spring pins 3 Fig 65 End stop and pivot area hydraulic tine trailer NOTE The height adjustment is implemented as described in chapter 9 6 1 Remove retaining ring 4 Remove spring pin 3 Set adjustment range by inserting the spring pin into the corresponding hole a Fasten the spring pin with the retaining ring Set the tine trailer stop height equally on all hydraulic cylinders ...

Page 51: ...ng hole and secure with the retaining ring NOTE Do not set the wheel mark eradicator too deep Fig 67 Wheel mark eradicator Fig 68 Adjusting the depth of the wheel mark eradicator 9 7 Adjusting the working depth of the wheel mark eradicator addi tional equipment Preparations Lift the implement with the three point power lift until the wheel mark eradicator 1 is free of the ground Preparation for us...

Page 52: ...support wheels Tetra 7500 L 9000 L Preparation for use Fig 69 Support wheel adjust height Tetra 7500 L and 9000 L The height of the support wheels 1 can be arbitrarily adjusted with the spindles 2 Set the height of the support wheels such that the side arms are horizontal during operation The default setting with a fully lowered implement with horizontal side arms Lower edge of wheel Lower edge of...

Page 53: ...of the tine trailer see Chapter Adjust the height of the tine trailer Page 49 9 12 Rectifying blockages DANGER Risk of accident while alleviating blockages Alleviate blockages with suitable tools never reach into the implement Lower implement If the implement is raised do not work underneath it whilst unsecured Secure the implement from lowering Rectify blockage Stop tractor Lift up the implement ...

Page 54: ... the working position to the transport position Before driving on roads observe the instructions in Chapter Travelling by road Page 43 After working Fig 71 Transport position Fig 72 Raise tine field Tetra 4501 L LS and 7500 L 10 1 Preparations for folding in the implement Tetra 4501 L LS 7500 L Pin the tine fields in the top position see Chapter Adjust the working depth of the tine fields Page 48 ...

Page 55: ...shock due to overhead power lines When lifting implements and folding unfolding implement parts ensure that sufficient clearance is left for power lines Fig 75 Lift the implement Tetra 9000 L Raise the wheel mark eradicator seeChapter Adjusting the working depth of the wheel mark eradicator Page 51 Fig 74 Fold down the side arm locking Tetra 7500 L and 9000 L Tetra 7500 L and 9000 L Fold down the ...

Page 56: ...s corrected latched in Fig 76 Fold in implement Actuate the control device until the implement has folded in to the transport position Fig 77 Transport lock NOTE When folding in ensure that the transport lock fig 80 fig 81 1 is not bent and does not foul the frame of the spike disc harrow Fig 78 Side arm locking Tetra 7500 L and 9000 L ...

Page 57: ...e the ignition key Secure the implement from rolling away If necessary apply the handbrake apply the brake on the implement Secure the implement from rolling away by using wheel chocks Parking and uncoupling Fig 79 Tetra folded out example 6001 L Fig 80 Tetra folded in example 4501 L 11 1 Note the following before setting down The machine can be set down when folded out or folded in Use the set do...

Page 58: ... ports III IV at the rear These must also be pulled out as described above before setting down the implement Fig 82 Put out the support Fig 83 Rear support Tetra 7500 L and 9000 L 1 Pull out spring cotter 2 Pull out pins 3 Pull out the support as far as the lower edge of the spike disc harrow crosskill roller fig 85 a 4 Fasten the support by inserting the pin below the receptacle b 5 Secure the pi...

Page 59: ...RISK OF INFECTION Fluids hydraulic oil escaping under high pressure may penetrate the skin and cause severe injury Set down implements depressurise the system switch off the engine and remove the ignition key before commencing work on the hydraulic system Consult a doctor immediately in case of injury NOTE Always additionally consult the operating instructions of the tractor manufacturer when disc...

Page 60: ... load Open the lock a on the top link and Uncouple the top link 1 from the pin Uncoupling the implement Fig 86 Uncouple top link Fig 87 Uncouple lower link 11 6 Uncoupling the bottom links NOTE Always additionally consult the operating instructions of the tractor manufacturer when uncoupling Before coupling ensure that the lower links are relieved of load Open the lock b on the bottom links and un...

Page 61: ...onents Using too high a pressure for cleaning can cause damage to paintwork Maintain a minimum distance of the cleaning nozzle from the implement of approx 30 cm After cleaning lubricate the implement as per the lubrication schedule Take precautions to prevent rust forming Uncoated metal parts of the implement and piston rods must be treated with an environmentally compatible corrosion protection ...

Page 62: ...ng so properly Observe the tightening torques Check the tyre pressure regularly Only use original spare parts Risk of accident due to improperly carried out work on tyres and wheels The removal and installation of wheels requires thorough expertise and approved mounting tools Repairs to tyres and wheels may only be undertaken by service centres Maintenance 14 2 Who may carry out maintenance Qualif...

Page 63: ...e Check all frame parts of the implement for damage Check all bearing points of the implement for damage Check tightness of all screws 66 Check the tine fields for wear replace if necessary 69 Check the tines and levelling bar of the tine trailer for wear replace if necessary 73 Check the wheel mark eradicator for wear replace if necessary 75 Check the top and bottom links for wear Check the safet...

Page 64: ...rd grease Fig 89 Lubrication points on the Tetra 4501 L LS for example NOTE The arrows indicate examples of lubrication nipple locations Grease all parts evenly Position Every After cleaning Before after the season 1 Side arm joints Side arm bearings Tetra 7500 L 9000 L 40 h 2 Outer bearing Spike disc harrow Crosskill roller 40 h ...

Page 65: ... to technical modifications Maintenance Position Every After cleaning Before after the season 3 Tine trailer Spring hanger 40 h 4 Tine trailer adjustment spindles 40 h 5 Wheel mark eradicator 40 h 6 Support wheel bearings 40 h ...

Page 66: ... 17 M12 93 69 137 101 160 118 18 19 M14 148 109 218 161 255 188 21 22 M16 230 170 338 250 395 292 24 M18 329 243 469 346 549 405 27 M20 464 342 661 488 773 570 30 M22 634 468 904 667 1057 780 34 32 M24 798 589 1136 838 1329 980 36 M27 1176 867 1674 1235 1959 1445 41 M30 1597 1178 2274 1677 2662 1964 46 Since tightening torques are dependent upon the condition of the surfaces coefficient of frictio...

Page 67: ...ter Year 10 2010 Type and nominal values HD high pressure 208 nominal width 8 mm Hose standard Hose type Internal diameter 8 mm Maximum permitted operating pressure 350 bar C2HF 10 11 HD 208 EN 853 2 SN 08 WP 350 BAR Fig 90 Identification on the hydraulic hose 3Q 10 Check each time before start up Check hydraulic hoses for wear Hydraulic hoses are subject to natural ageing The period of usage for ...

Page 68: ... to heavy components When handling heavy components use suitable lifting accessories or seek the assistance of a second person Risk of accident due to failure to perform maintenance and repair tasks or not doing so properly Replace self locking nuts during reassembly with new ones Do not replace self locking nuts with normal nuts For threaded connections with spring washers inspect the spring wash...

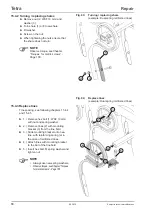
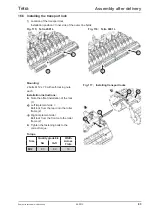
Page 69: ...tools Replace worn shares in good time Share wear limits Tines V 1 Mild harrow tines V ca 240 mm 9 5 in 2 Upright mild harrow tines V ca 240 mm 9 5 in 3 Dual spring reinforced tines V ca 380 mm 15 in 4 Upright vibra tines V ca 360 mm 14 2 in NOTE Worn out shares can be turned around once Fig 91 Share wear limits 15 4 1 Preparation Fold the implement out into working position see Chapter Fold machi...

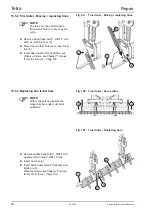
Page 70: ...ws Page 100 Fig 94 Replace tines example Dual spring reinforced tines 15 4 3 Replace tines Tine spacing see following chapters 15 4 4 and 15 4 5 1 Remove hex bolt 1 WAF 19 mm with nut and spring washer 2 Remove tines 2 with mounting bracket 3 from the tine field 3 Slide mounting bracket onto new tine with reinforcing spring a in the case of reinforced tines 4 Attach tines with mounting bracket to ...

Page 71: ... tines Tine field with 5 bars Stipulated spacing central tine fastening Mild harrow tines Upright mild harrow tines Repair Direction of travel NOTE The different spacing of the tines on the bars provides an almost even tine spacing in the tine field Fig 95 Tine field mild harrow tines ...

Page 72: ...ual spring tines upright vibra tines Tine field with 4 bars Stipulated spacing central tine fastening Dual spring Vibra tines NOTE The different spacing of the tines on the bars provides an almost even tine spacing in the tine field Fig 96 Tine fielddual spring vibra tines Direction of travel ...

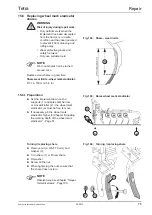
Page 73: ...ping and rolling away Wear protective gloves and safety footwear Only use suitable tools 15 5 1 Preparation Fold the implement out into working position see Chapter Fold machine out into working position Page 47 Set the implement down on the supports 1 and spike disc harrow or crosskill roller 2 the tines a must be free to move If necessary set the tine trailer in higher position 3 see Chapter Adj...

Page 74: ... all Allen head bolts 1 WAF 8 mm washers 2 and nuts 3 WAF 19 mm Insert new bar a Insert Allen head bolts fit washers and tighten nuts Observe torque seeChapter Torques for metric screws Page 100 15 5 2 Tine trailer Moving replacing tines NOTE The tines can be transferred to the second hole a once they are worn Remove Allen head bolt 1 WAF 8 mm and nut 2 WAF 19 mm Move tine to other hole a or inser...

Page 75: ...aise wheel mark eradicator Turning replacing share Remove nut 2 WAF 19 mm and washer 3 Turn share 1 or fit new share Fit washer Screw on the nut When tightening the nuts ensure that the share does not turn NOTE Observe torque seeChapter Torques for metric screws Page 100 Replace worn shares in good time Share wear limits wheel mark eradicator V ca 150 mm 5 9 in 15 6 1 Preparation Set the implement...

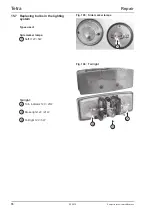
Page 76: ...chnical modifications Repair 15 7 Replacing bulbs in the lighting system Types used Side marker lamps 1 Soffit 12V 5W Fig 105 Side marker lamps Fig 106 Tail light Tail light 2 Turn indicator 12V 21W 3 Brake light 12V 21W 4 Tail light 12V 5W ...

Page 77: ...pinching or crushing while performing installation work Only perform work when the implement is in a safe condition and has been secured to prevent it from dropping and rolling away Use all provided supports During all work wear the prescribed working clothing and protective equipment If the implement is folded use additional means to secure it against unfolding unintentionally Close the provided ...

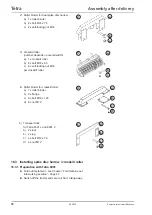
Page 78: ...actor and secure it from rolling away 2 Roller binder for dual spike disc harrow a 1 x roller binder b 2 x bolt M16 x 75 c 2 x self locking nut M16 5 Transport lock for Tetra 4501 L and 6001 L a 2 x lock b 2 x lug c 4 x bolt M12 x 70 d 4 x nut M12 3 Crosskill roller number depends on overall width a 1 x crosskill roller b 8 x bolt M16 x 65 c 8 x self locking nut M16 per crosskill roller 4 Roller b...

Page 79: ...sc harrow on Tetra Mounting 4 fastening bolts per bracket M 16 x 50 with self locking nuts Installation instructions Attach roller arm 1 to the outside of the tine field frame 2 Bolt the roller arm to the bottom holes 1 on the tine field frame Tighten the fastening bolts to the cor rect torque Torque Size Quality grade 8 8 Width across flats Nm Ib ft M16 230 170 24 ...

Page 80: ...ill roller on Tetra L Torque Size Quality grade 8 8 Width across flats Nm Ib ft M16 230 170 24 Mounting 4 bolts per bracket M 16 x 65 with self locking nuts Installation instructions Attach roller frame 1 to the outside of the tine field frame 2 Bolt the roller frame to the bottom holes 1 on the tine field frame Tighten the fastening bolts to the correct torque ...

Page 81: ...lation instructions Slide roller binder 1 over the roller frame 2 and bolt down Tighten the fastening bolts to the correct torque 16 4 Installation of the roller binder on spike disc harrow for Tetra 3001 L 6001 L 9000 L Fig 109 Tetra 3001 L Fig 111 Tetra 9000 L Fig 112 Install roller binder Fig 110 Tetra 6001 L 1 Position of the roller binder Binding of the inner spike disc harrows on the Tetra 3...

Page 82: ...x 120 with self locking nuts Installation instructions Bolt roller binder 1 with flange 2 onto roller frame 3 Tighten the fastening bolts to the correct torque 16 5 Installing the roller binder on the crosskill rollers on the Tetra 6001 LS Fig 113 Tetra 4501 LS Fig 114 Install roller binder 1 Position of the roller binder Binding of the inner crosskill rollers on the Tetra 6001 LS ...

Page 83: ...M12 93 69 19 1 Location of the transport lock Installation position Inner side of the outer tine fields Assembly after delivery Mounting 2 bolts M 12 x 70 with self locking nuts each Installation instructions Note the offset installation of the lock 1 L Left implement side Bolt lock from the rear onto the roller frame 2 R Right implement side Bolt lock from the front onto the roller frame 2 Tighte...

Page 84: ...nching or crushing while performing installation work Only perform work when the implement is in a safe condition and has been secured to prevent it from dropping and rolling away Use all provided supports During all work wear the prescribed working clothing and protective equipment Risk of accident due to failure to perform installation tasks or not doing so properly Do not replace self locking n...

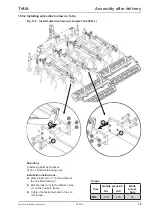
Page 85: ...mine the connection point for the lighting bracket 2 Install lighting bracket on the Tetra 3 Bolt lighting unit to the lighting bracket 4 Install lighting wiring Fig 119 Connection point for the lighting bracket The lighting bracket is bolted on at different locations depending on the country specific design of the lighting unit DE EU Connection point for German European design Lighting unit witho...

Page 86: ...uts per bracket Installation instructions Fit lighting bracket 1 to the outer roller arms 2 of the two centre dual spike disc harrows 3 Install the lighting bracket 1 with the bends upwards and inwards 4 Installation Attach the lighting bracket 1 with the selected holes Chapter 17 4 2 Determine the connection point for the lighting bracket Page 85 from the outside a to the roller arm 2 Bolt the li...

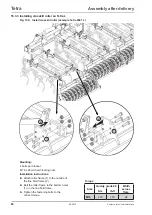
Page 87: ...ith self locking nuts per bracket Installation instructions Fit lighting bracket 1 to the roller arms 2 of the centre dual spike disc harrow 3 Install the lighting bracket 1 with the bends upwards and outwards 4 Installation Attach the lighting bracket 1 with the selected holes Chapter 17 4 2 Determine the connection point for the lighting bracket Page 85 from the outside a to the roller arm 2 Bol...

Page 88: ...acket Tetra Fig 122 Fasten lighting unit Mounting 2 x U bolt M 8 with washers and self locking nuts Installation instructions Fit lighting unit 1 onto the lighting bracket 2 from above Insert U bolt 3 and fasten loosely with washers and nuts Centre the lighting unit Tighten the nuts to the correct torque Observe torque seeChapter Torques for metric screws Page 100 ...

Page 89: ...hting unit DE EU Connection point for German European design Lighting unit without side panels 1 FR Connection point for French version Lighting unit with side panels 2 NOTE The clearance between the side plates of the French lighting 2 and the crosskill roller 3 must be 50 mm or more Smaller clearances will result in the lighting unit being damaged when the implement is folded in 17 5 1 Installat...

Page 90: ...per bracket Installation instructions Fit the adapter 1 for the lighting bracket 2 onto the outer profile 3 of the middle tine field frame Install the lighting bracket 2 with the bends downwards and inwards 4 Installation Bolt the adapter 1 from the inside to the tine field frame 3 with the hex bolts Attach the lighting bracket 2 with the selected holes Chapter 17 5 2 Determine the connection poin...

Page 91: ...h self locking nuts per bracket Installation instructions Fit adapter 1 for lighting bracket 2 onto the middle tine field frame 3 Install the lighting bracket 2 with the bends downwards and outwards 4 Installation Bolt the adapter 1 from the inside to the tine field frame 3 with the hex bolts Attach the lighting bracket 2 with the selected holes Chapter 17 5 2 Determine the connection point for th...

Page 92: ...acket TetraS Fig 128 Fit the lighting unit Mounting 2 x U bolt M 8 with washers and self lock ing nuts Installation instructions Fit lighting unit 1 onto the lighting bracket 2 from below Insert U bolt 3 and fasten loosely with washers and nuts Centre the lighting unit Tighten the nuts to the correct torque Observe torque seeChapter Torques for metric screws Page 100 ...

Page 93: ...e connecting cables in the vicinity of slewing or rotating components Symbols in the illustration Cable fastening with cable ties Cable fastening with cable clips After installing the cable check that the lighting cable will not be crushed or kinked whilst working with the implement NOTE The cable installation on the 6001 LS with crosskill roller should be implemented in principle in the same mann...

Page 94: ...alling lighting cable on Tetra 4501 L 4501 LS Fig 131 Installing lighting cable on Tetra 4501 L 4501 LS NOTE The cable installation on the 4501 LS with crosskill roller should be implemented in principle in the same manner as shown in Fig 131 1 lay in a loop 2 fasten at the frame side ...

Page 95: ...allation must only be carried out by a qualified specialist from an agricultural machinery workshop or by Grégoire Besson service personnel The applicable accident prevention rules as well as any other generally accepted safety requirements occupational health regulations must be observed DANGER OF ACCIDENTS When setting down the implement always use the various supports provided DANGER OF CRUSHIN...

Page 96: ...culations For the calculation data is required from the operating instructions for the tractor from the implement s operating instructions from weighing and measuring NOTE Enter the values that you have obtained into the table at the top of the following page Appendix Ballast calculation 19 0 Appendix Obtain from the tractor operating instructions or by weighing Data Description TE Empty weight of...

Page 97: ...n for front implement Calculate actual front axle load TF act Calculate actual total weight TG act Calculate actual rear axle load TR act IR x c d TF x b 0 2 x TE x b IF min a b IF x a TR x b 0 45 x TE x b IR min b c d IF x a b TF x b IR x c d TF act b TG act IF TE IR TR act T G act TF act Enter into the table Calculations Enter the calculated values into the table at the bottom of the page Tyre c...

Page 98: ...e implement for your safety These labels must not be removed Damaged or illegible labels must be replaced The position of safety symbols is detailed in the following outline Fig 135 Safety symbols Appendix Safety symbols Bestellnummer Order No Numéro de commande 19 2 1 Safety symbols Tetra 3001 L Front Side Rear ...

Page 99: ...tra Subject to technical modifications Fig 136 Safety symbols 19 2 2 Safety symbols Tetra 4501 L 4501 LS 6001 L 6001 LS 7500 L 9000 L Appendix Safety symbols Bestellnummer Order No Numéro de commande Front Side Rear ...

Page 100: ... M12 93 69 137 101 160 118 18 19 M14 148 109 218 161 255 188 21 22 M16 230 170 338 250 395 292 24 M18 329 243 469 346 549 405 27 M20 464 342 661 488 773 570 30 M22 634 468 904 667 1057 780 34 32 M24 798 589 1136 838 1329 980 36 M27 1176 867 1674 1235 1959 1445 41 M30 1597 1178 2274 1677 2662 1964 46 Since tightening torques are dependent upon the condition of the surfaces coefficient of friction a...

Page 101: ...101 05 2012 Tetra Subject to technical modifications Appendix Electrical wiring diagram 19 4 Electrical diagram lighting additional equipment ...

Page 102: ...fications 19 5 Hydraulic diagram Folding hydraulics Annex Hydraulic diagram Item Description 01 Cylinder 02 Throttling disc 03 Coupler with protective dust cap red 04 Dual check valve 05 Flow divider Fig 137 Hydraulic diagram Tetra 4501 L LS 6001 L LS Fig 138 Hydraulic diagram Tetra 7500 L and 9000 L ...

Page 103: ...2 1 3 3 3 3 2 1 3 3 3 2 1 3 3 2 Tetra Subject to technical modifications 19 6 Hydraulic diagram Tine trailer additional equipment Annex Hydraulic diagram Item Description 1 Coupler with protective dust cap yellow 2 Throttling disc 3 Cylinder ...

Page 104: ......

Page 105: ..._____ District ___________________________________________ Telephone ______________________________ The implement was delivered to the customer in a complete see delivery note and fully functional condition The customer has received training on the function and operation of the machine First use commissioning was carried out properly _____________________________________ __________ Signature of th...

Page 106: ......

Page 107: ...107 05 2012 Tetra Subject to technical modifications 21 0 EU Declaration of Conformity ...

Page 108: ......

Page 109: ...ll roller roller binder 21 Scope of delivery Spike disc harrow roller binder 20 Scope of delivery Support wheel 22 Scope of delivery Tines 20 Scope of delivery Tine trailer 22 Scope of delivery Transport lock 21 Set down support 42 58 Side arm lock 47 56 Side marker lamps 76 Spike disc harrow 79 Tetra dimensions 29 Tetra variants 19 Support wheel 28 52 T Tail light 76 Tine adjustment 25 Tine field...

Page 110: ......

Page 111: ......

Page 112: ...ad Essen Germany Phone 49 0 5472 7710 Fax 49 0 5472 771100 info rabe agri eu www rabe agri eu Order number 9901 00 02EN01GB Edition 05 2012 Version 01 Language EN Translation of the original operating instructions DE Obtained from on Dealer stamp ...

Reviews: