background image

46

47

ENGLISH

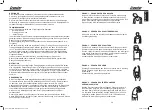
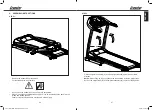
6.  ASSEMBLY INSTRUCTIONS

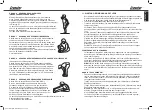
STEP 1:

•  Remove the treadmill from the carton.

• 

Put the treadmill on a flat surface.

•  Do not move the treadmill until the unit is fully assembled. 

•  When moving the assembled treadmill, move it on its wheels while the deck is in the 

folded and locked position. 

•  Failure to follow this procedure may result in serious injury.

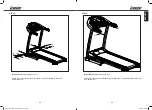
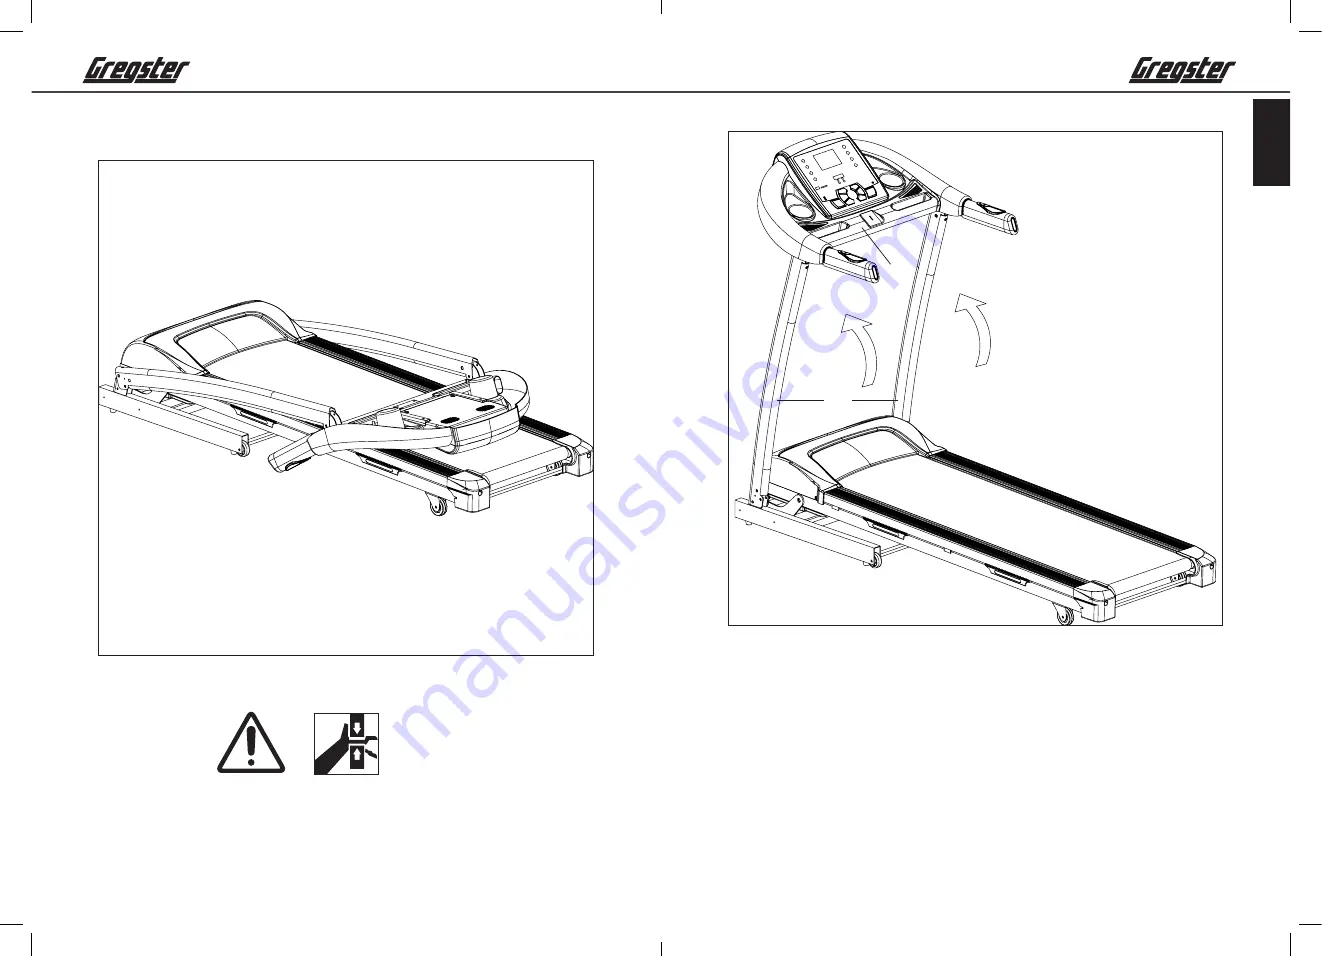
STEP 2:

A

B

•  Lift the computer assembly (A) and the upright tubes (B) upward as per arrow 

direction.

• 

Notice:

 When lifting up, do not squeeze the wires stored inside the upright tube. 

•  Hold on the upright tube (B) and computer assembly (A) to prevent falling down.

GRG-TM-4216e-IM-06-DE+GB+FR .indb   46-47

21/6/2016   4:52 PM

Summary of Contents for GRG-TM-4216e

Page 1: ...BEDIENUNGSANLEITUNG LAUFBAND DE GRG TM 4216e USER MANUAL TREADMILL GB MODE D EMPLOI TAPIS ROULANT FR GRG TM 4216e IM 06 DE GB FR indb 1 21 6 2016 4 52 PM...

Page 2: ...Erstickungsgefahr VORSICHT VERLETZUNGSGEFAHR Benutzen Sie kein besch digtes oder defektes Produkt Wenden Sie sich in diesem Fall an eine Fachwerkstatt oder unseren Kundendienst Pr fen Sie das Produkt...

Page 3: ...ltig durch und sehen Sie sich die Bauzeichnung an Entfernen Sie s mtliches Verpackungsmaterial und legen dann die einzelnen Teile auf eine freie Fl che Dieses verschafft Ihnen einen berblick und erlei...

Page 4: ...ndrohr 1 5 Rechtes Standrohr 1 6 Halterung f r DC Motor 1 7 Unterseite der Sicherheitsleine 1 8 Neigungsbuchse 2 9 Vordere Rolle 1 10 Hintere Rolle 1 11 Schl ssel mit Schraubenzieher 1 12 Inbusschl ss...

Page 5: ...ro er Dichtungsring 10 26 2 0 6 59 Schalttafel 1 60 Puls mit Geschwindigkeit Start Stopp 2 61 Obere Signalleitung 1 62 Mittlere Signalleitung 1 63 Untere Signalleitung 1 64 Geschwindigkeitssensor 1 65...

Page 6: ...mengeklappt und gesichert Nichtbefolgen dieses Warnhinweises kann zu schweren Verletzungen f hren SCHRITT 2 Heben Sie die Computereinheit A und die Standrohre B gem den Pfeilmarkierungen an Hinweis Ac...

Page 7: ...Standrohr mit 6x Schrauben M8 15 39 und 6x Dichtungsringen 55 am Hauptrahmen SCHRITT 4 39 39 55 Ben tigtes Werkzeug 5 Inbusschl ssel 12 Befestigen Sie den Computer mit 4x Schrauben M8 15 39 und 4x Dic...

Page 8: ...l des Laufbands A in Richtung der Pfeilmarkierung an bis Sie ein Ger usch h ren welches darauf hinweist dass der hydraulische Zylinder B und das runde Rohr eingerastet sind AUFKLAPPEN Halten Sie das U...

Page 9: ...ten Zeit bis 0 00 an Wenn nach Ablauf der Zeit 0 00 erscheint h lt das Laufband langsam an und im Display erscheint die Anzeige End Nach weiteren 5 Sekunden aktiviert das Ger t den Standby Modus DIS A...

Page 10: ...us Erl uterung F r alle Modi Dr cken Sie nach der Einstellung die Taste START Nach 3 Sekunden startet das Laufband Dr cken Sie SPEED zum Einstellen der Geschwindigkeit Dr cken Sie INCLINE zum Einstell...

Page 11: ...gsam an EINSTELLUNGSBEREICH PRO PROGRAMM PROGRAMM EINSTELLUNGSBEREICH DAUER MIN SEKUNDEN 0 00 5 00 99 00 NEIGUNG EINHEIT 0 0 12 GESCHWINDIGKEIT KM H 1 0 1 0 16 STRECKE KM 0 0 5 99 9 PULS HYPO MIN P N...

Page 12: ...ler der Neigungsfunktion berpr fen Sie ob die Signalleitung und der AC Einzeldraht des Neigungsmotors richtig verbunden sind Ersetzen Sie das Neigungskabel Ersetzen Sie den Neigungsmotor Ersetzen Sie...

Page 13: ...r Training sicher indem Sie die Taste STOP dr cken oder die Sicherheitsleine ziehen das Laufband h lt dann automatisch an STARTEN MANUELLER MODUS 1 Schalten Sie das Laufband mit der Betriebstaste ein...

Page 14: ...le Hinweise sind nur ein grober Anhaltspunkt f r eine Trainingsgestaltung F r Ihre speziellen pers nlichen Anforderungen gibt Ihnen ggf Ihr Arzt entsprechende Hinweise Die folgenden Seiten erkl ren Ih...

Page 15: ...bungen eignen sich grunds tzlich f r ein Aufw rmen wie auch f r die Abk hlphase nach dem Training Dabei ist jedoch zu beachten dass in der Aufw rmphase die Dehnungen nur kurz ca 5 bis 10 Sekunden geh...

Page 16: ...auftauchen halten Sie bitte Ihren Kaufbeleg bereit Teile unter der Motorabdeckung bed rfen keiner Wartung Trennen Sie den Netzstecker von der Netzsteckdose bevor Sie das Ger t warten reinigen oder ffn...

Page 17: ...ng l uft Ist dies nicht der Fall muss das Laufband nachjustiert werden Lassen Sie das Laufband mit einer Geschwindigkeit von ca 5 6 km h laufen und pr fen Sie ob das Laufband seitlich wegdriftet Schal...

Page 18: ...112 108 133 136 140 153 148 144 139 162 Maximalpuls 220 Alter 90 des Maximalpulses 85 des Maximalpulses 70 des Maximalpulses LAUFBAND DRIFTET NACH RECHTS Falls das Laufband nach rechts driftet drehen...

Page 19: ...te senden Sie Ihr Produkt nicht ohne Aufforderung durch unser Service Team an unsere Anschrift Die Kosten und die Gefahr des Verlustes f r unaufgeforderte Zusendungen gehen zu Lasten des Absenders Wir...

Page 20: ...a suffocation hazard CAUTION RISK OF INJURY Do not use the product if it is damaged or defective In this case contact a professional workshop or our customer service Always verify that the product is...

Page 21: ...ram Remove all packaging materials and place all individual components on a free surface This will give you a good overview and simplify assembly Shield the assembly surface from filth and scratching...

Page 22: ...ame 1 3 Console frame 1 4 Left upright tube 1 5 Right upright tube 1 6 DC motor bracket 1 7 Safety key base 1 8 Incline bushing 2 9 Front roller 1 10 Back roller 1 11 Wrench with screw driver 1 12 All...

Page 23: ...59 Control board 1 60 Pulse with speed start stop 2 61 Top signal wire 1 62 Middle signal wire 1 63 Bottom signal wire 1 64 Speed sensor 1 65 DC motor 1 66 Safety key 1 67 AC single wire blue 1 68 AC...

Page 24: ...s wheels while the deck is in the folded and locked position Failure to follow this procedure may result in serious injury STEP 2 A B Lift the computer assembly A and the upright tubes B upward as per...

Page 25: ...the upright tube to the main frame using 6x bolts M8 15 39 and 6x washers 55 STEP 4 39 39 55 Required tool 5 Allen wrench 12 Attach the computer to the left and right upright tube using 4x bolts M8 1...

Page 26: ...admill base A in the direction of the arrow until you hear a sound which indicates that the hydraulic cylinder B is locked into the round tube UNFOLDING Hold the treadmill base A with your hand Slight...

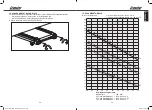
Page 27: ...after 5 seconds When counting down it will show the time elapsed from the set time to 0 00 After counting down to 0 00 the treadmill will stop smoothly and the display shows End Then it enters into th...

Page 28: ...ly setting the incline MODE OVERVIEW Mode Description For all modes After setting is finished press START button The treadmill will start to run after 3 seconds Press SPEED to adjust the speed Press I...

Page 29: ...GE TIME MIN SECOND 0 00 5 00 99 00 INCLINE SECTION 0 0 12 SPEED KM H 1 0 1 0 16 DISTANCE KM 0 0 5 99 9 PULSE HYPO MIN P N A CALORIE THERM 0 10 999 EXERCISE PROGRAM CHART TIME INTERVAL SETTING TIME 10...

Page 30: ...he actual medically accurate metabolic rate The computer is not calibrated and the heart rate values it calculates and displays are intended as a rough guide and may vary greatly from the actual heart...

Page 31: ...e rear end deck and the belt roller Do not step on the end deck Do not touch TRAINING INSTRUCTIONS All recommendations in this manual apply only to healthy persons and are not intended for cardiovascu...

Page 32: ...after training Still please note that stretches during warm up should be held briefly approx 5 to 10 seconds before being released This increases muscle tension and prepares muscles for subsequent tr...

Page 33: ...defects become evident within the warranty period please have your proof of purchase ready The components beneath the motor cover are maintenance free Unplug the unit before maintenance and before you...

Page 34: ...d nonetheless check whether the belt is still centered on the running board and runs with sufficient tension If this is not the case the belt must be adjusted Run the belt at a speed of approx 5 6 km...

Page 35: ...10 205 200 195 190 185 180 175 170 165 160 155 150 145 140 135 130 125 120 115 110 105 150 136 127 105 20 25 30 35 40 45 50 55 60 65 70 131 136 140 144 148 153 157 157 129 126 122 119 116 112 108 133...

Page 36: ...prompted to do so by our service team The costs and risk of loss for unsolicited shipments will be borne by the sender We reserve the right to refuse to accept unsolicited shipments or to return the c...

Page 37: ...us les mat riaux d emballage Il existe un risque d asphyxie ATTENTION RISQUE DE BLESSURE N utilisez jamais le produit lorsqu il est endommag ou d fectueux Dans ce cas adressez vous un service techniqu...

Page 38: ...x d emballage et positionnez ensuite toutes les pi ces sur une surface libre Cela vous offre un bon aper u et vous facilite l assemblage Prot gez la surface de montage avec un rev tement afin de ne pa...

Page 39: ...CC 1 7 Dessous de la ligne de s curit 1 8 Douille de r glage de l inclin 2 9 Rouleau avant 1 10 Rouleau arri re 1 11 Cl avec tournevis 1 12 Cl 6 pans 1 13 Cylindre 1 14 Couvercle sup rieur de la conso...

Page 40: ...Marche Arr t 2 61 Ligne de signal sup rieure 1 62 Ligne de signal m diane 1 63 Ligne de signal inf rieure 1 64 Capteur de vitesse 1 65 Moteur CC 1 66 Ligne de s curit 1 67 Fil unique de CA bleu 1 68 F...

Page 41: ...oulant exclusivement quand il est repli et fix Le non respect de cet avertissement peut entra ner des blessures graves 2E TAPE Soulevez l unit d ordinateur A et les tube verticaux B en suivant les fl...

Page 42: ...ical avec 6x vis M8 15 39 et 6x anneaux d tanch it 55 sur le ch ssis principal 4E TAPE 39 39 55 Outils n cessaires Cl Allen de 5 12 Fixez l ordinateur avec 4x vis M8 15 39 et 4x anneaux d tanch it 55...

Page 43: ...9 sur le ch ssis au sol 7 REPLIEZ REPLIEZ Tenez fermement le ch ssis de base du tapis de course roulant A d une main Soulevez la base de support du tapis de course roulant A vers la fl che jusqu ce qu...

Page 44: ...leur de 99 59 le tapis de course roulant s arr te lentement et le cadran affiche le mot End Apr s 5 secondes l appareil passe en mode veille En compte rebours le compteur indique le temps coul depuis...

Page 45: ...VUE D ENSEMBLE DES MODES Mode Explication Pour tous les modes Apr s l installation appuyez sur le bouton START Au bout de 3 secondes d marrez le tapis de course roulant Appuyez sur SPEED pour r gler l...

Page 46: ...ment GAMME DE R GLAGES PAR PROGRAMME PROGRAMME GAMME DE R GLAGE DUR E MIN SECONDE 00 00 5 00 99 00 INCLIN UNIT 0 0 12 VITESSE KM H 1 0 1 0 16 DISTANCE KM 0 0 5 99 9 POULS HYPO MIN P Inapplicable CALOR...

Page 47: ...le fil unique CA du moteur d inclinaison soient correctement connect s Remplacez le c ble d inclinaison Remplacez le moteur d inclinaison Remplacez le panneau de contr le du moteur Message d erreur C...

Page 48: ...MATIQUE DE L AFFICHAGE Si le tapis de course roulant est inactif et qu aucun bouton n est press pendant 10 minutes l cran d affichage s teint pour conomiser l nergie Appuyez sur une touche pour r acti...

Page 49: ...ent es Ceci est possible gr ce une extension de la dur e et ou une augmentation des niveaux de difficult Si vous voulez v rifier manuellement votre fr quence cardiaque en plus de la mesure avec l ordi...

Page 50: ...er u de la fr quence moyenne avec laquelle la courroie doit tre graiss e Appliquez un paquet une dose de lubrifiant apr s les 25 premi res heures 2 3 mois Appliquez un paquet une dose de lubrifiant ap...

Page 51: ...SE ROULANT TIRE VERS LA GAUCHE Si le tapis roulant tire vers la gauche tournez l aide de la cl hexagonale la vis gauche tour dans le sens horaire et la vis droite tour dans le sens antihoraire Ensuite...

Page 52: ...achat MISES EN GARDE IMPORTANTES Veillez ne pas envoyer votre produit notre adresse sans en avoir effectu la demande explicite notre quipe du service client le Les frais et le risque de perte lors d...

Page 53: ...uipe de service vous est disponible comme suit Heures de service du lundi au vedredi de 9h 00 18h 00 Service d assistance T l phonique 33 176 361 493 T l phone fixe national frais sous r serve de four...

Reviews: